> For the complete documentation index, see [llms.txt](https://docs.prismacloud.io/llms.txt). Markdown versions of documentation pages are available by appending `.md` to page URLs; this page is available as [Markdown](https://docs.prismacloud.io/admin-guide/32/agentless-scanning/onboard-accounts.md).
# Onboard Accounts for Agentless Scanning
Agentless scanning provides visibility into vulnerabilities and compliance risks on cloud workloads by scanning the root volumes of snapshots. The agentless scanning architecture lets you inspect a host and the container images in that host without having to install an agent or affecting its execution.
To learn more about the architecture and scan results, see [How agentless scanning works?](https://github.com/PaloAltoNetworks/pc-docs-md/tree/main/compute-edition/32/admin-guide/agentless-scanning/agentless-scanning.md)
## Bulk Actions
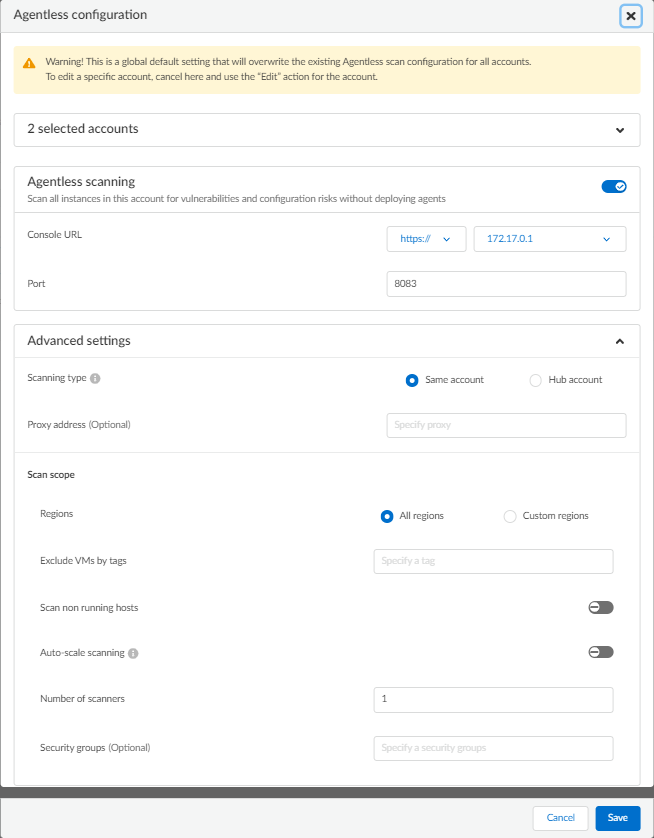
Prisma Cloud supports performing agentless configuration at scale. Different cloud providers and authentication subtypes require different configuration fields, which also limits your ability to change accounts in bulk. The Prisma Cloud Console displays all the configuration fields that can be changed across all the selected accounts, and hides those that differ to prevent accidental misconfiguration.
Only change the configuration of multiple accounts from the same cloud provider and of the same authentication subtype. If you select accounts from different providers, you can’t change agentless configuration fields.
The following procedure shows the steps needed to configure agentless scanning for multiple accounts at the same time.
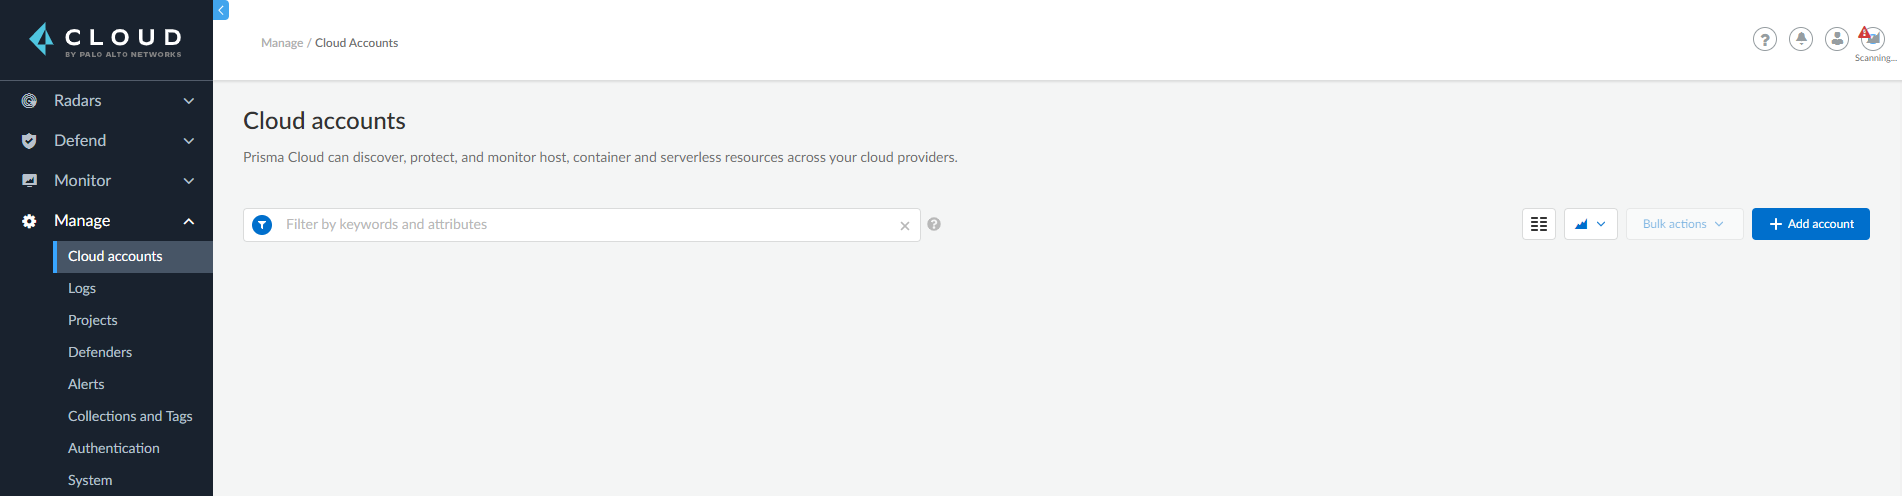
1. Go to **Compute > Manage > Cloud accounts**
2. Select multiple accounts.
Only select accounts from the same cloud provider and of the same authentication subtype. If you select accounts from different providers, you can’t change agentless configuration fields.
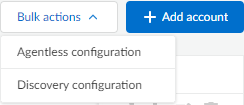
3. Click the **Bulk actions** dropdown.
4. Select the **Agentless configuration** button.
5. Change the configuration values for the selected accounts.
* Select **Save** to save the configuration for the selected accounts.
### Agentless Scanning for Cloud Accounts
* **During Onboarding**: When cloud accounts are onboarded to Prisma Cloud with the "Agentless Scanning" option enabled, scanning starts immediately. This provides instant visibility into the vulnerabilities and configurations risks for the account. If this option is disabled before onboarding, Prisma Cloud does not scan the workloads in the account. The account remains unscanned until agentless scanning is enabled.
To modify the scan settings, see [Edit Agentless Scan Settings](#enable-agentless-scan).
* **For existing accounts**: Enabling agentless scanning for existing accounts in Prisma Cloud does not initiate an immediate scan. Instead, these accounts are added to the next scheduled scan cycle, which occurs every 24 hours by default. This ensures that scans are conducted systematically according to the scan cycle, rather than starting immediately upon enabling.
To modify the scan cycle, see [Modify the Agentless Scan Interval](#modifying-the-agentless-scan-interval).
### Edit Agentless Scan Settings
You can safely enable agentless scanning settings for disabled accounts on the **Runtime Security** > **Manage** > **Cloud accounts** page. After enabling agentless scan, the scan will trigger with the correct configuration in place.
To edit agentless scan settings, complete the following steps:
1. Go to **Runtime Security > Manage > Cloud accounts**.
2. Select **Edit Account** icon from the Actions column for the account.
3. In **Account and Agentless setup**, go to **Agentless scanning** section.
4. Modify the agentless configuration options in this section.
5. Select **Save**.
After the configuration is modified, the next scan uses the updated settings.
### Modify the Agentless Scan Interval
By default, agentless scans are triggered every 24 hours.
To change the interval, complete the following steps.
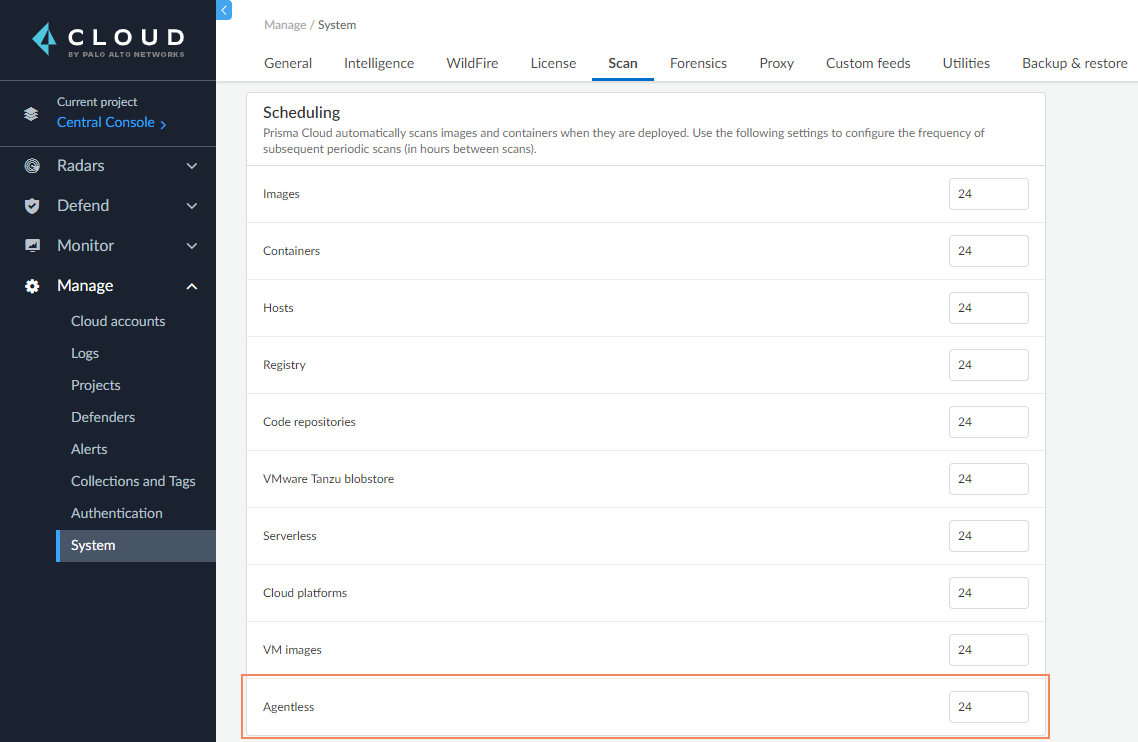
1. Go to **Runtime Security > Manage > System**.
2. Select the **Scan** tab.
3. In the **Scheduling** section, in **Agentless** box, type the new duration for the scan cycle.
4. Select **Save**
### Manually Start Agentless Scanning
To manually start a scan, complete the following steps.
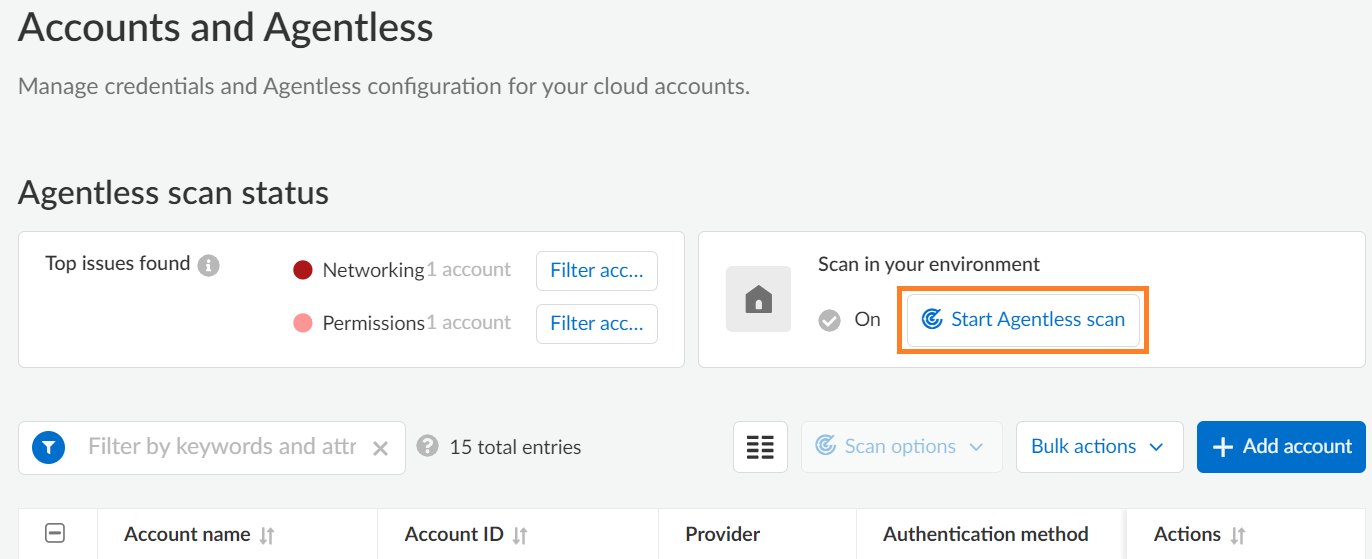
1. Go to **Runtime Security > Manage > Cloud accounts**.
2. In the **Scan in your environment** section, select **Start Agentless scan**.
Note: Scanning starts for all the accounts that have the agentless scanning option enabled.
3. Select the Scan icon in the top-right corner of the console to view the scan status.
4. To view the results, complete the following steps.
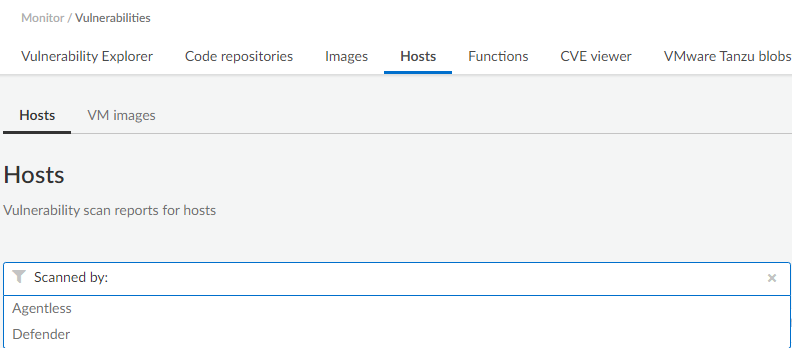
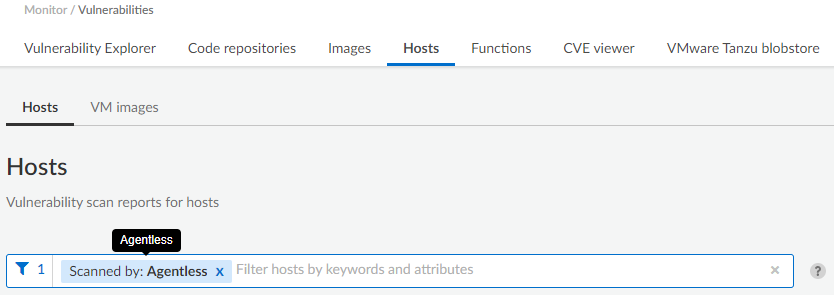
1. Go to **Runtime Security > Monitor > Vulnerabilities > Hosts** or **Runtime Security > Monitor > Vulnerabilities > Images**.
2. Select **Filter hosts**.
3. Select the **Scanned by** filter.
4. Select the **Agentless** filter.
---
# Agent Instructions
This documentation is published with GitBook. GitBook is the documentation platform designed so that both humans and AI agents can read, navigate, and reason over technical content effectively. Learn more at gitbook.com.
## Querying This Documentation
If you need additional information that is not directly available in this page, you can query the documentation by asking a question.
Perform an HTTP GET request on the following URL with the `ask` and `goal` query parameters:
```
GET https://docs.prismacloud.io/admin-guide/32/agentless-scanning/onboard-accounts.md?ask=&goal=
```
`ask` is the immediate question: it should be specific, self-contained, and written in natural language.
`goal` is what the user is ultimately trying to achieve, the reason they need the answer. Sharing it helps GitBook give you a better, more relevant answer. A goal is most helpful when it describes the outcome the user wants rather than restating the question. For example, with `ask=how do I create an API token`, a goal like `automate deployments from our CI pipeline` lets GitBook tailor the answer to that use case.
The response will contain a direct answer to the question and relevant excerpts and sources from the documentation.
Use this mechanism when the answer is not explicitly present in the current page, you need clarification or additional context, or you want to retrieve related documentation sections.