> For the complete documentation index, see [llms.txt](https://docs.prismacloud.io/llms.txt). Markdown versions of documentation pages are available by appending `.md` to page URLs; this page is available as [Markdown](https://docs.prismacloud.io/admin-guide/alerts/aws-security-hub.md).
# AWS Security Hub
AWS Security Hub aggregates, organizes, and prioritizes security alerts from multiple AWS services and AWS Partner Network solutions, including Prisma Cloud, to give you a comprehensive view of security across your environment.
## Permissions
The minimum required permissions policy to integrate Prisma Cloud with AWS Security Hub is **AWSSecurityHubFullAccess**. Whether using IAM users, groups, or roles, be sure the entity Prisma Cloud uses to access AWS Security Hub has this minimum permissions policy.
This procedure shows you how to set up integration with an IAM user (configured as a service account). In AWS IAM, create a service account that has the **AWSSecurityHubFullAccess** permissions policy. You will need the service account’s access key ID and secret access key to integrate with Prisma Cloud.
## Enabling AWS Security Hub
1. Log into your AWS tenant and enter **Security Hub** in the **Find services** search, then select **Security Hub**.
2. Click **Enable Security Hub**.
3. Enable the Prisma Cloud integration.
1. Choose Integrations from the Security Hub menu.
2. Accept findings from Palo Alto Networks: Prisma Cloud Compute.
See [AWS documentation](https://docs.aws.amazon.com/securityhub/latest/userguide/securityhub-integrations-managing.html)
Note: Prisma Cloud integration with AWS Security Hub is not supported for US Gov Cloud regions.
## Configuring alert frequency
You can configure the rate at which alerts are emitted. This is a global setting that controls the spamminess of the alert service. Alerts received during the specified period are aggregated into a single alert. For each alert profile, an alert is sent as soon as the first matching event is received. All subsequent alerts are sent once per period.
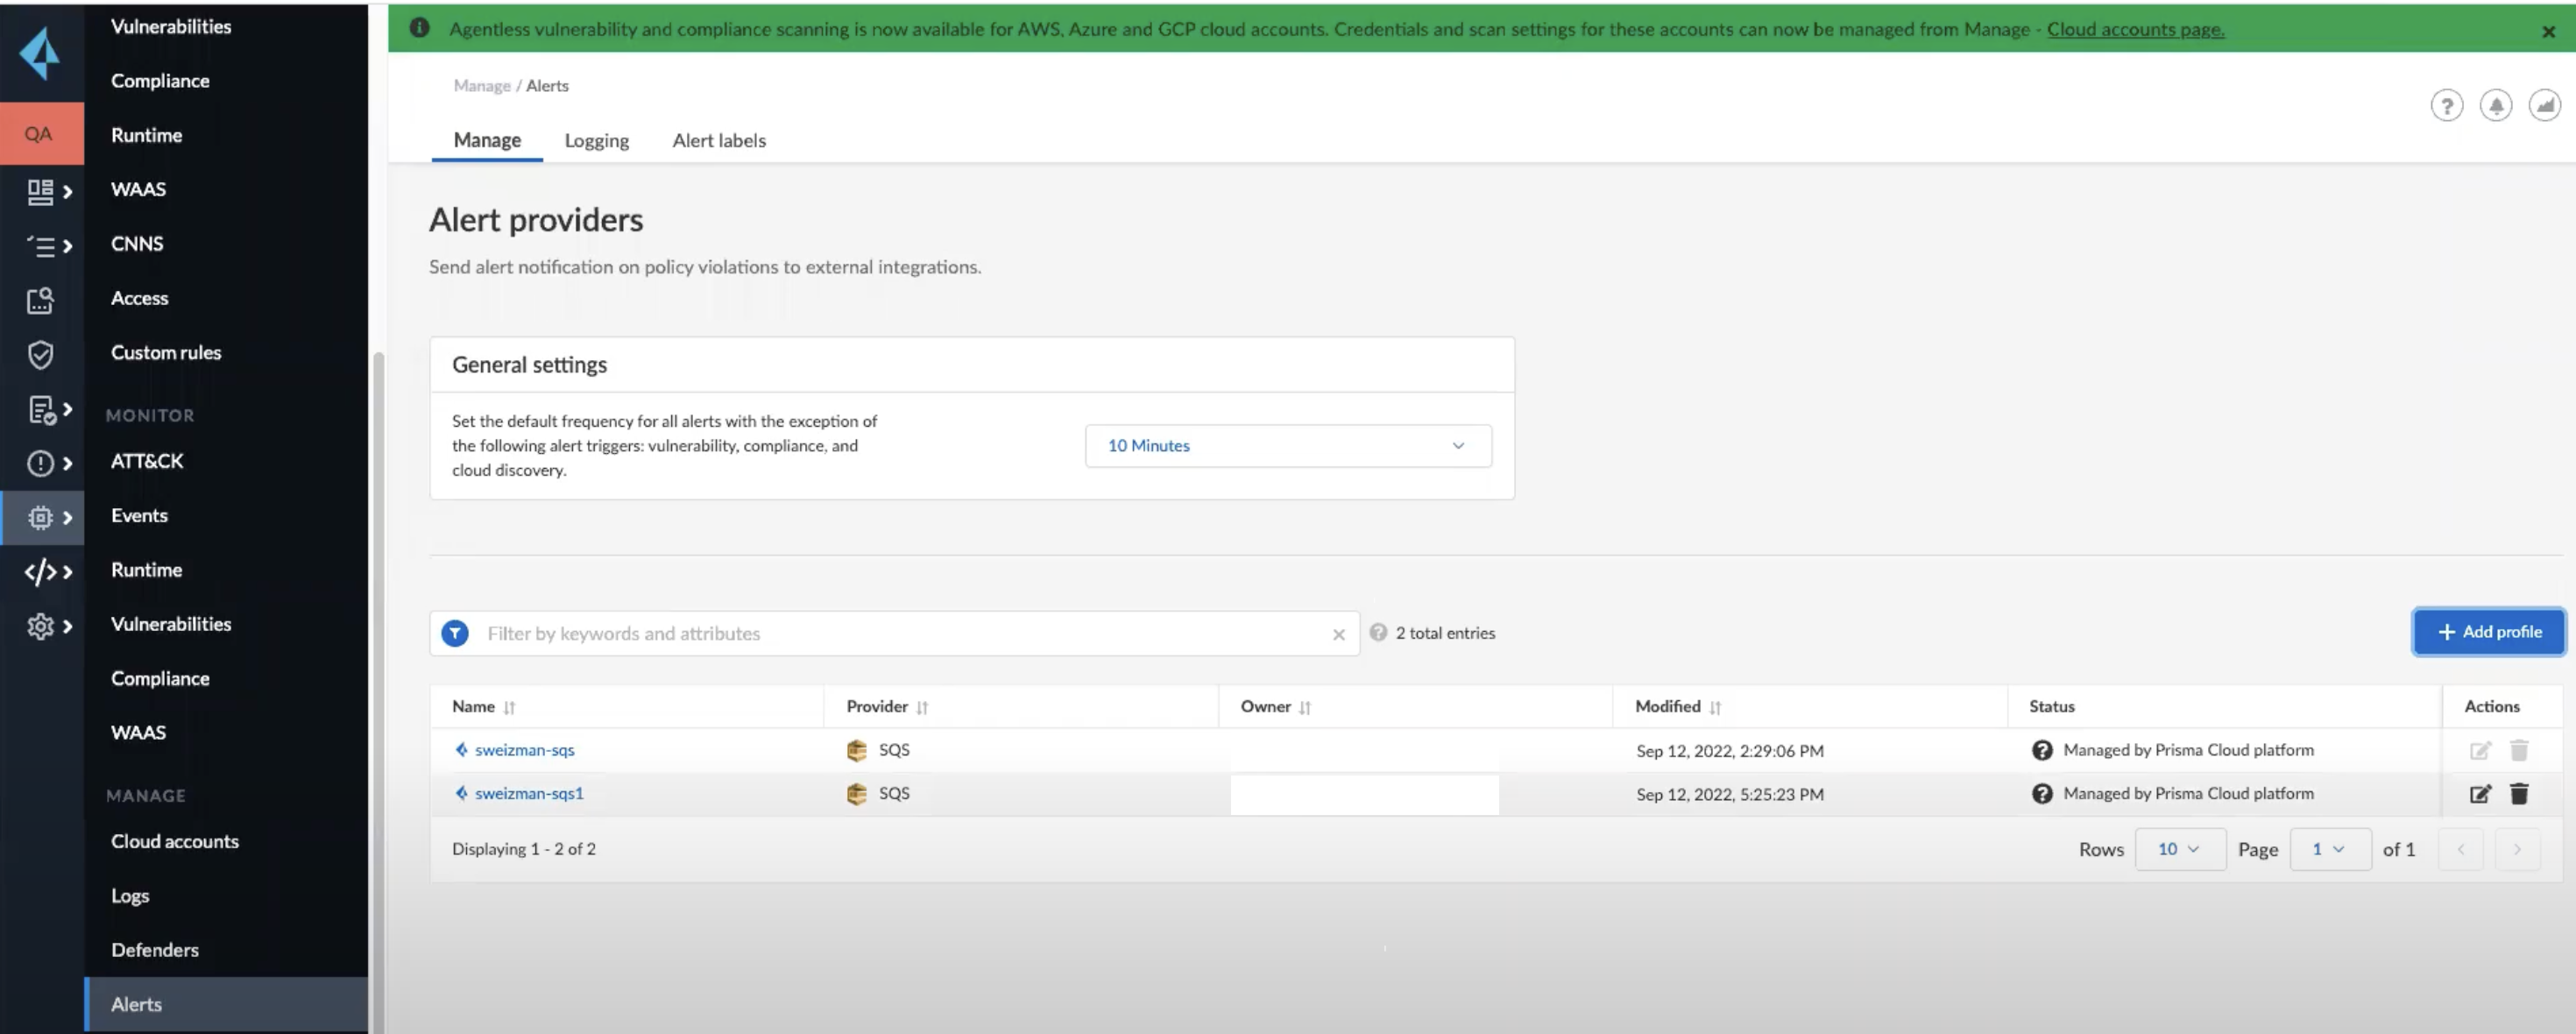
1. Open Console, and go to **Manage > Alerts**.
2. In **General settings**, select the default frequency for all alerts.
You can specify the following frequencies.
* **10 Minutes**
* **1 Hour**
* **1 Day**.
## Sending alerts to Security Hub
Alert profiles specify which events should trigger the alert machinery, and to which channel alerts are sent. You can send alerts to any combination of channels by creating multiple alert profiles.
Alert profiles consist of two parts:
**(1) Alert settings — Who should get the alerts, and on what channel?** Configure Prisma Cloud to integrate with your messaging service and specify the people or places where alerts should be sent. For example, configure the email channel and specify a list of all the email addresses where alerts should be sent. Or for JIRA, configure the project where the issue should be created, along with the type of issue, priority, assignee, and so on.
**(2) Alert triggers — Which events should trigger an alert to be sent?** Specify which of the rules that make up your overall policy should trigger alerts.
If you use multi-factor authentication, you must create an exception or app-specific password to allow Console to authenticate to the service.
## Create a new alert profile
1. In **Manage > Alerts**, click **Add profile**.
2. Enter a **Profile name**.
3. In **Provider**, select **AWS Security Hub**.
4. Click **Next**.
## Configure the triggers
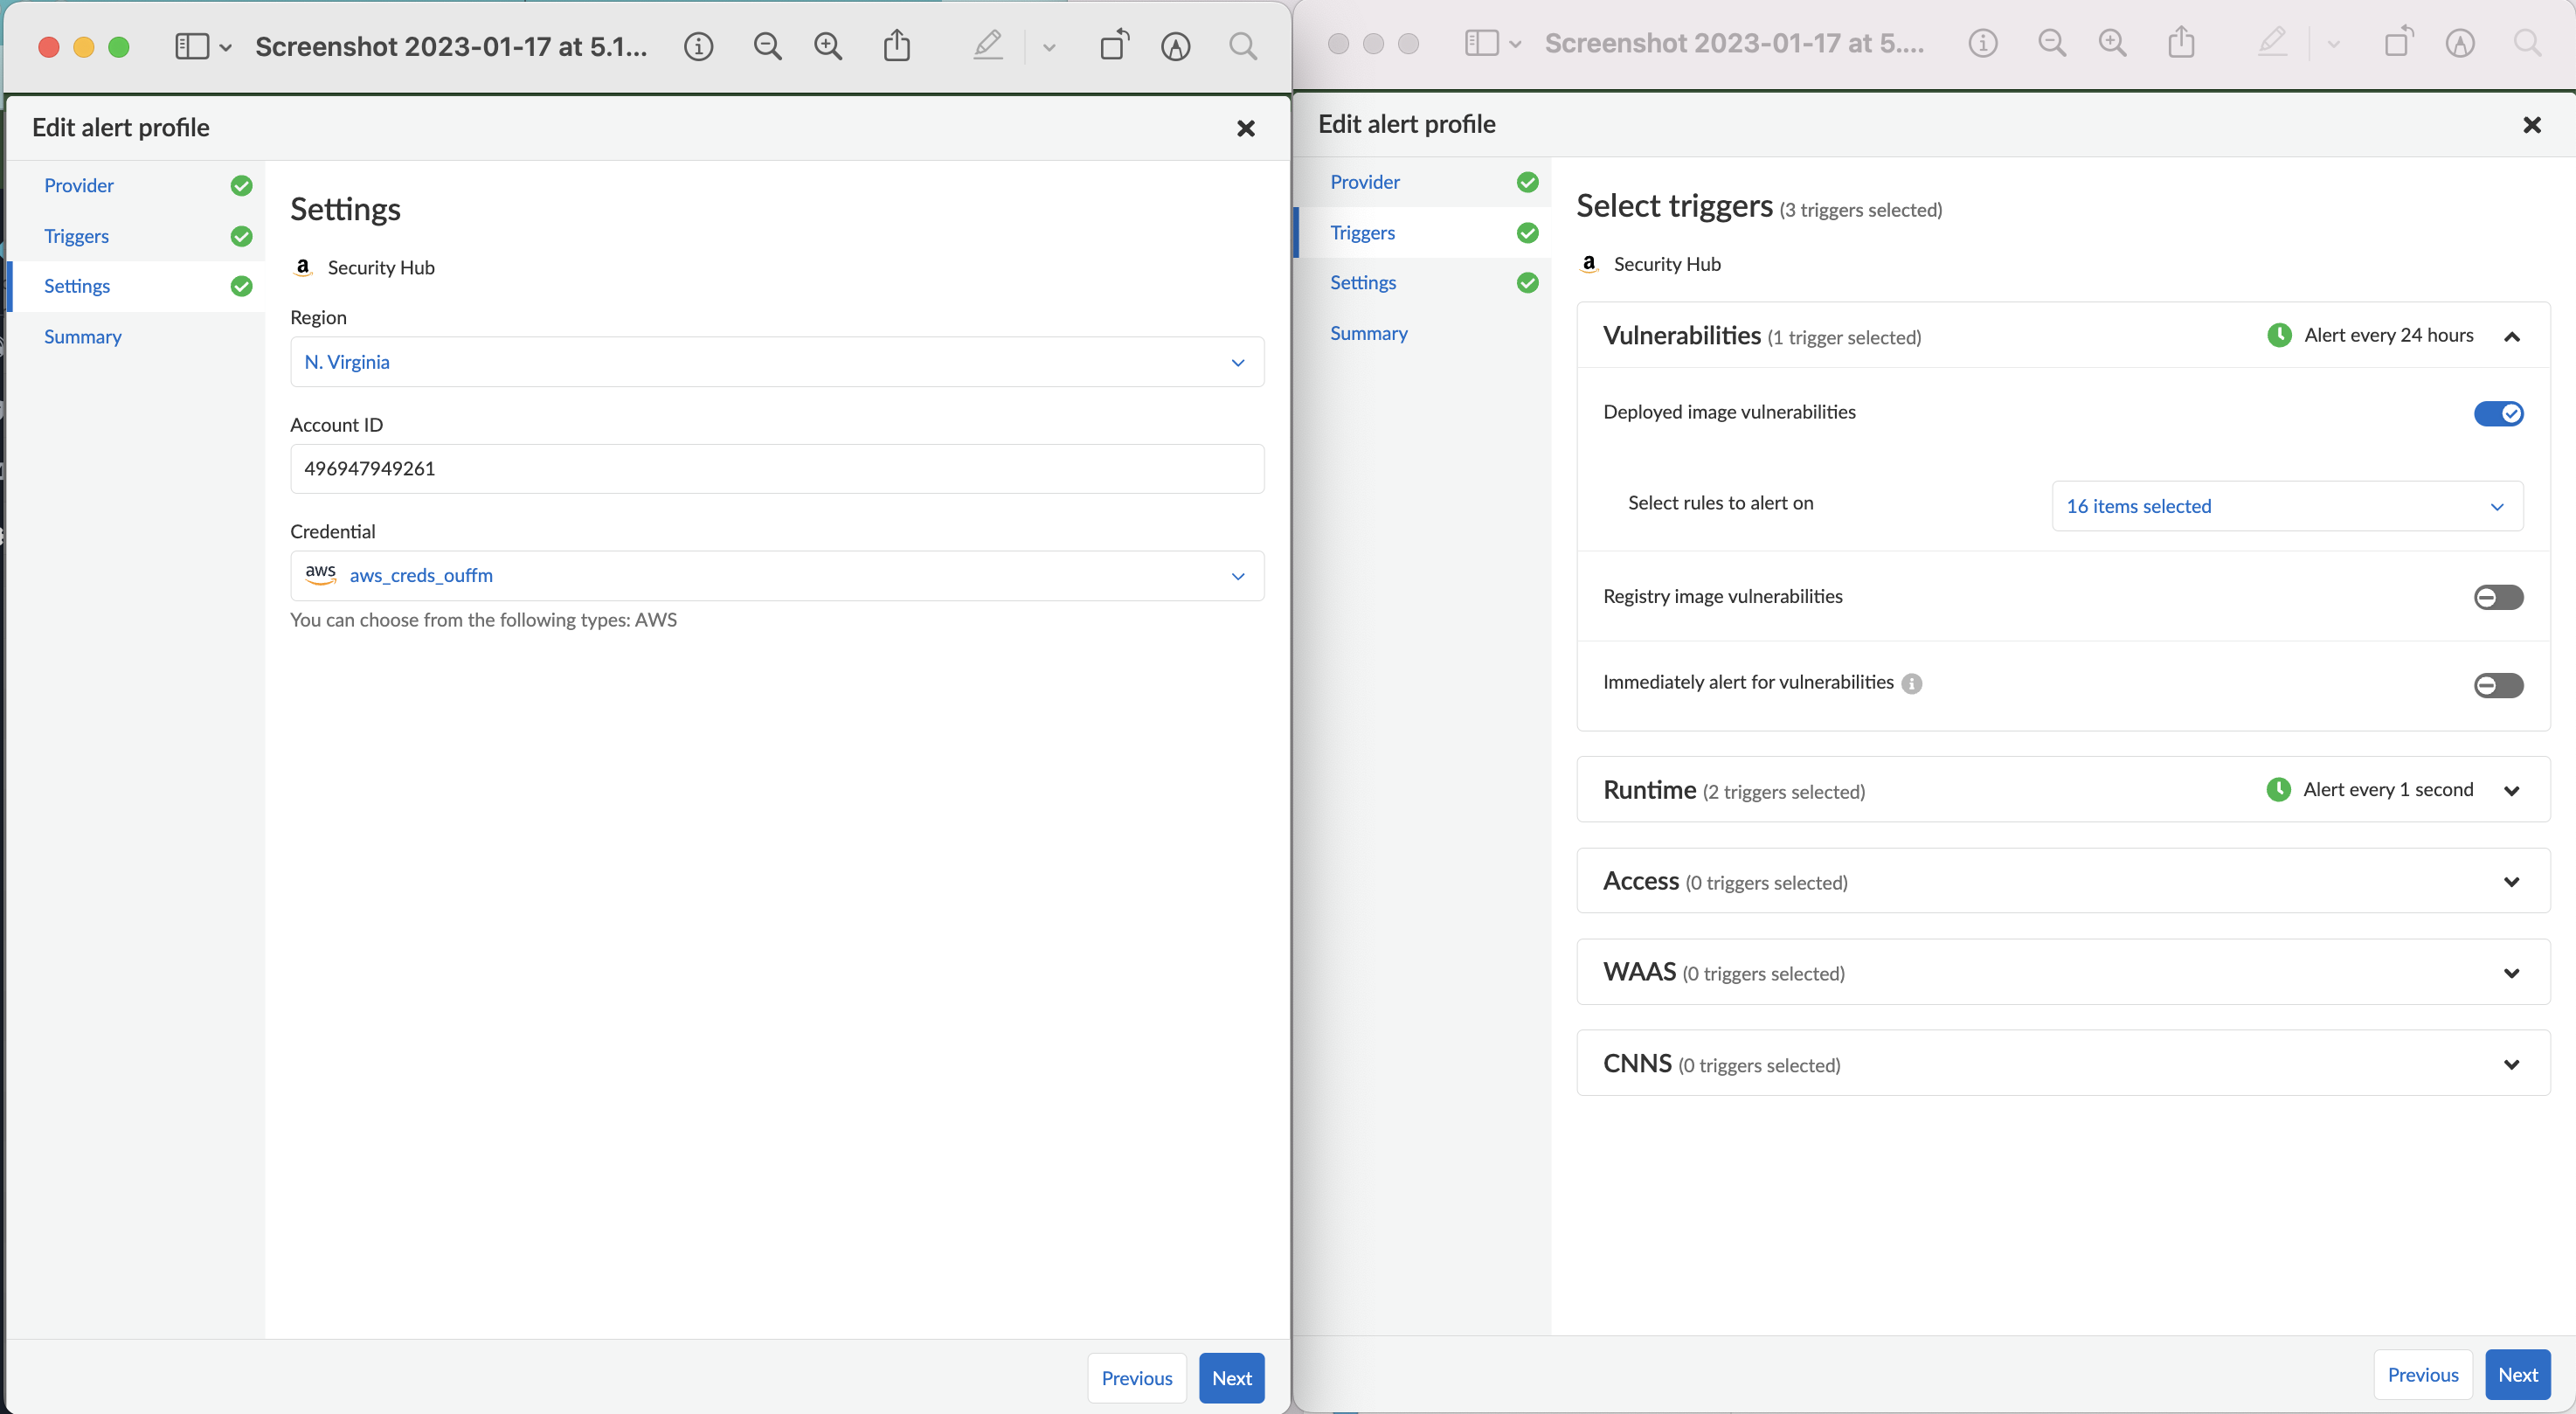
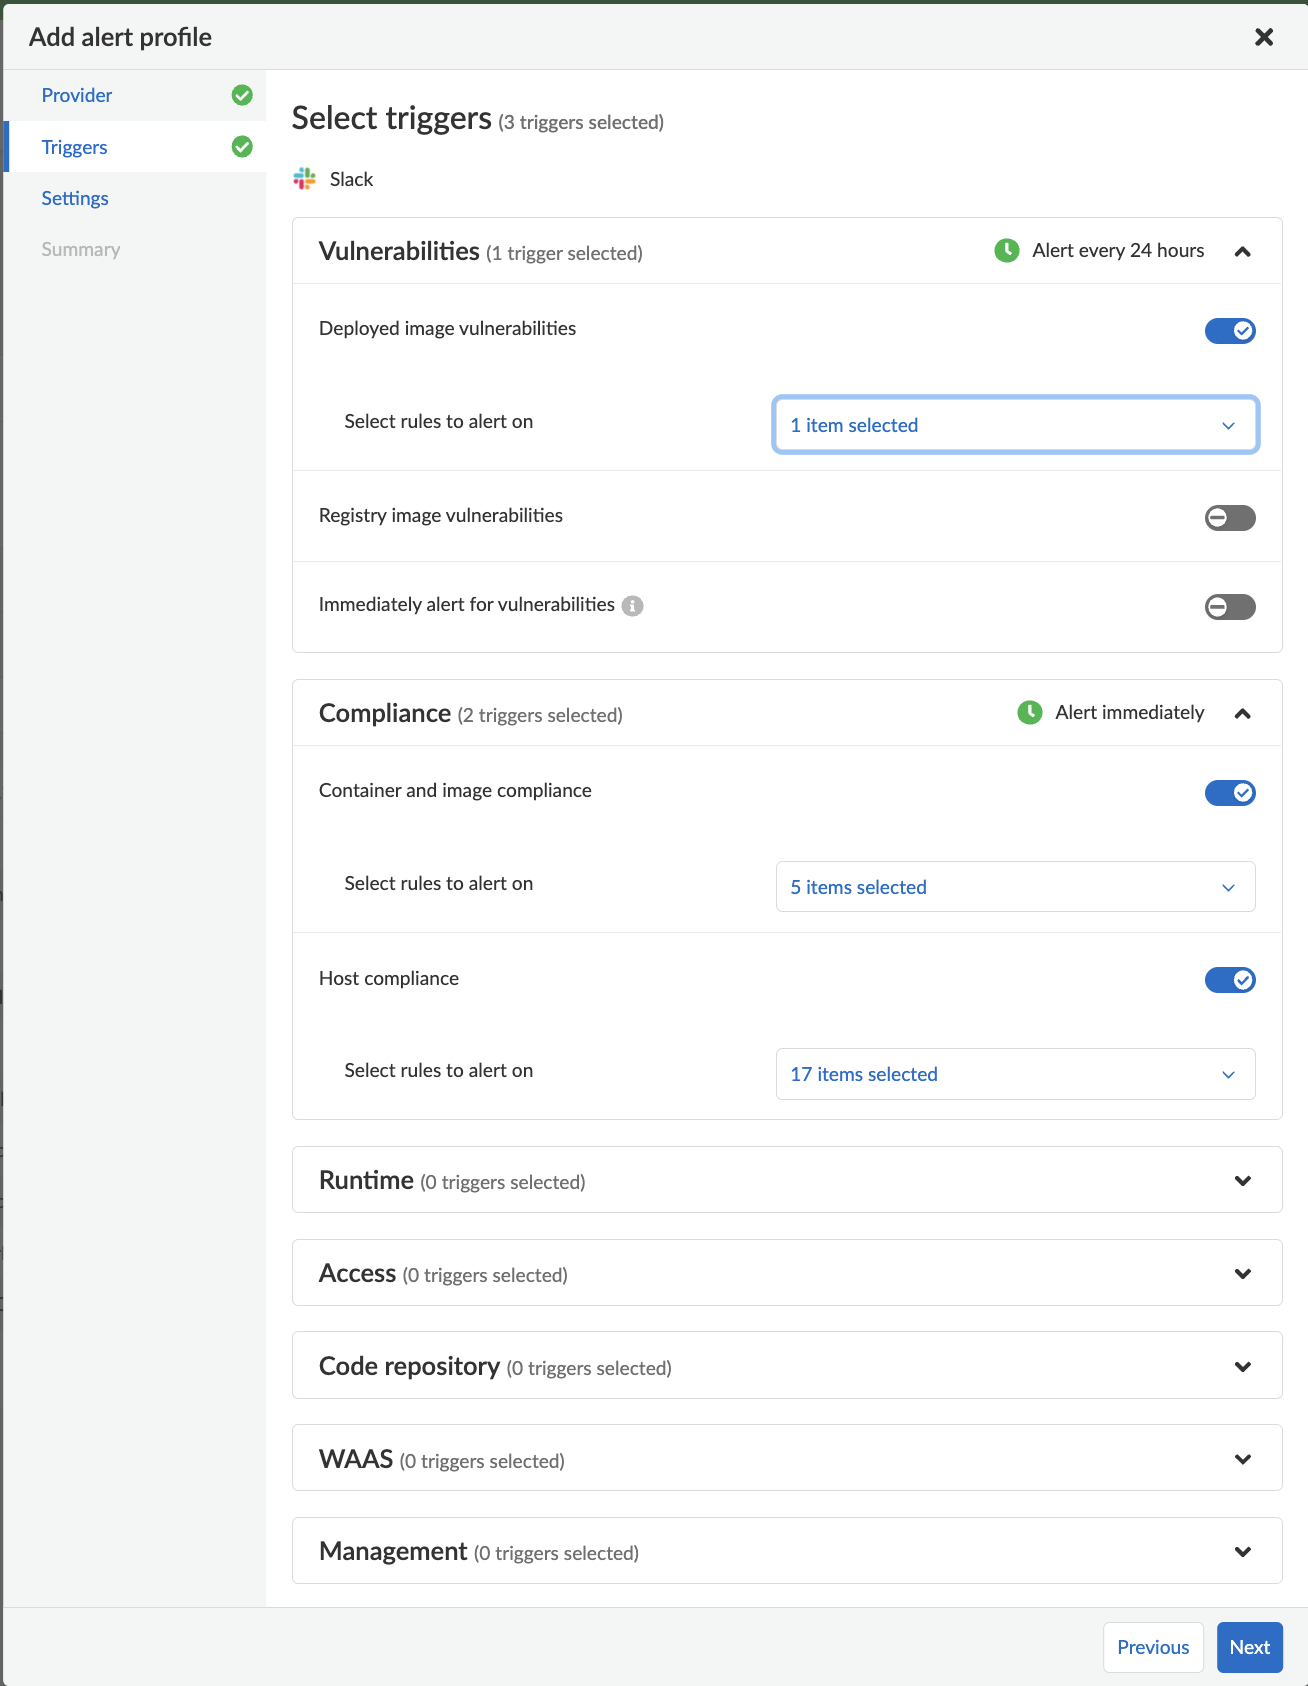
1. In **Select triggers**, select the events that should trigger an alert to be sent.
2. To specify specific rules that should trigger an alert, deselect **All rules**, and then select any individual rules.
3. Click **Next**.
## Configure the channel
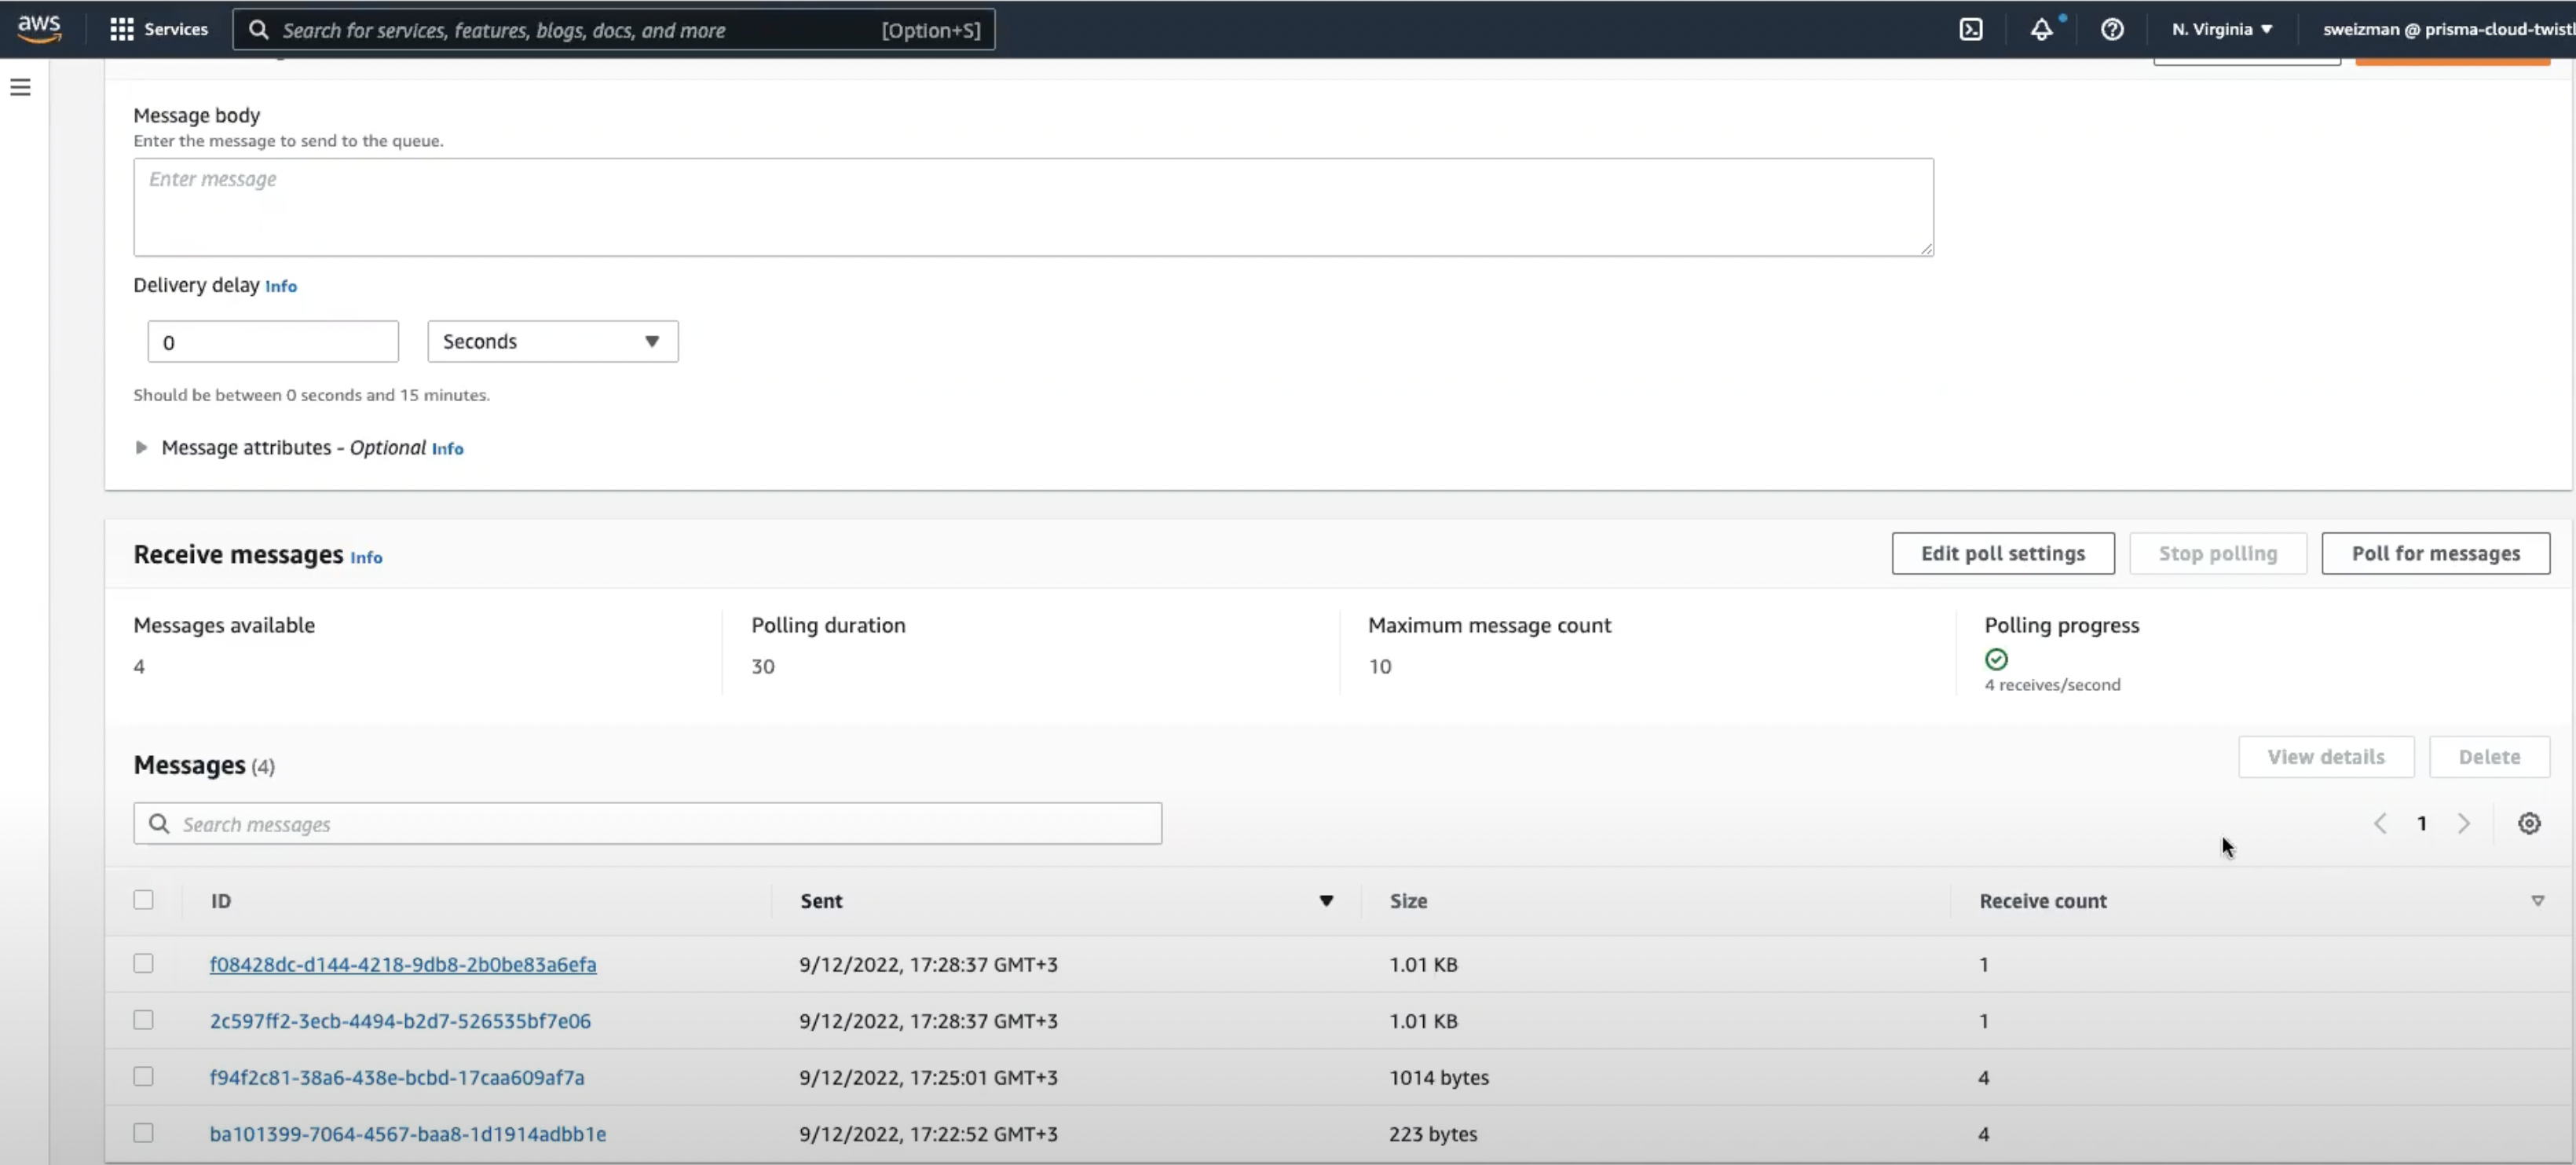
After completing the steps in this procedure, you can use the AWS SQS integration configured in the Prisma platform to send compute workload alerts to AWS SQS.
1. In **Region**, select your region.
2. Enter your **Account ID**, which can be found in the AWS Management Console under **My Account > Account Settings**.
3. Select or create [credentials](/admin-guide/authentication/credentials-store/aws-credentials.md), which Prisma Cloud uses to integrate with AWS Security Hub.
You can use an IAM user, IAM role, or AWS STS.
4. Click **Next**.
5. Review the **Summary** and test the configuration by selecting **Send test alert**.
6. Click **Save**.
## Configure AWS SQS Integration
Add AWS SQS integration in the Prisma Platform.
1. Create an [AWS SQS queue](https://docs.aws.amazon.com/AWSSimpleQueueService/latest/SQSDeveloperGuide/sqs-setting-up.html).
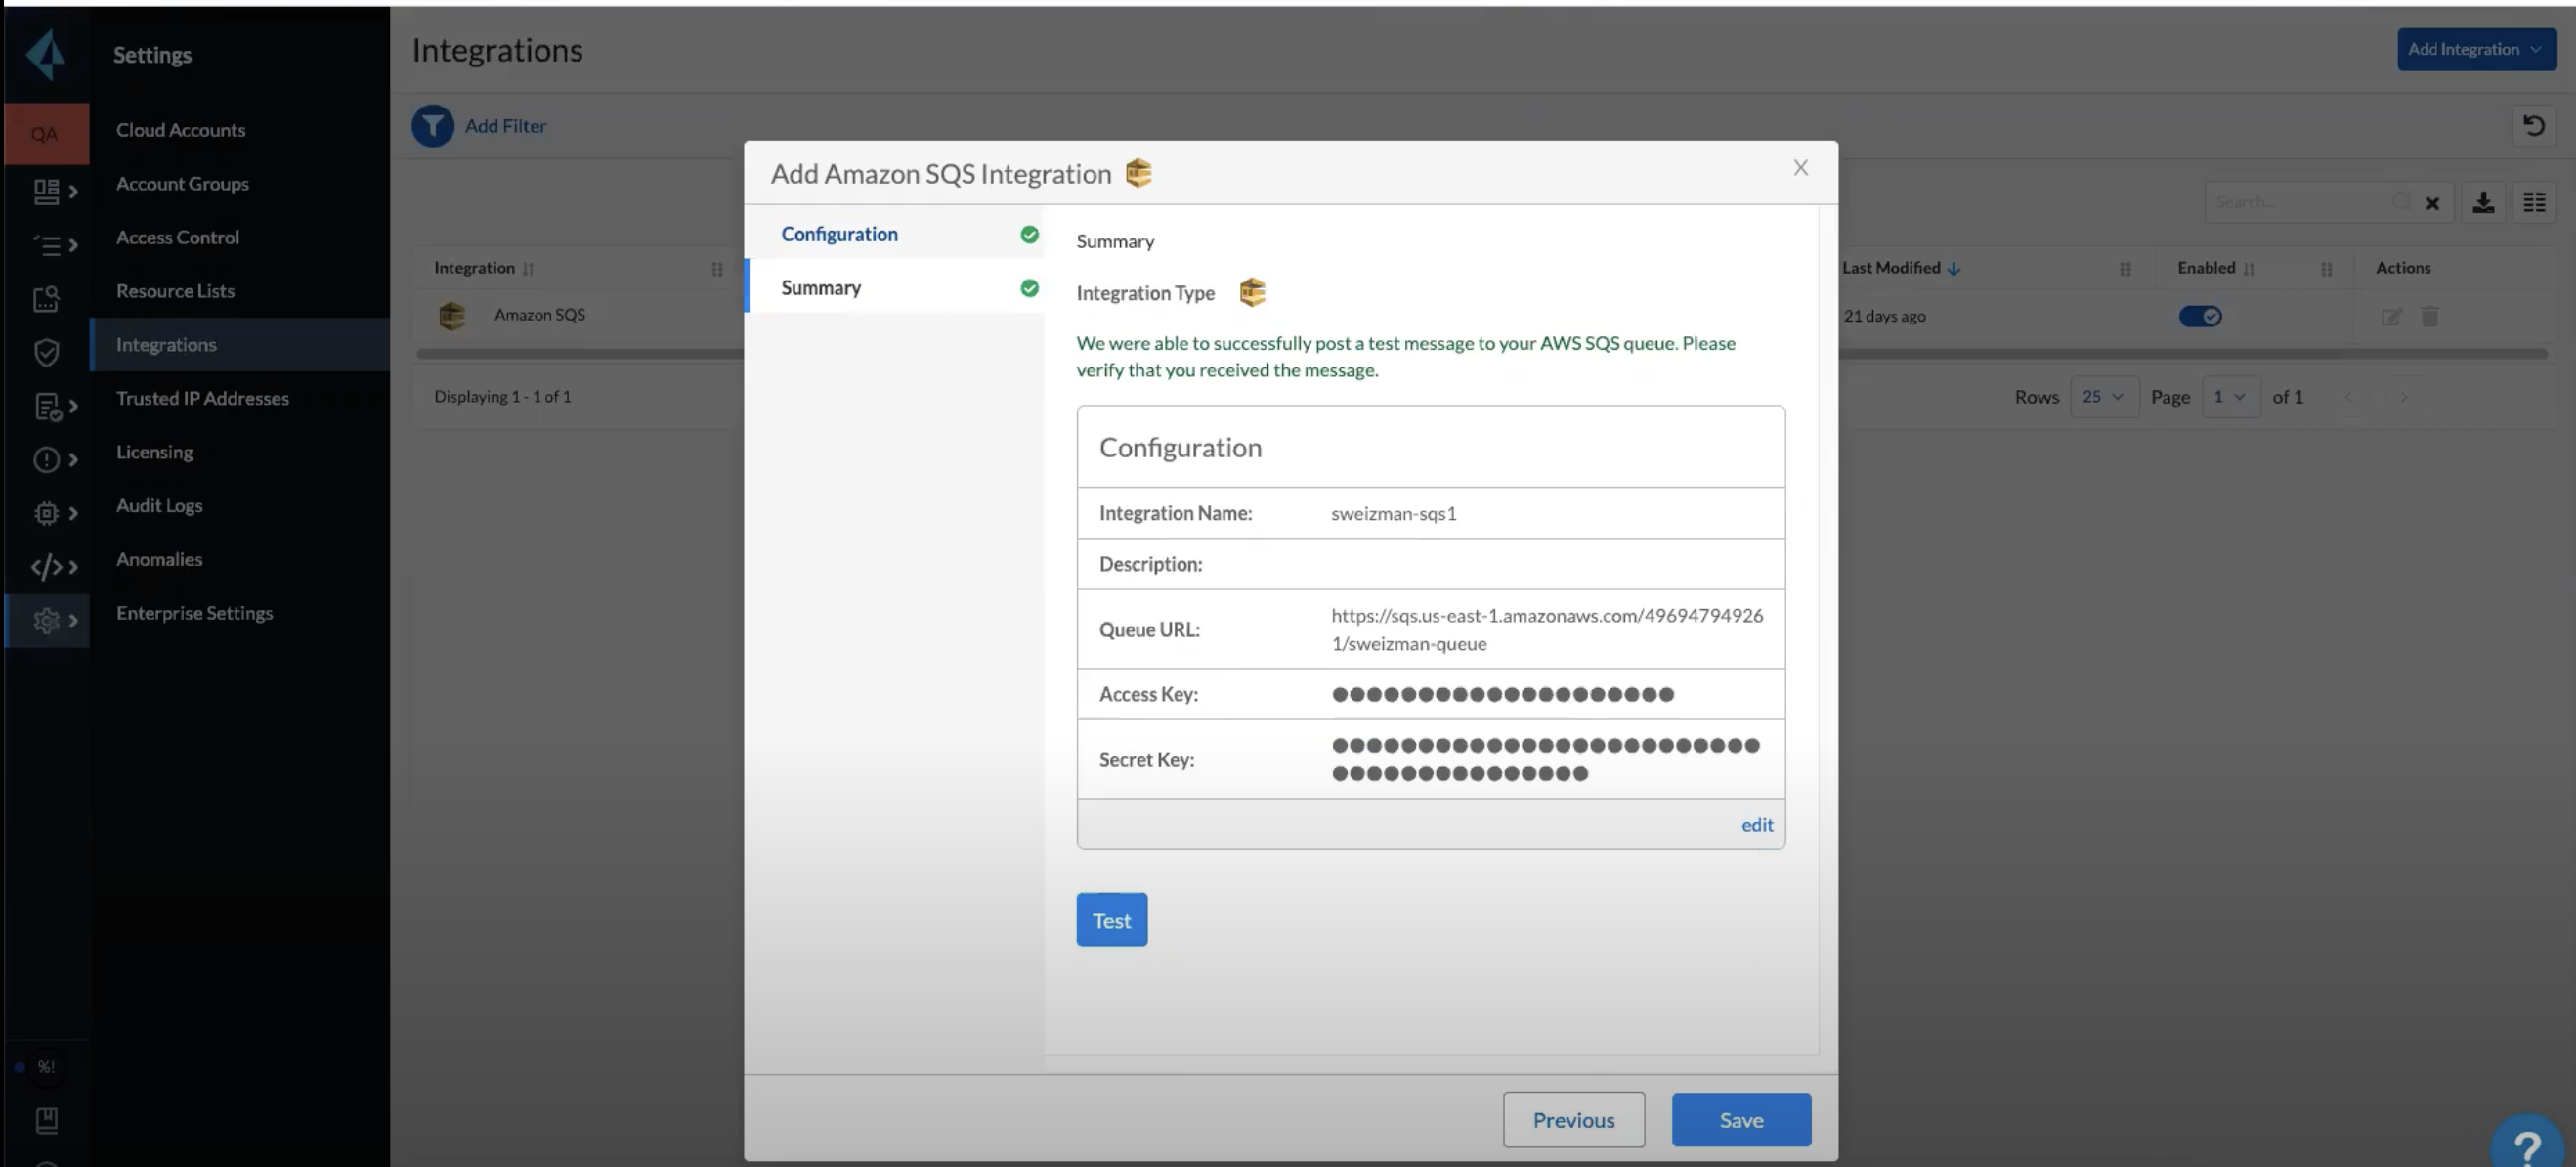
2. Go to Prisma **SaaS > Settings > Integrations > Add Integration**.
3. Select **Amazon SQS**.
1. Enter the **Integration Name**.
2. Enter the **Queue URL** that you copied from the AWS SQS queue.
3. Under **More Options**, enter the credentials for **IAM Role** or **IAM Access Keys**.
4. **Test** to make sure that Prisma Cloud was successfully able to post a test message to your AWS SQS queue.
### Create an alert profile for AWS SQS in Prisma Console
1. Go to **Compute > Manage > Alerts > Add profile**.
2. Enter the profile **Name**.
3. Select the **Provider** as **Prisma Cloud**.
4. Select your AWS SQS **Integration** that you created under **SaaS > Settings > Integrations > Add Integration**.
5. Select the **Triggers**.
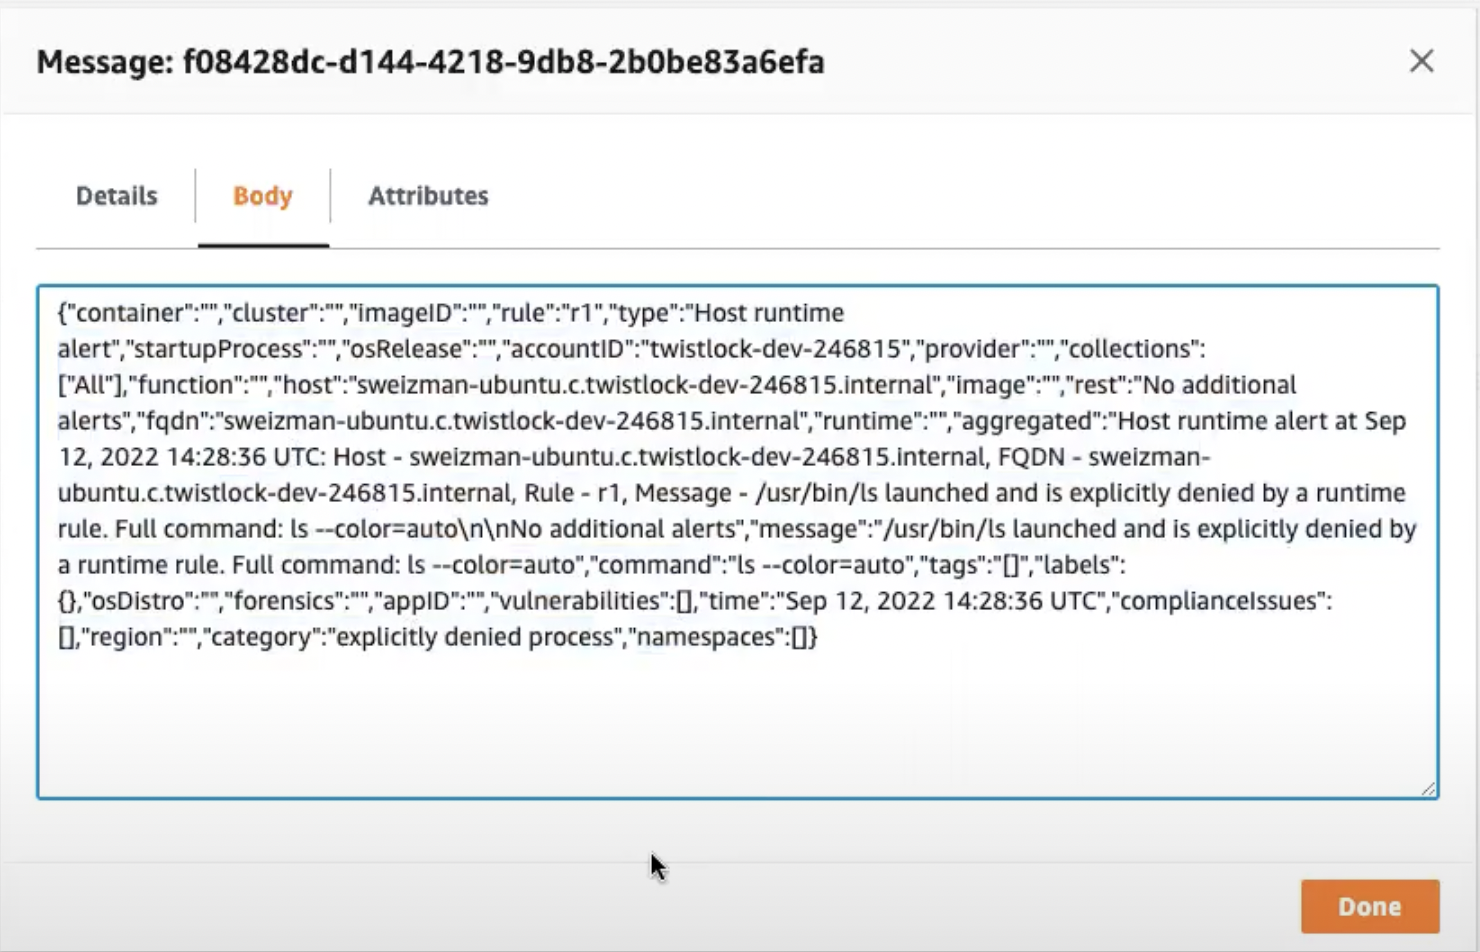
6. Under **Settings** enter the custom JSON for the message payload.
7. You can **Send test alert** message and verify that the message was sent to the AWS queue.
8. Click **Save**.
This alert will be triggered based on your runtime policy settings under **Compute > Defend** policy settings, and the JSON payload message will be sent to the AWS SQS queue.
**Limitations**
* Additional SQS features such as associating attributes with the message, etc. can not be used as these capabilities are not supported by Prisma. In the case of SQS, Compute sends the SQS message payload through Prisma API.
* Maximum allowed SQS message is 256kb. Messages larger than this limit won’t be sent to Prisma, instead a specific error will be written to the Compute console log.
---
# Agent Instructions
This documentation is published with GitBook. GitBook is the documentation platform designed so that both humans and AI agents can read, navigate, and reason over technical content effectively. Learn more at gitbook.com.
## Querying This Documentation
If you need additional information that is not directly available in this page, you can query the documentation by asking a question.
Perform an HTTP GET request on the following URL with the `ask` and `goal` query parameters:
```
GET https://docs.prismacloud.io/admin-guide/alerts/aws-security-hub.md?ask=&goal=
```
`ask` is the immediate question: it should be specific, self-contained, and written in natural language.
`goal` is what the user is ultimately trying to achieve, the reason they need the answer. Sharing it helps GitBook give you a better, more relevant answer. A goal is most helpful when it describes the outcome the user wants rather than restating the question. For example, with `ask=how do I create an API token`, a goal like `automate deployments from our CI pipeline` lets GitBook tailor the answer to that use case.
The response will contain a direct answer to the question and relevant excerpts and sources from the documentation.
Use this mechanism when the answer is not explicitly present in the current page, you need clarification or additional context, or you want to retrieve related documentation sections.