> For the complete documentation index, see [llms.txt](https://docs.prismacloud.io/llms.txt). Markdown versions of documentation pages are available by appending `.md` to page URLs; this page is available as [Markdown](https://docs.prismacloud.io/admin-guide/authentication/saml-active-directory-federation-services.md).
# Active Directory Federation Services (SAML 2.0)
Many organizations use SAML to authenticate users for web services. Prisma Cloud supports the SAML 2.0 federation protocol for access to the Prisma Cloud Console. When SAML support is enabled, users can log into Console with their federated credentials. This article provides detailed steps for federating your Prisma Cloud Console with your Active Directory Federation Service (ADFS) Identity Provider (IdP).
Prisma Cloud supports SAML 2.0 federation with Windows Server 2016 and Windows Server 2012r2 Active Directory Federation Services via the SAML protocol. The federation flow works as follows:
1. Users browse to Prisma Cloud Console.
2. Their browsers are redirected to the ADFS SAML 2.0 endpoint.
3. Users authenticate either with Windows Integrated Authentication or Forms Based Authentication. Multi-factor authentication can be enforced at this step.
4. An ADFS SAML token is returned to Prisma Cloud Console.
5. Prisma Cloud Console validates the SAML token’s signature and associates the user to their Prisma Cloud account via user identity mapping or group membership.
Prisma Cloud Console is integrated with ADFS as a federated SAML Relying Party Trust.
* [Configure Active Directory Federation Services](#_configure_active_directory_federation_services)
* [Configure the Prisma Cloud Console](#_configure_the_prisma_cloud_console)
The Relying Party trust workflows may differ slightly between Windows Server 2016 and Windows Server 2012r2 ADFS, but the concepts are the same.
## Configure Active Directory Federation Services
This guide assumes you have already deployed Active Directory Federation Services, and Active Directory is the claims provider for the service.
1. Log onto your Active Directory Federation Services server.
2. Go to **Server Manager > Tools > AD FS Management** to start the ADFS snap-in.
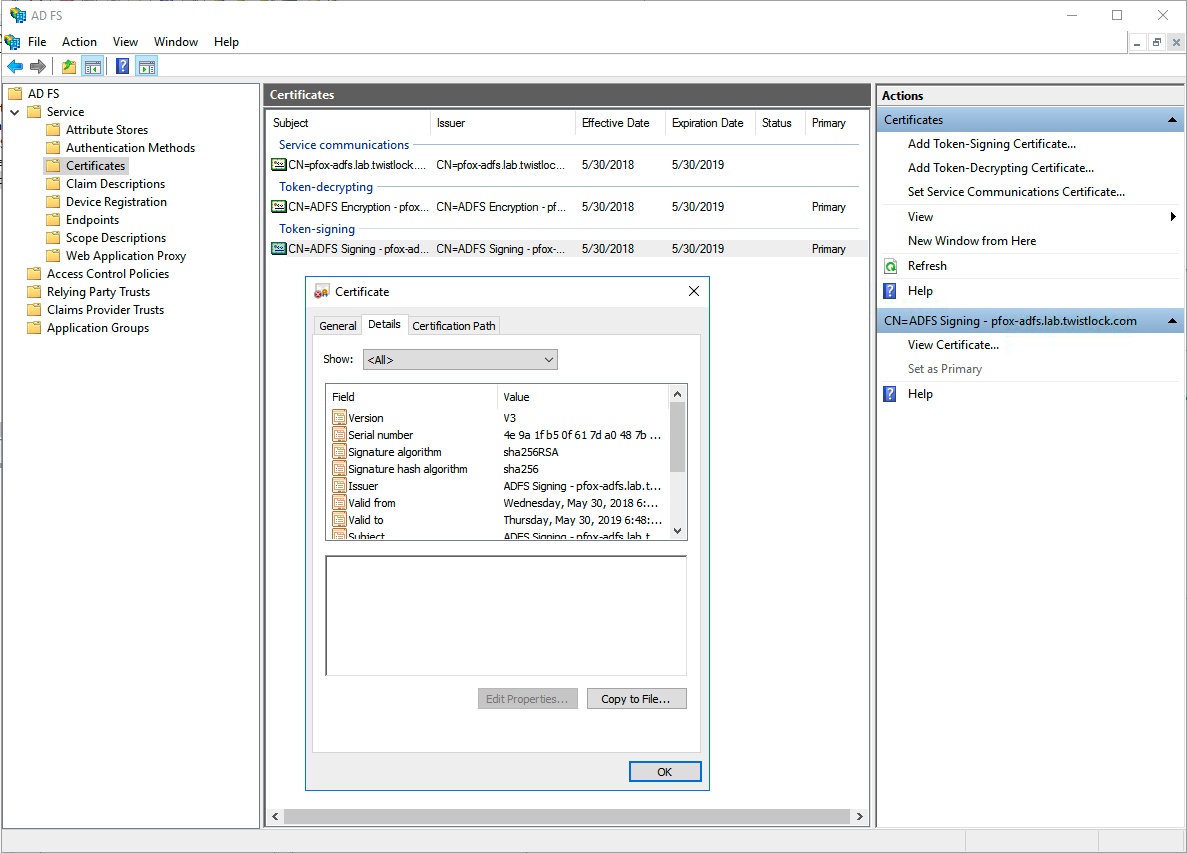
3. Go to **AD FS > Service > Certificates** and click on the **Primary Token-signing** certificate.
4. Select the Details tab, and click **Copy to File…**.
5. Save the certificate as a Base-64 encoded X.509 (.CER) file. You will upload this certificate into the Prisma Cloud console in a later step.
6. Go to **AD FS > Relying Party Trusts**.
7. Click **Add Relying Party Trust** from the **Actions** menu.
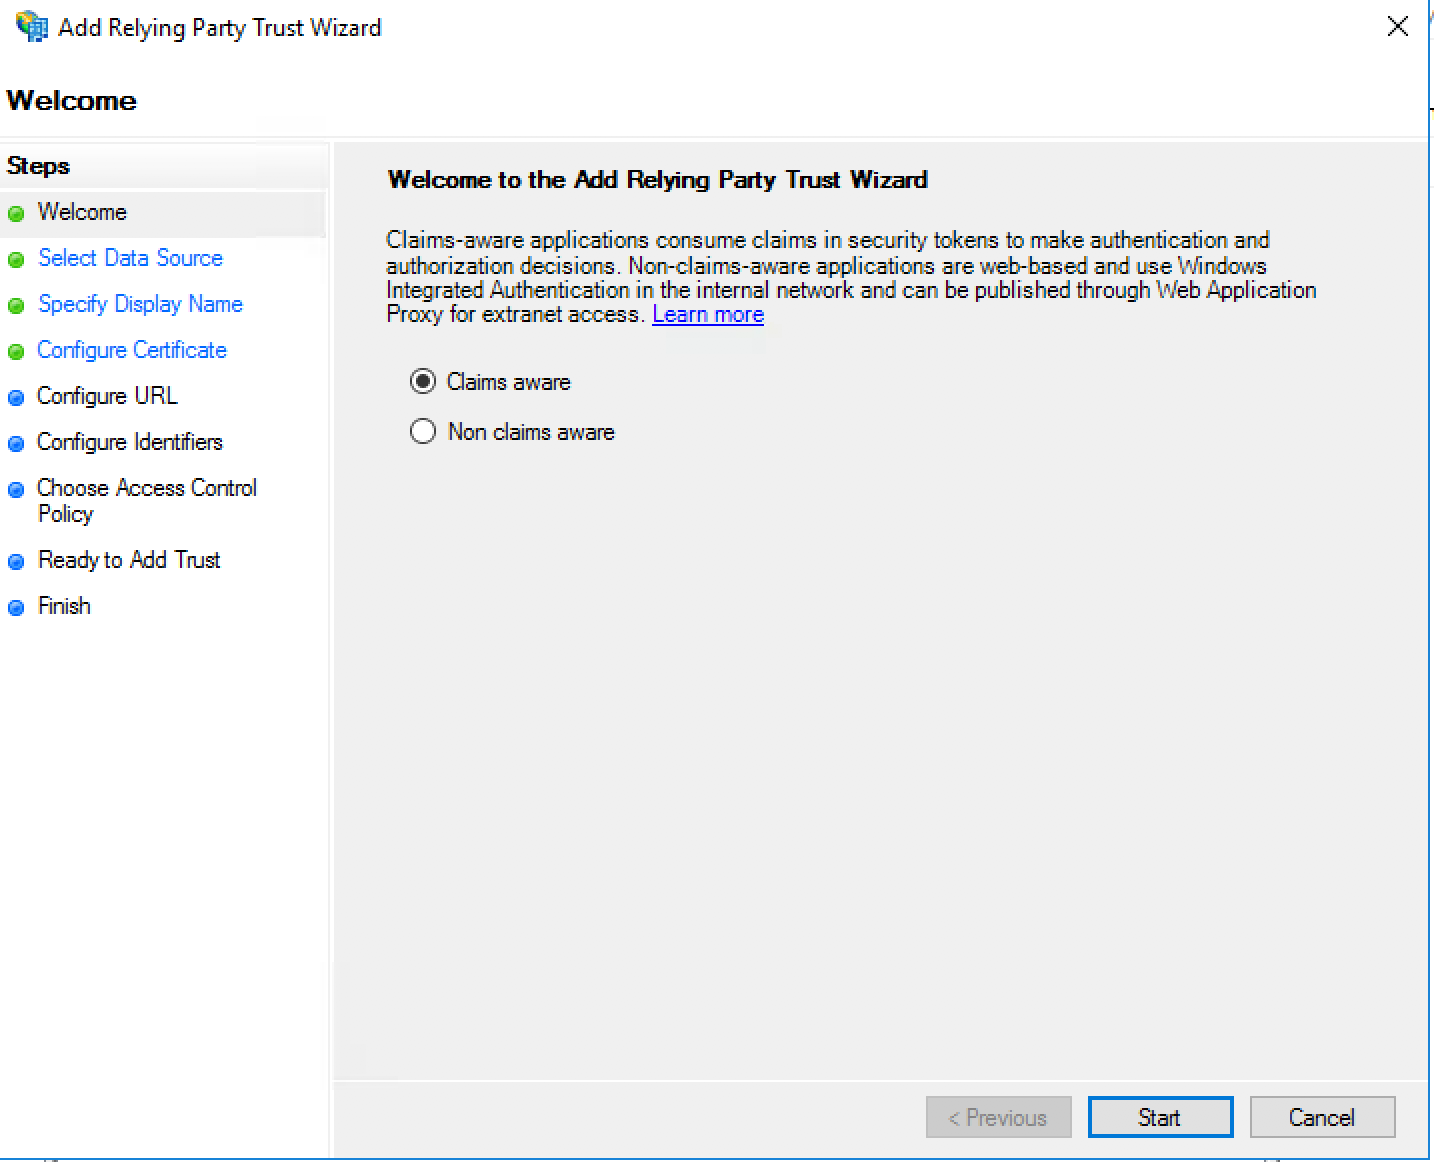
1. Step Welcome: select **Claims aware**.
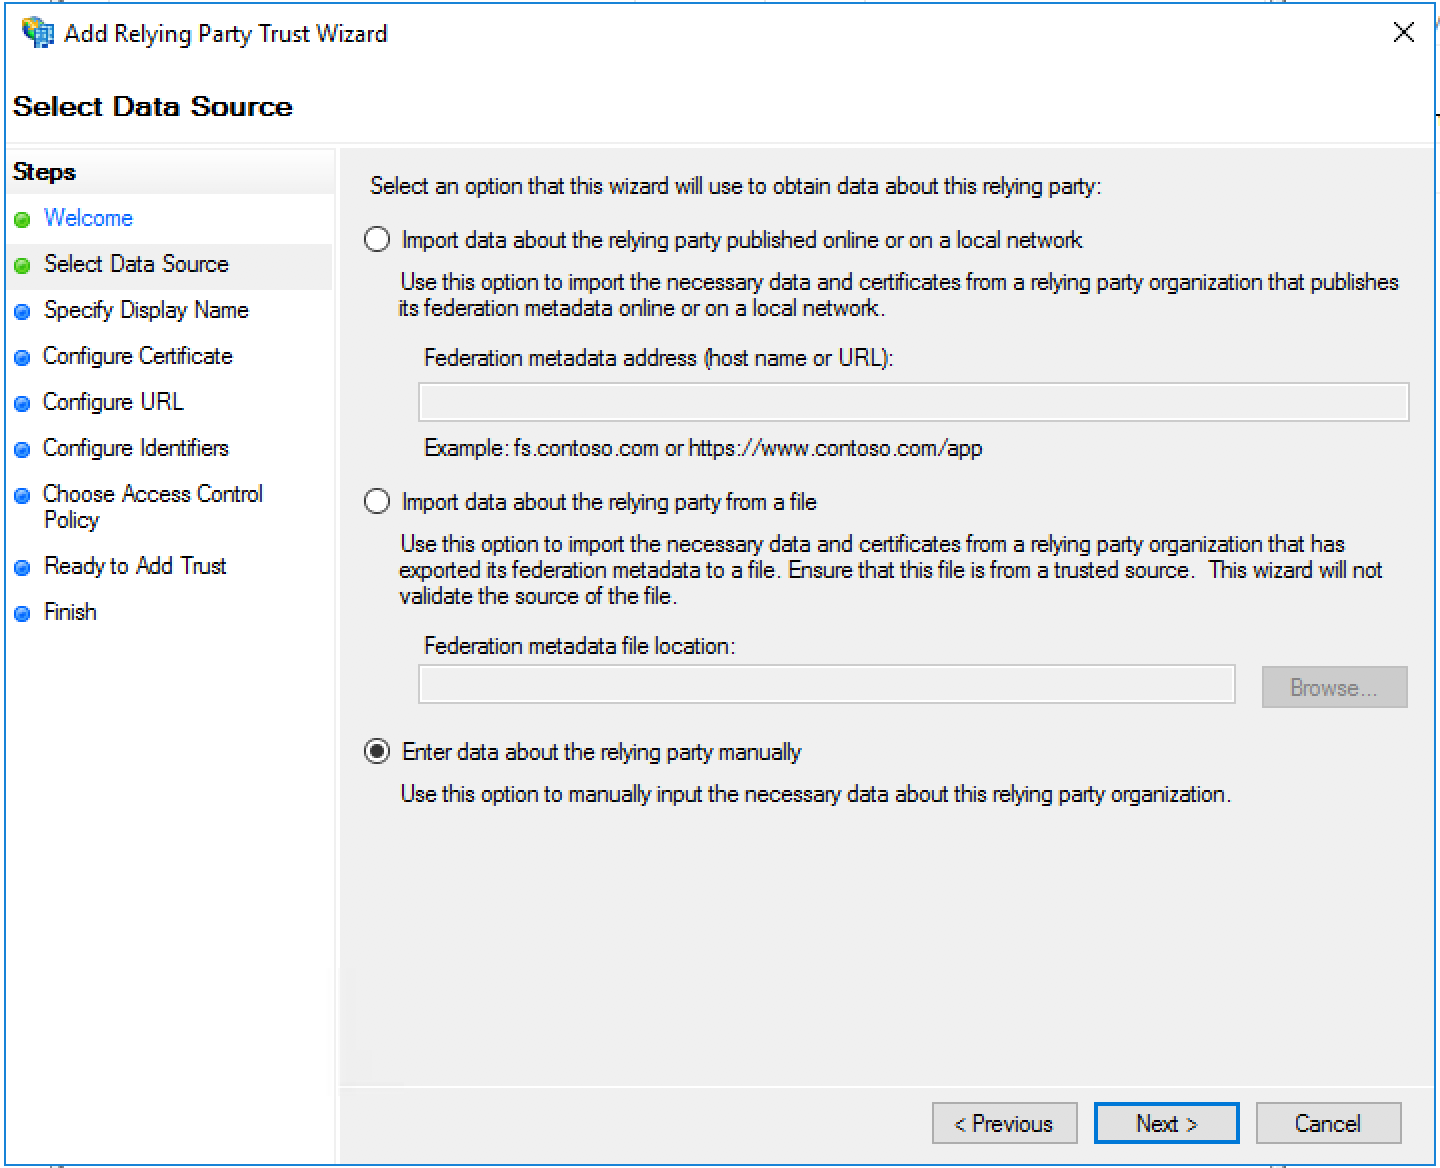
2. Step Select Data Source: select **Enter data about the relying party manually**.
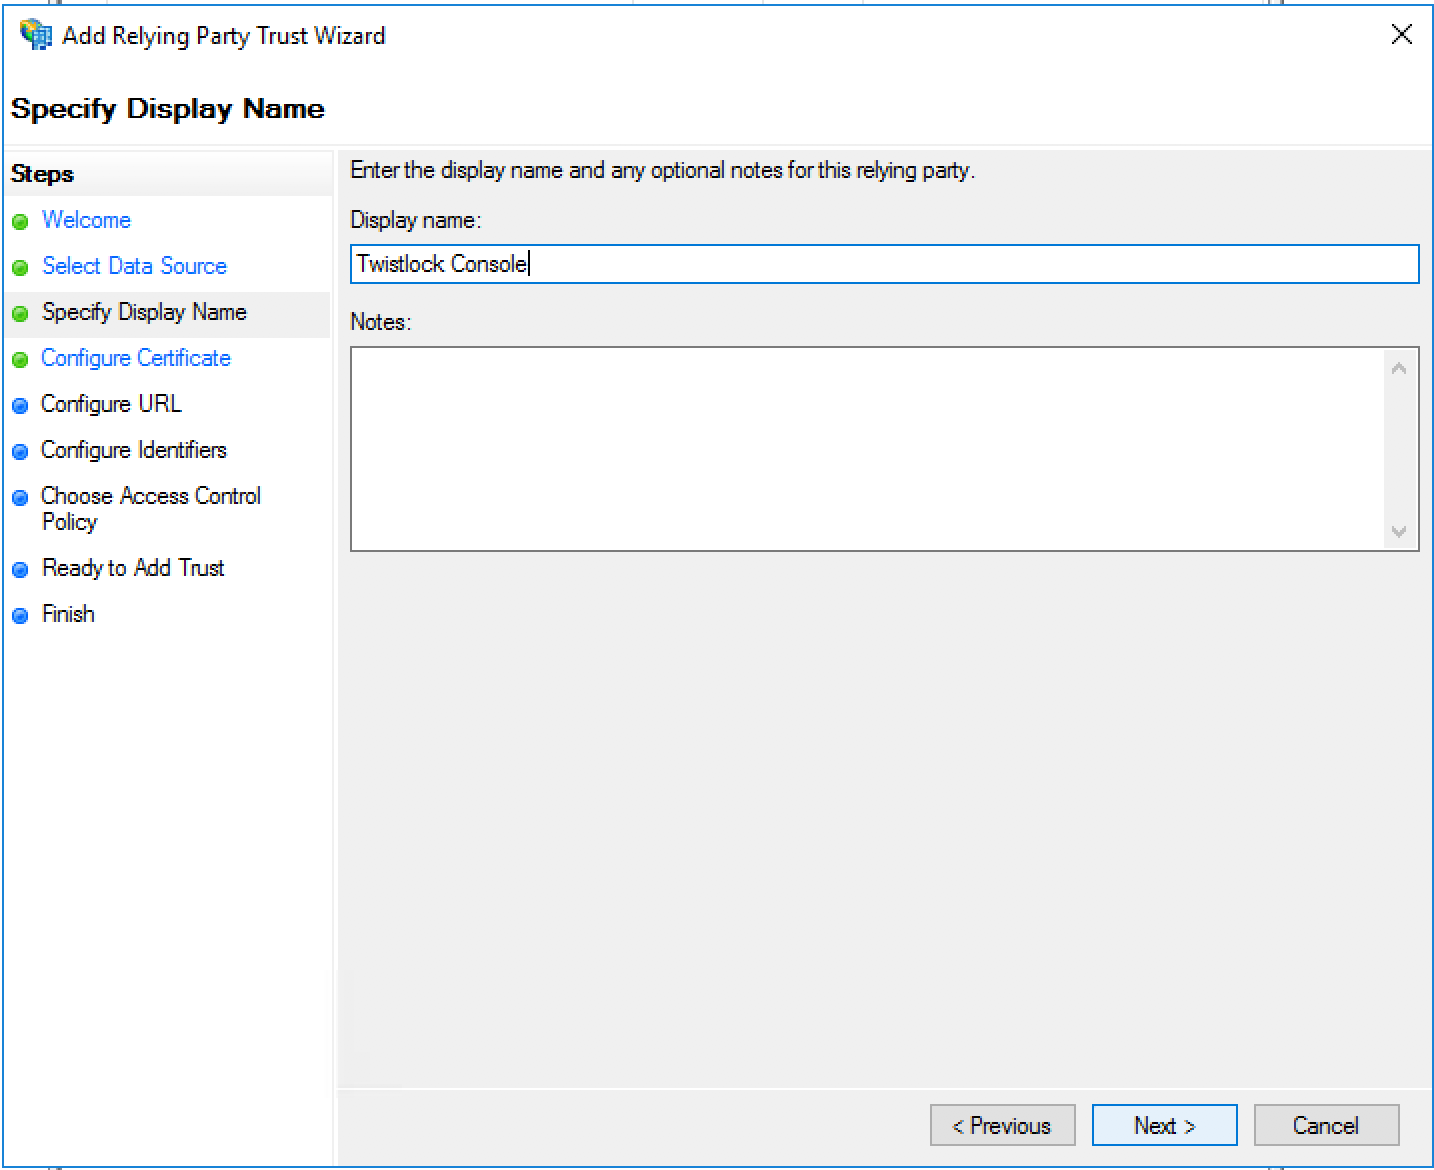
3. Step Specify Display Name: In **Display Name**, enter **twistlock Console**.
4. Step Configure Certificate: leave blank.
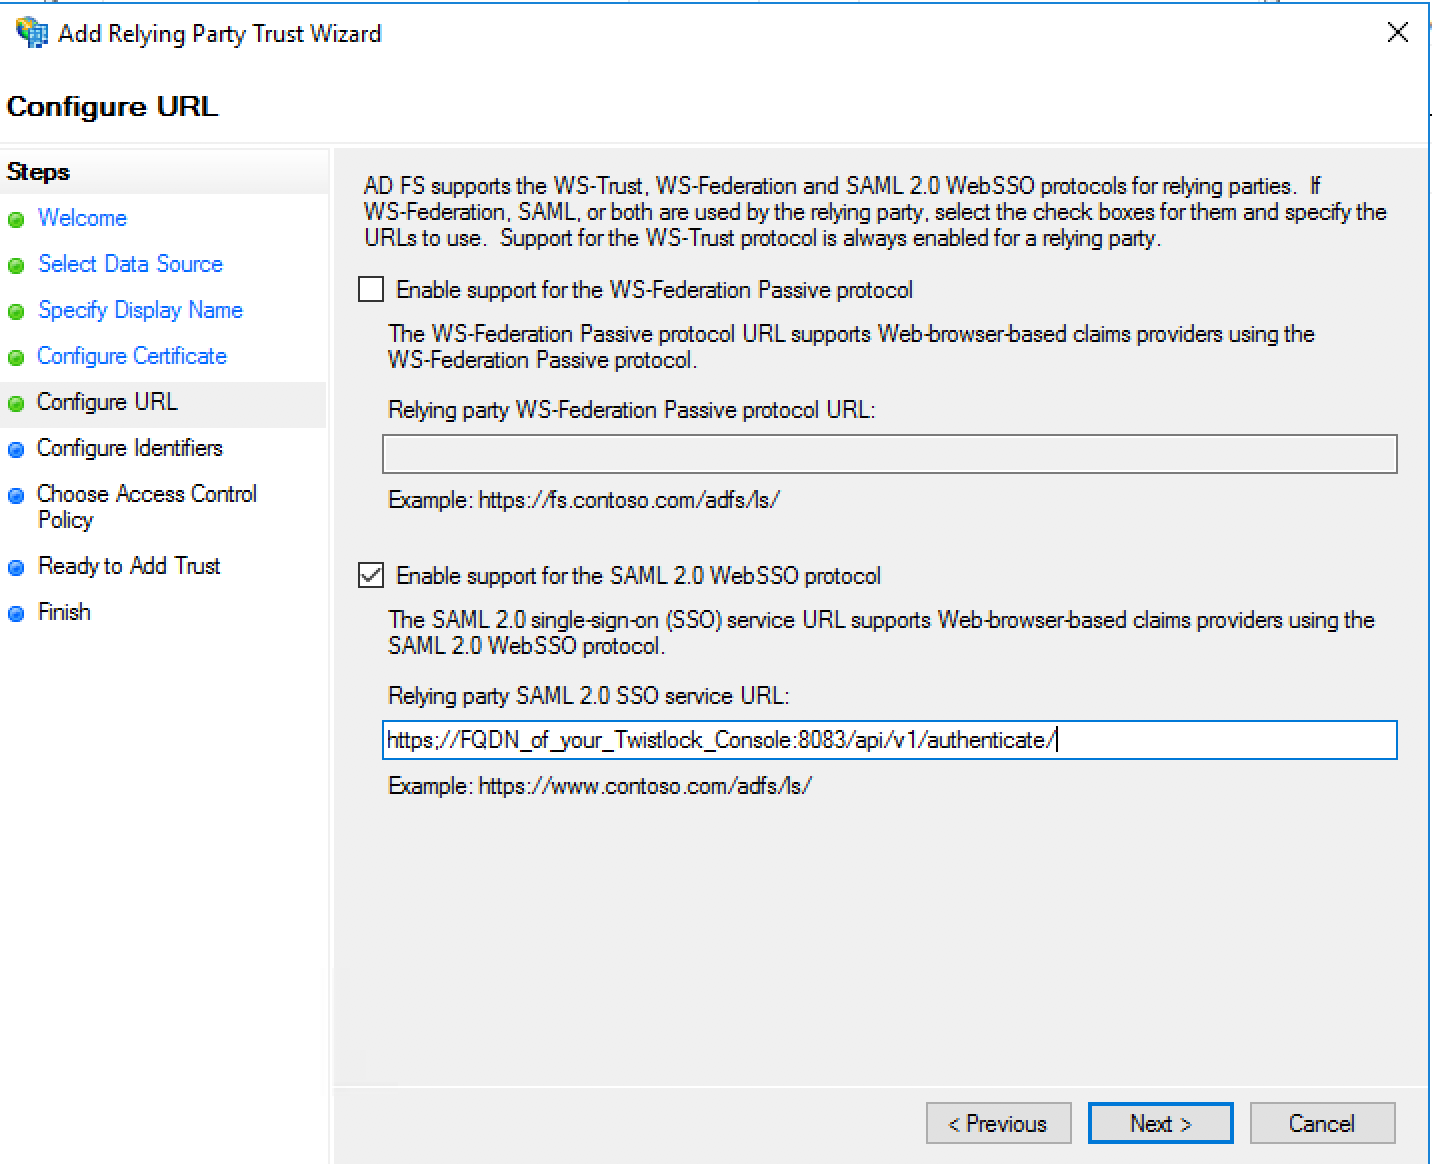
5. Step Configure URL: select **Enable support for the SAML 2.0 WebSSO protocol**. Enter the URL for your Prisma Cloud Console **https\://\:8083/api/v1/authenticate/**.
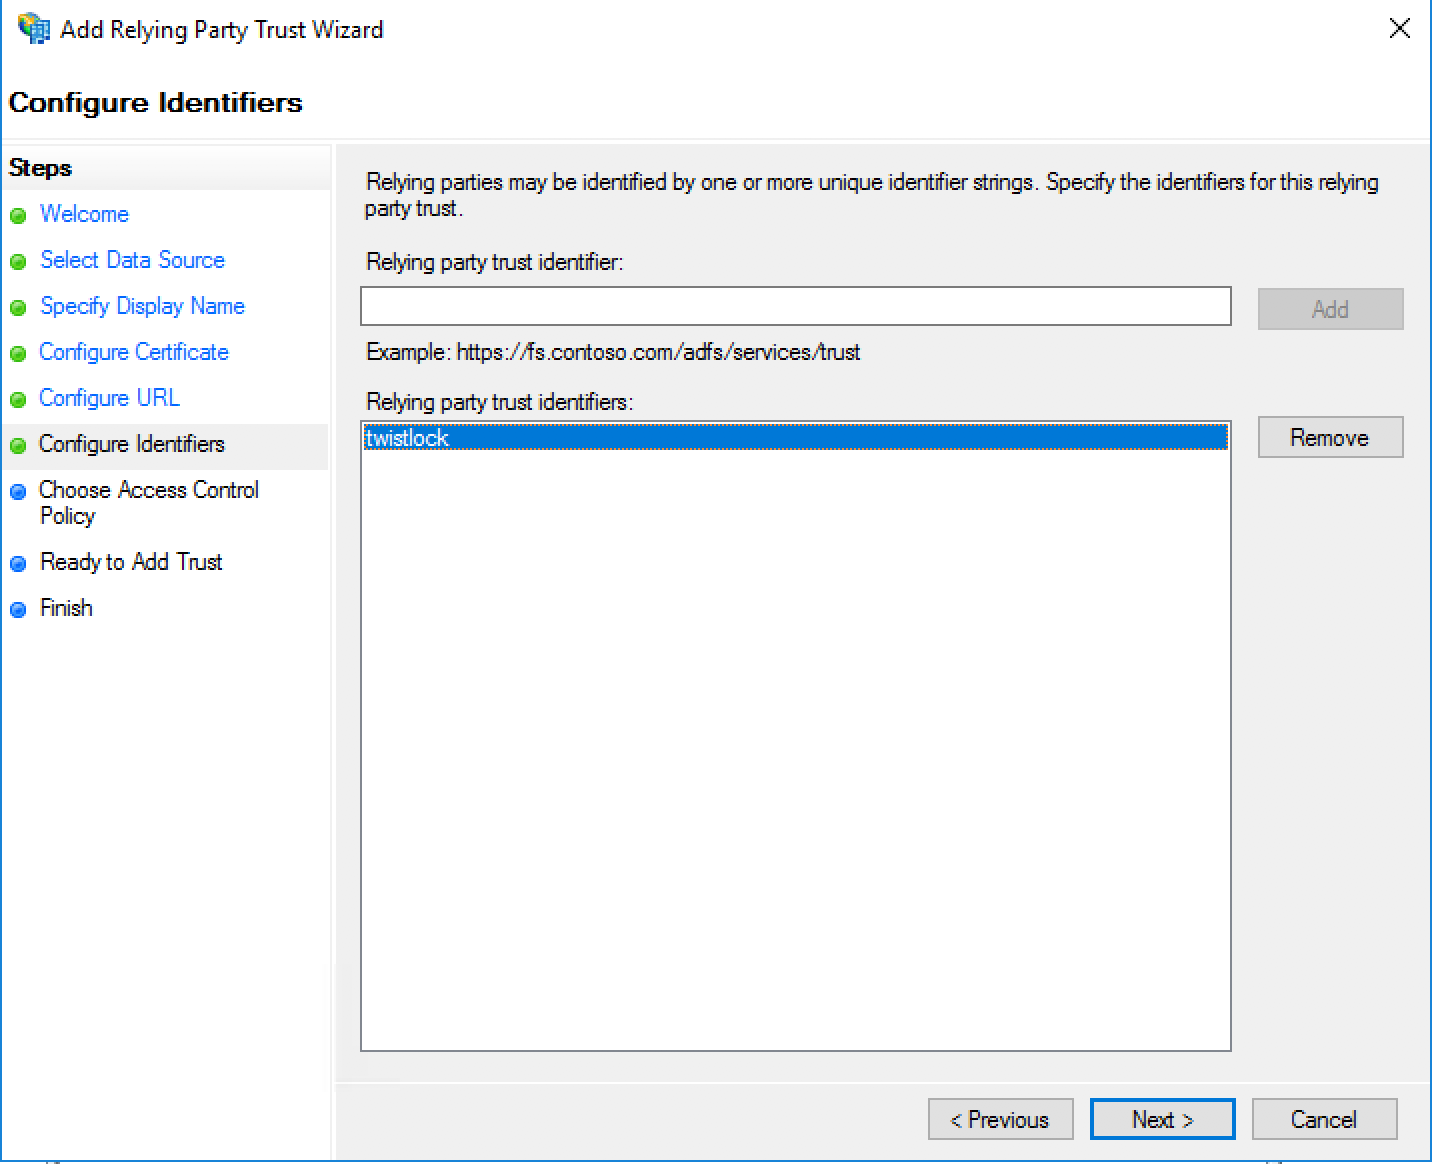
6. Step Configure Identifiers: for example enter **twistlock** all lower case and click **Add**.
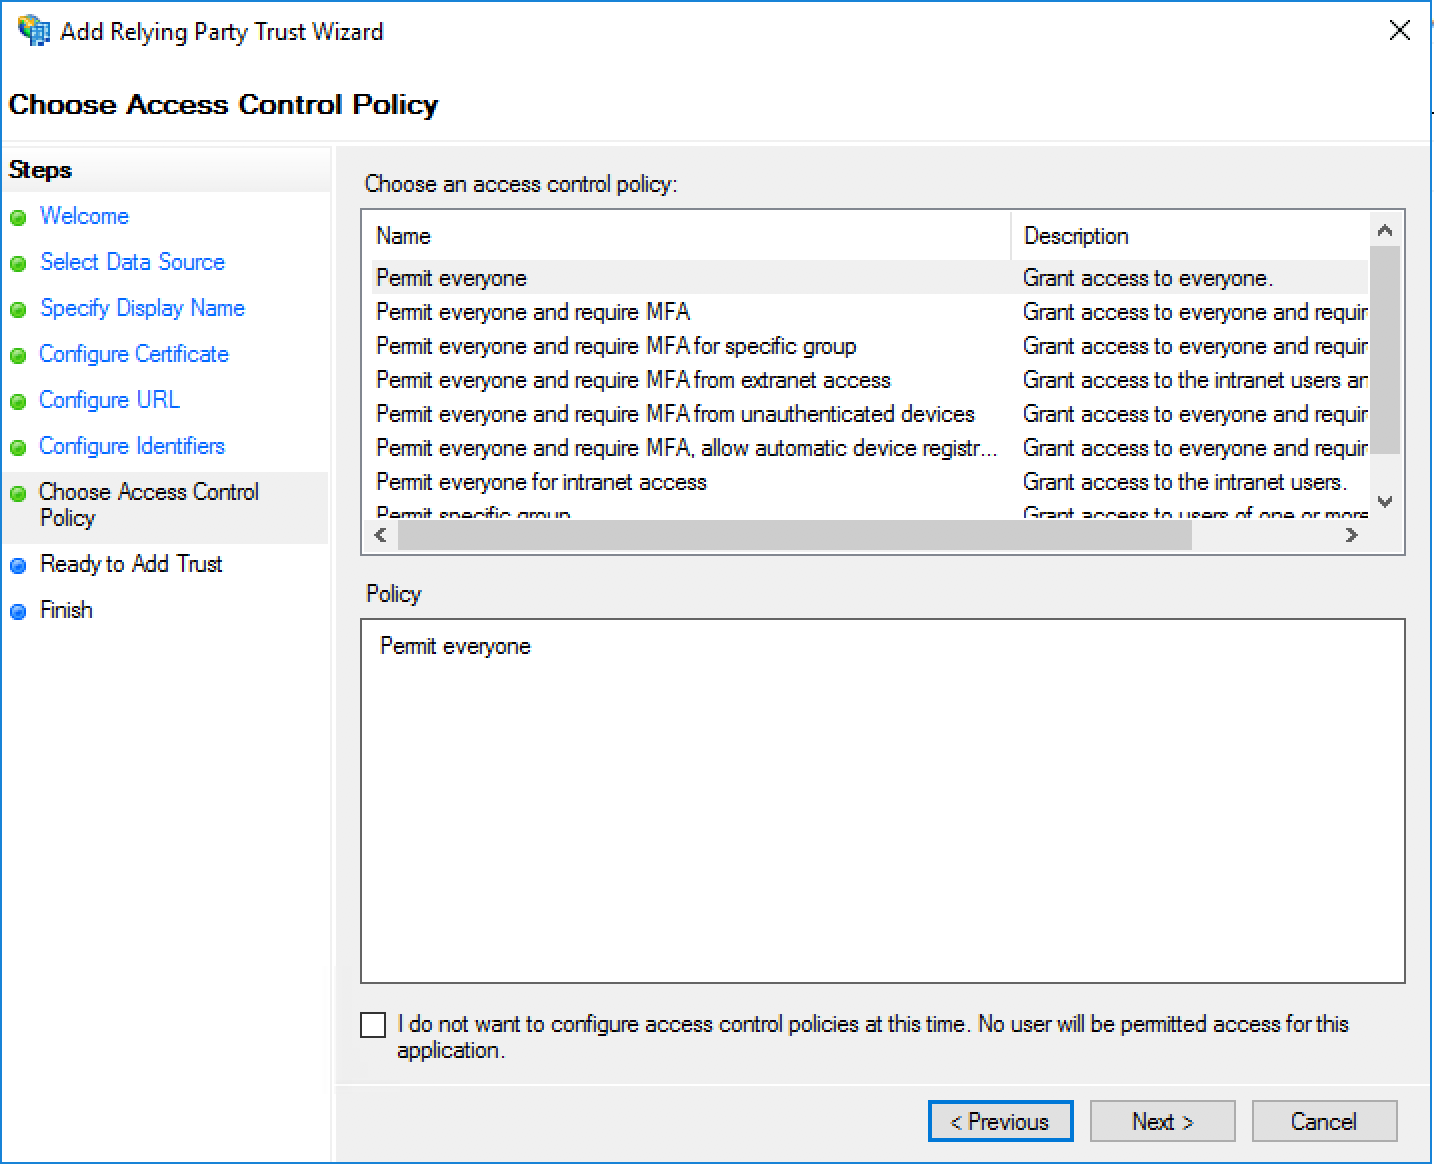
7. Step Choose Access Control Policy: this is where you can enforce multi-factor authentication for Prisma Cloud Console access. For this example, select **Permit everyone**.
8. Step Ready to Add Trust: no changes, click **Next**.
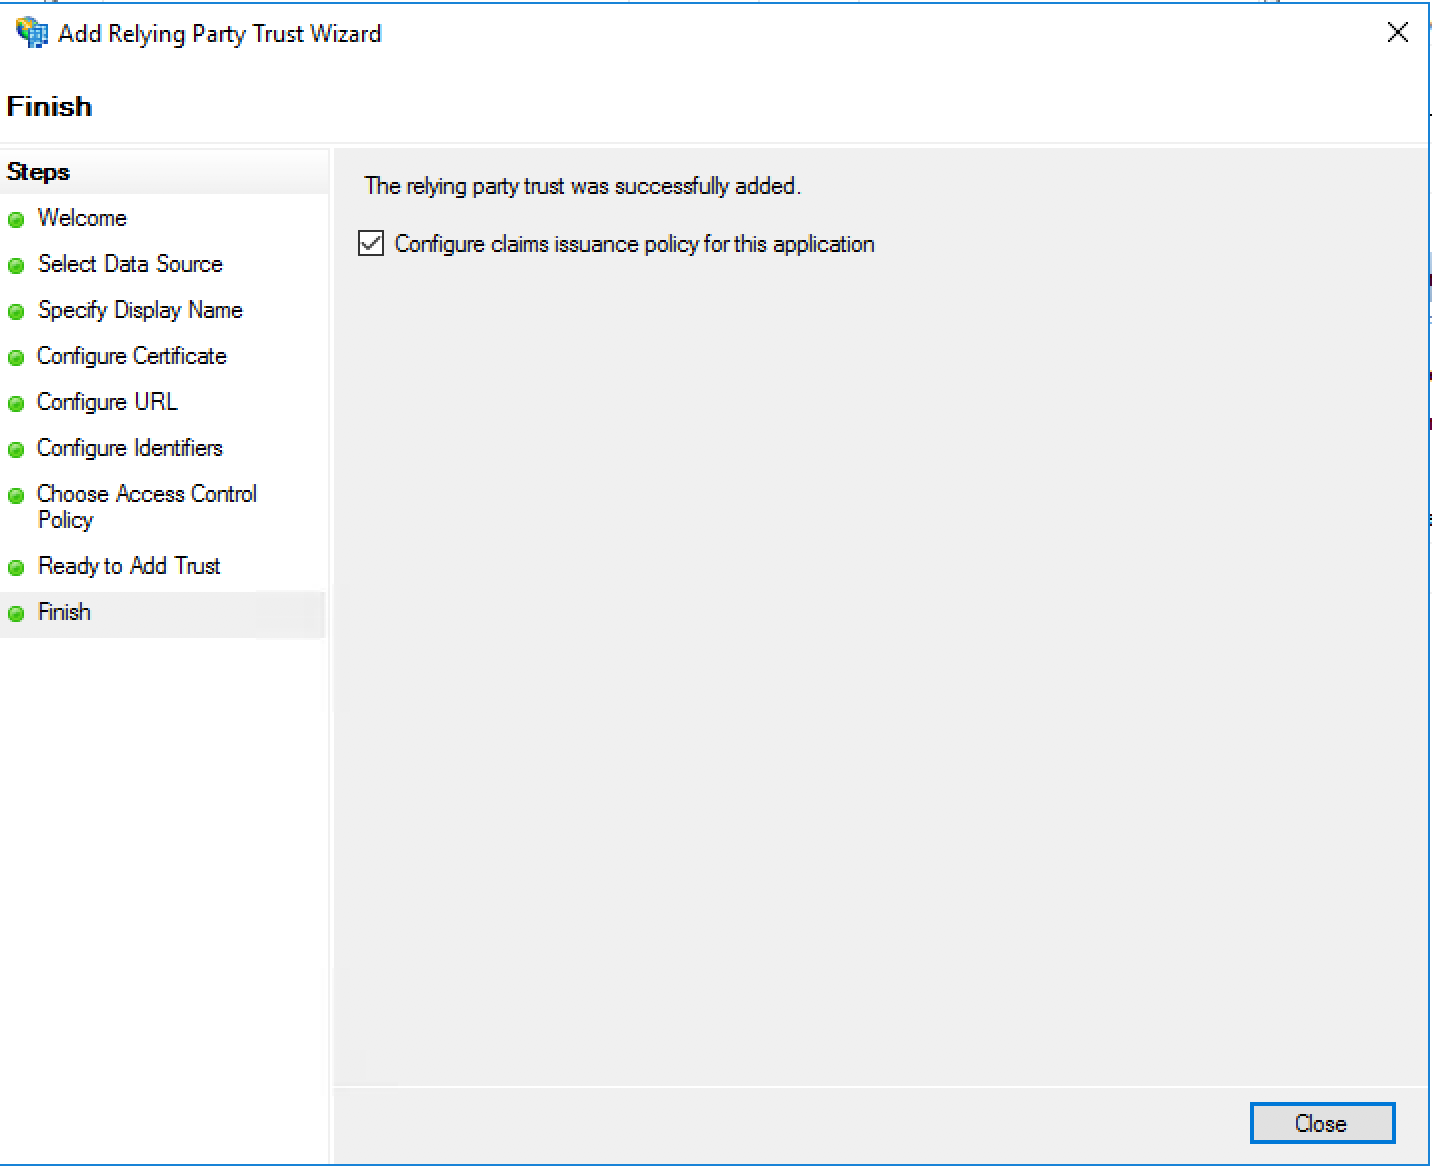
9. Step Finish: select **Configure claims issuance policy for this application** then click **Close**.
10. In the Edit Claim Issuance Policy for Prisma Cloud Console click **Add Rule**.
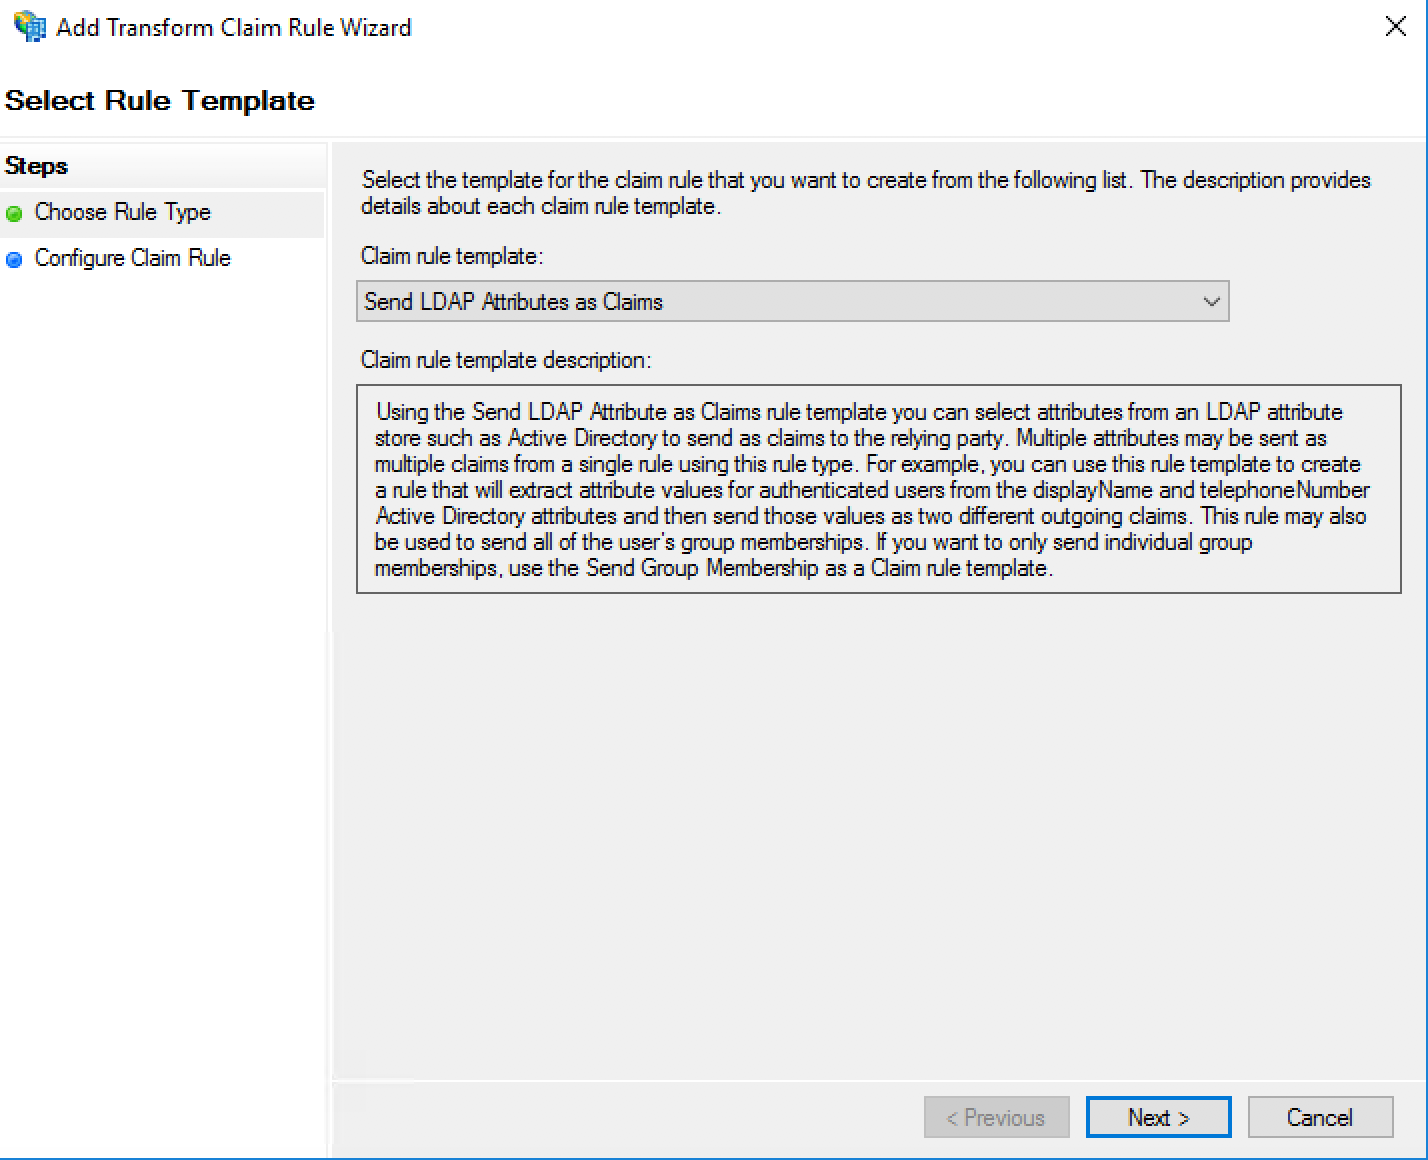
11. Step Choose Rule Type: In **Claim rule template**, select **Send LDAP Attributes as Claims**.
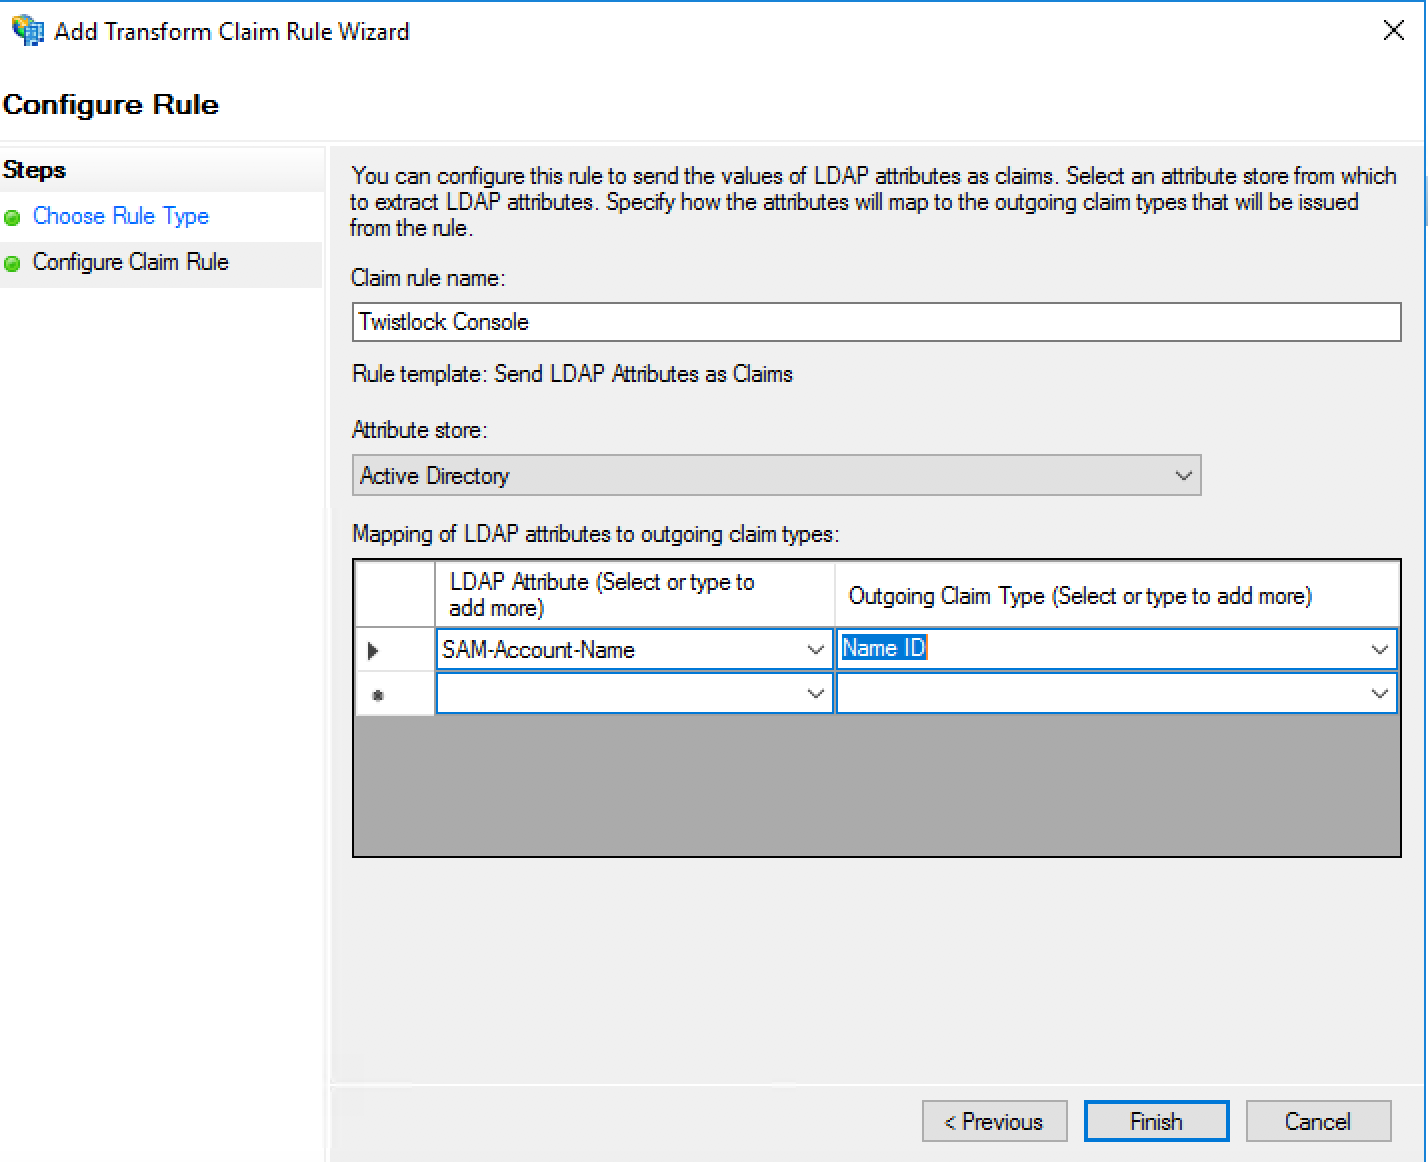
12. Step Configure Claim Rule:
* Set **Claim rule name** to **Prisma Cloud Console**
* Set **Attribute Store** to **Active Directory**
* In **Mapping of LDAP attributes to outgoing claim types**, set the **LDAP Attribute** to **SAM-Account-Name** and **Outgoing claim type** to **Name ID**.
The user’s Active Directory attribute returned in the claim must match the Prisma Cloud user’s name. In this example we are using the samAccountName attribute.
13. Click **Finish**.
8. Configure ADFS to either sign the SAML response (*-SamlResponseSignature MessageOnly*) or the SAML response and assertion (*-SamlResponseSignature MessageAndAssertion*) for the Prisma Cloud Console relying party trust. For example to configure the ADFS to only sign the response, start an administrative PowerShell session and run the following command:
```
set-adfsrelyingpartytrust -TargetName "Prisma Cloud Console" -SamlResponseSignature MessageOnly
```
## Active Directory group membership within SAML response
You can use Active Directory group membership to assign users to Prisma Cloud roles. When a user’s group membership is sent in the SAML response, Prisma Cloud attempts to associate the user’s group to a Prisma Cloud role. If there is no group association, Prisma Cloud matches the user to an identity based on the NameID to Prisma Cloud username mapping. The SAML group to Prisma Cloud role association *does not require* the creation of a Prisma Cloud user. Therefore simplify the identity management required for your implementation of Prisma Cloud.
1. In **Relying Party Trusts**, select the **Prisma Cloud Console** trust.
2. Click **Edit Claim Issuance Policy** in the right hand **Actions** pane.
3. Click **Add Rule**.
4. *Claim rule template:* **Send Claims Using a Custom Rule**.
5. Click **Next**.
6. *Claim rule name:* **Prisma Cloud Groups**.
7. Paste the following claim rule into the *Custom rule* field:
```
c:[Type == "http://schemas.microsoft.com/ws/2008/06/identity/claims/windowsaccountname", Issuer == "AD AUTHORITY"] => issue(store = "Active Directory", types = ("groups"), query = ";tokenGroups;{0}", param = c.Value);
```
## Configure the Prisma Cloud Console
Configure the Prisma Cloud Console.
1. Login to the Prisma Cloud Console as an administrator.
2. Go to **Manage > Authentication > Identity Providers**.
3. CLick **+ Add Provider**
4. Set **Protocol** to **Saml**.
5. Set **Identity Provider** to **ADFS**.
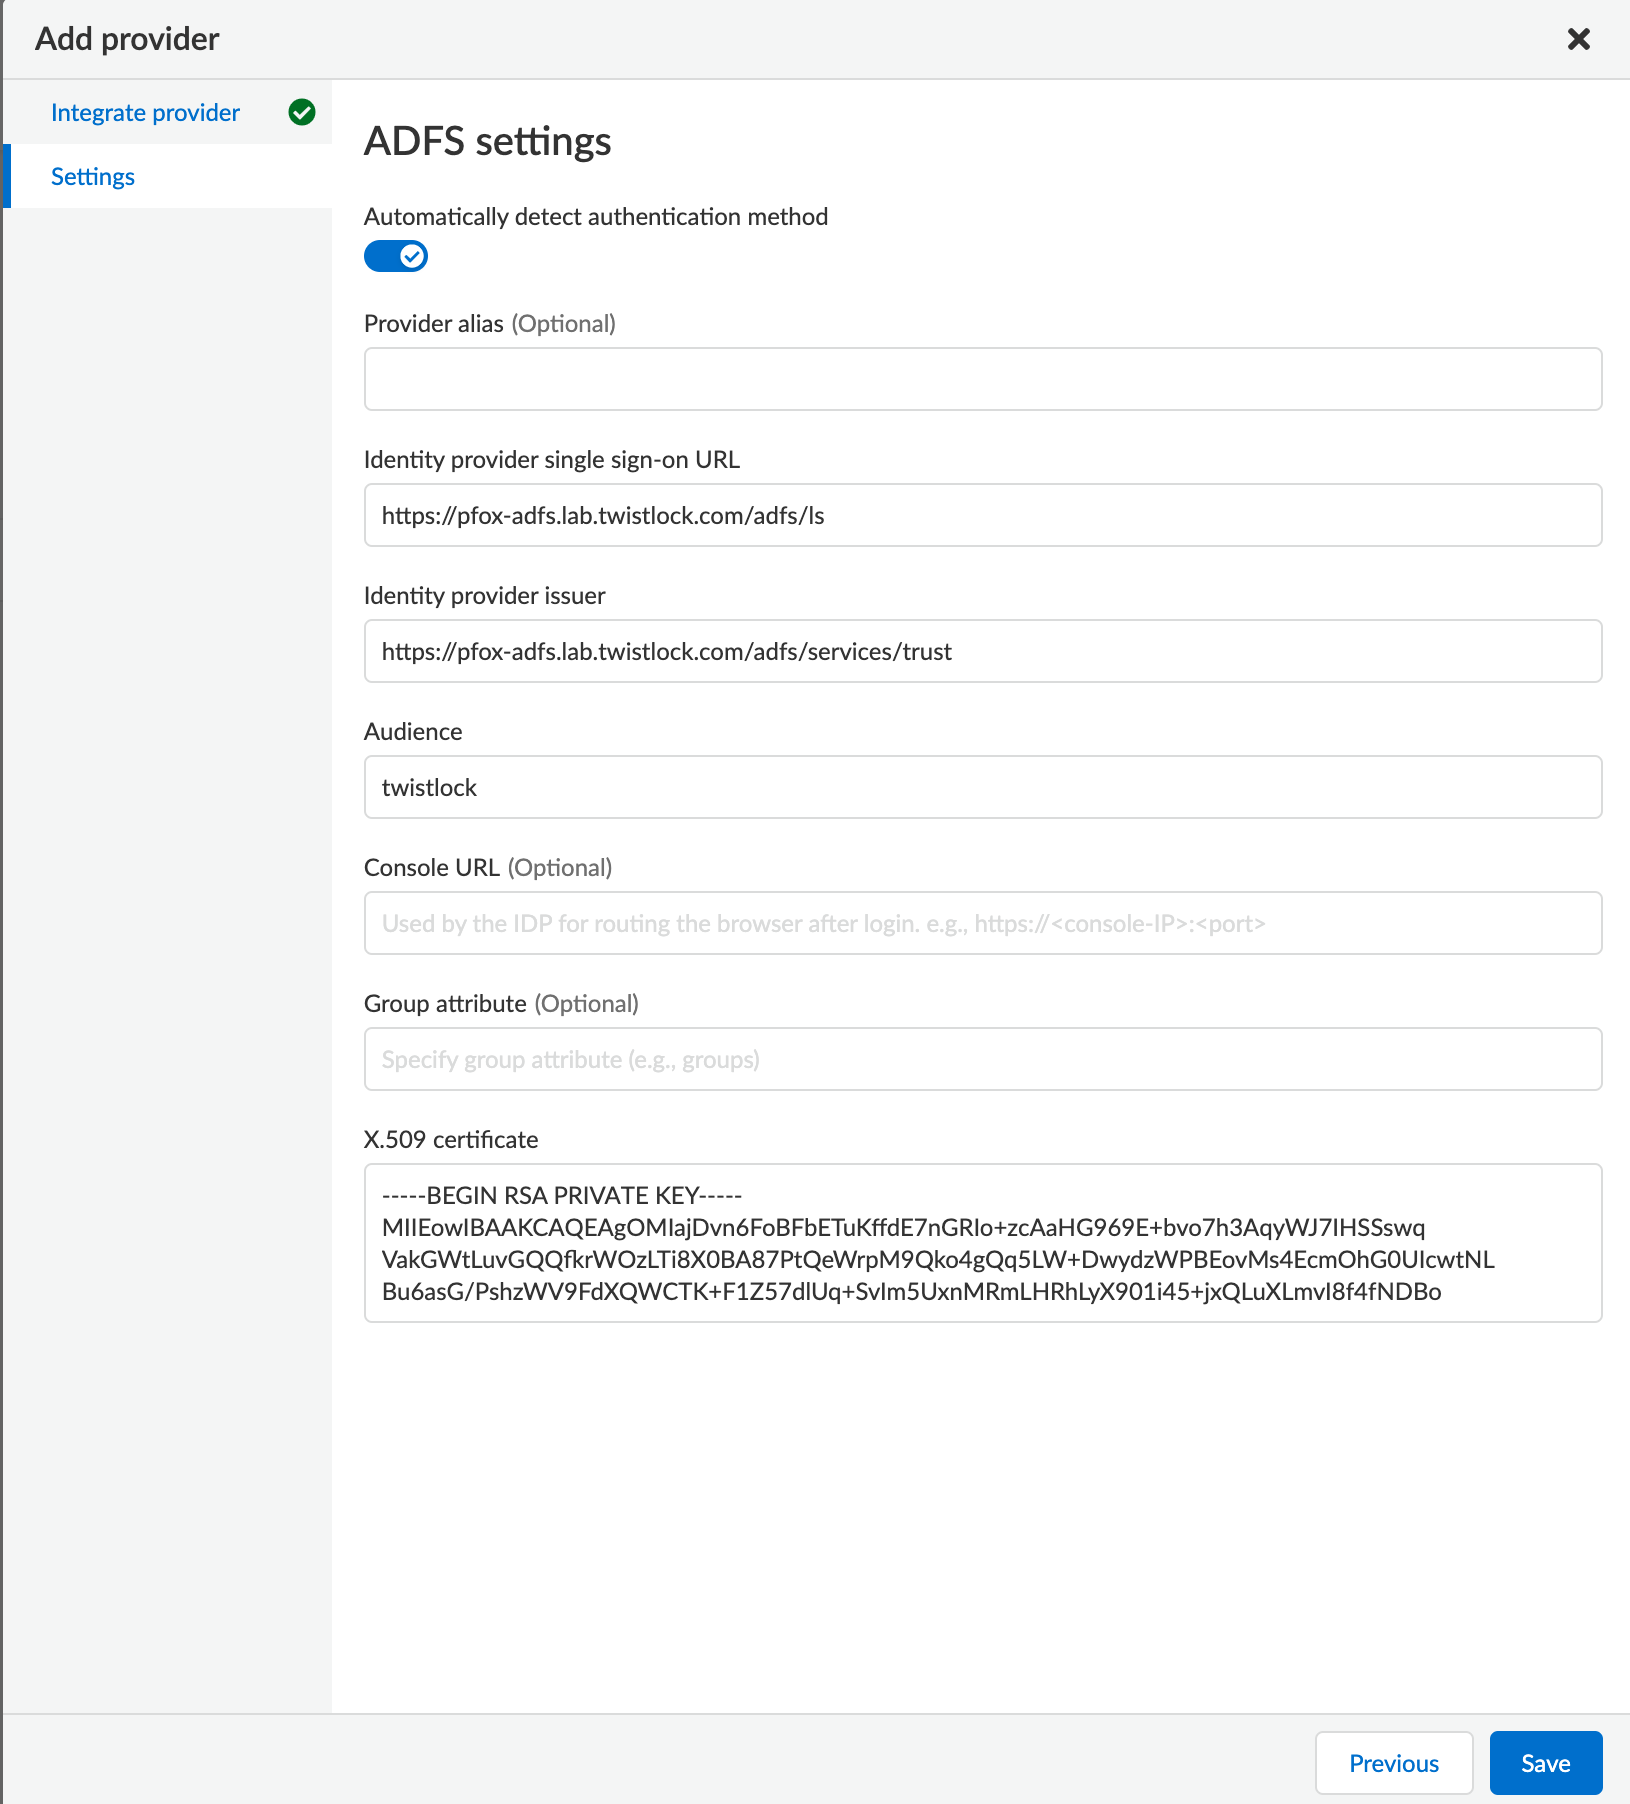
6. Enable **Automatically detect authentication method** if the authenticating users' workstations can perform integrated windows authentication with ADFS / Active Directory
7. Enter **Provider alias** name to render to the user when initiating the SAML workflow from the Console.
8. In **Identity provider single sign-on URL**, enter your SAML Single Sign-On Service URL. For example ****.
9. In **Identity provider issuer**, enter your SAML Entity ID, which can be retrieved from **ADFS > Service > Federation Service Properties : Federation Service Identifier**.
10. In **Audience**, enter the ADFS Relying Party identifier **twistlock**
11. In **X.509 certificate**, paste the ADFS **Token Signing Certificate Base64** into this field.
12. Click **Save**.
13. Go to **Manage > Authentication > Users**.
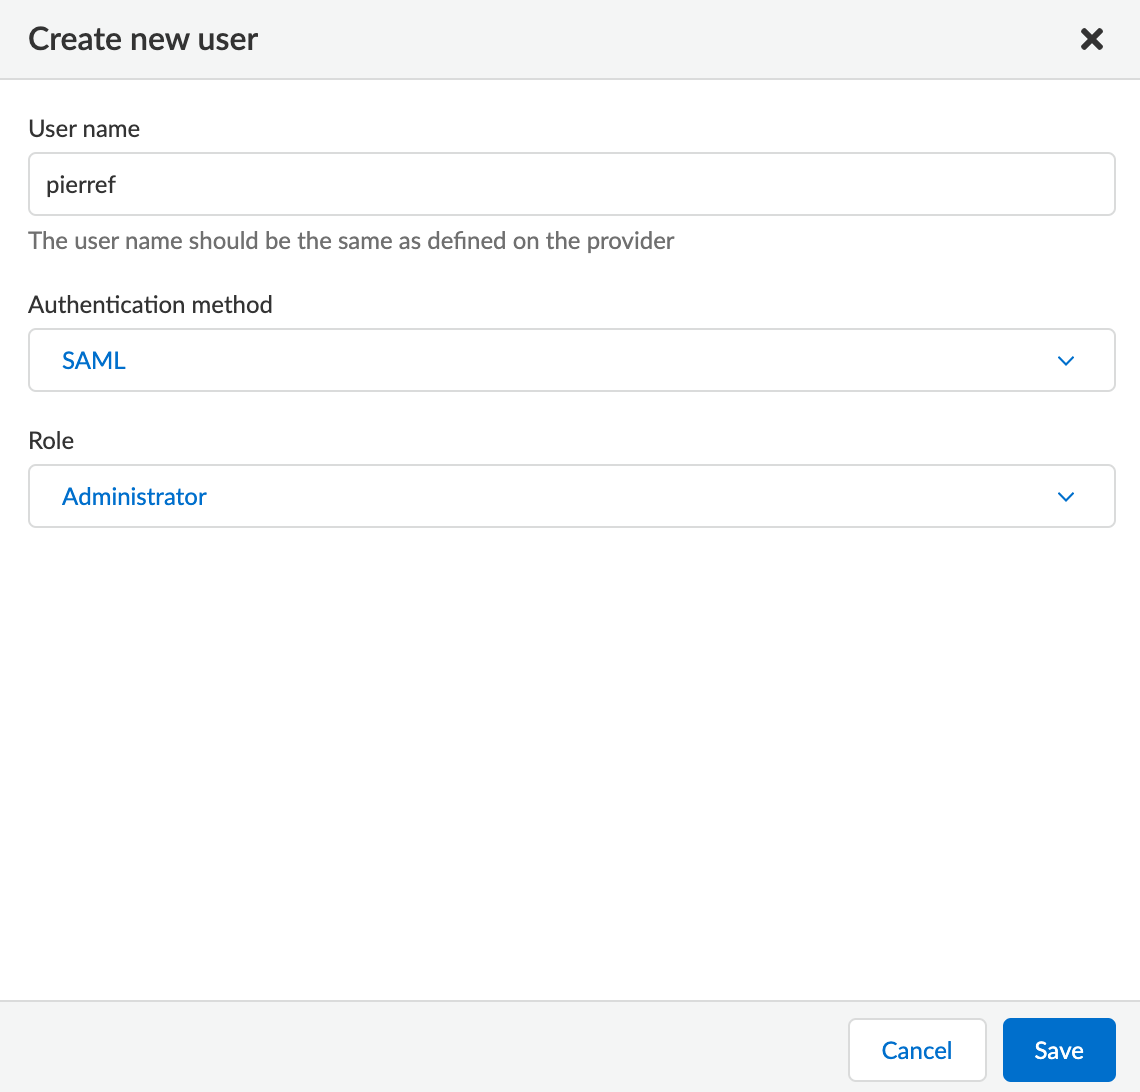
14. Click **Add user**.
1. **Username**: Active Directory *samAccountName* must match the value returned in SAML token’s Name ID attribute.
When federating with ADFS Prisma Cloud usernames are case insensitive. All other federation IdPs are case sensitive.
2. **Description**: Enter a description for the user (optional).
3. **Auth method**: set to **SAML**.
4. **Role**: select an appropriate [role](/admin-guide/authentication/user-roles.md).
15. Click **Save**.
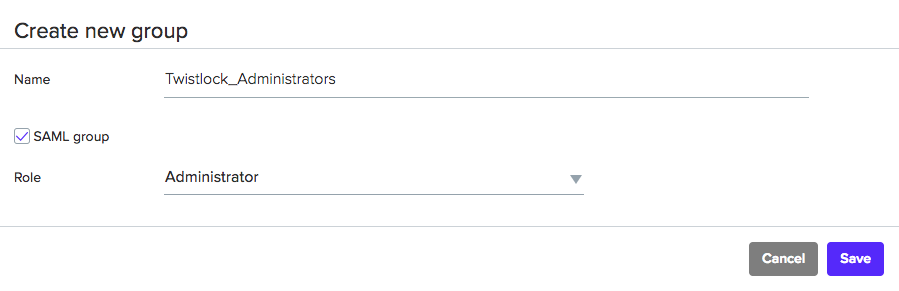
### Active Directory group membership mapping to Prisma Cloud role
Associate a user’s Active Directory group membership to a Prisma Cloud role.
1. Go to **Manage > Authentication > Groups**.
2. Click **Add group**.
3. *Group Name* matches the **Active Directory group name**.
4. Select the **SAML group** radio button.
5. Assign the **Role**.
The SAML group to Prisma Cloud role association *does not require* the creation of a Prisma Cloud user.
6. Test login into the Prisma Cloud Console via ADFS SAML federation.
Leave your existing session logged onto the Prisma Cloud Console in case you encounter issues. Open a new incognito browser window and go to https\://\:8083.
---
# Agent Instructions
This documentation is published with GitBook. GitBook is the documentation platform designed so that both humans and AI agents can read, navigate, and reason over technical content effectively. Learn more at gitbook.com.
## Querying This Documentation
If you need additional information that is not directly available in this page, you can query the documentation by asking a question.
Perform an HTTP GET request on the following URL with the `ask` and `goal` query parameters:
```
GET https://docs.prismacloud.io/admin-guide/authentication/saml-active-directory-federation-services.md?ask=&goal=
```
`ask` is the immediate question: it should be specific, self-contained, and written in natural language.
`goal` is what the user is ultimately trying to achieve, the reason they need the answer. Sharing it helps GitBook give you a better, more relevant answer. A goal is most helpful when it describes the outcome the user wants rather than restating the question. For example, with `ask=how do I create an API token`, a goal like `automate deployments from our CI pipeline` lets GitBook tailor the answer to that use case.
The response will contain a direct answer to the question and relevant excerpts and sources from the documentation.
Use this mechanism when the answer is not explicitly present in the current page, you need clarification or additional context, or you want to retrieve related documentation sections.