> For the complete documentation index, see [llms.txt](https://docs.prismacloud.io/llms.txt). Markdown versions of documentation pages are available by appending `.md` to page URLs; this page is available as [Markdown](https://docs.prismacloud.io/admin-guide/authentication/saml-ping-federate.md).
# PingFederate (SAML 2.0)
Many organizations use SAML to authenticate users for web services. Prisma Cloud supports the SAML 2.0 federation protocol to access the Prisma Cloud Console. When SAML support is enabled, users can log into the Console with their federated credentials. This article provides detailed steps for federating your Prisma Cloud Console with your PingFederate v8.4 Identity Provider (IdP).
The Prisma Cloud/PingFederate SAML federation flow works as follows:
1. Users browse to Prisma Cloud Console.
2. Their browsers are redirected to the PingFederate SAML 2.0 endpoint.
3. They enter their credentials to authenticate. Multi-factor authentication can be enforced at this step.
4. A PingFederate SAML token is returned to Prisma Cloud Console.
5. Prisma Cloud Console validates the SAML token’s signature and associates the user to their Prisma Cloud account via user identity mapping or group membership.
Prisma Cloud Console is integrated with PingFederate as a federated SAML Service Provider. The steps to set up the integration are:
* [Configure PingFederate](#_configure_pingfederate)
* [Configure Prisma Cloud Console](#_configure_prisma_cloud_console)
## Configure PingFederate
1. Logon to PingFederate
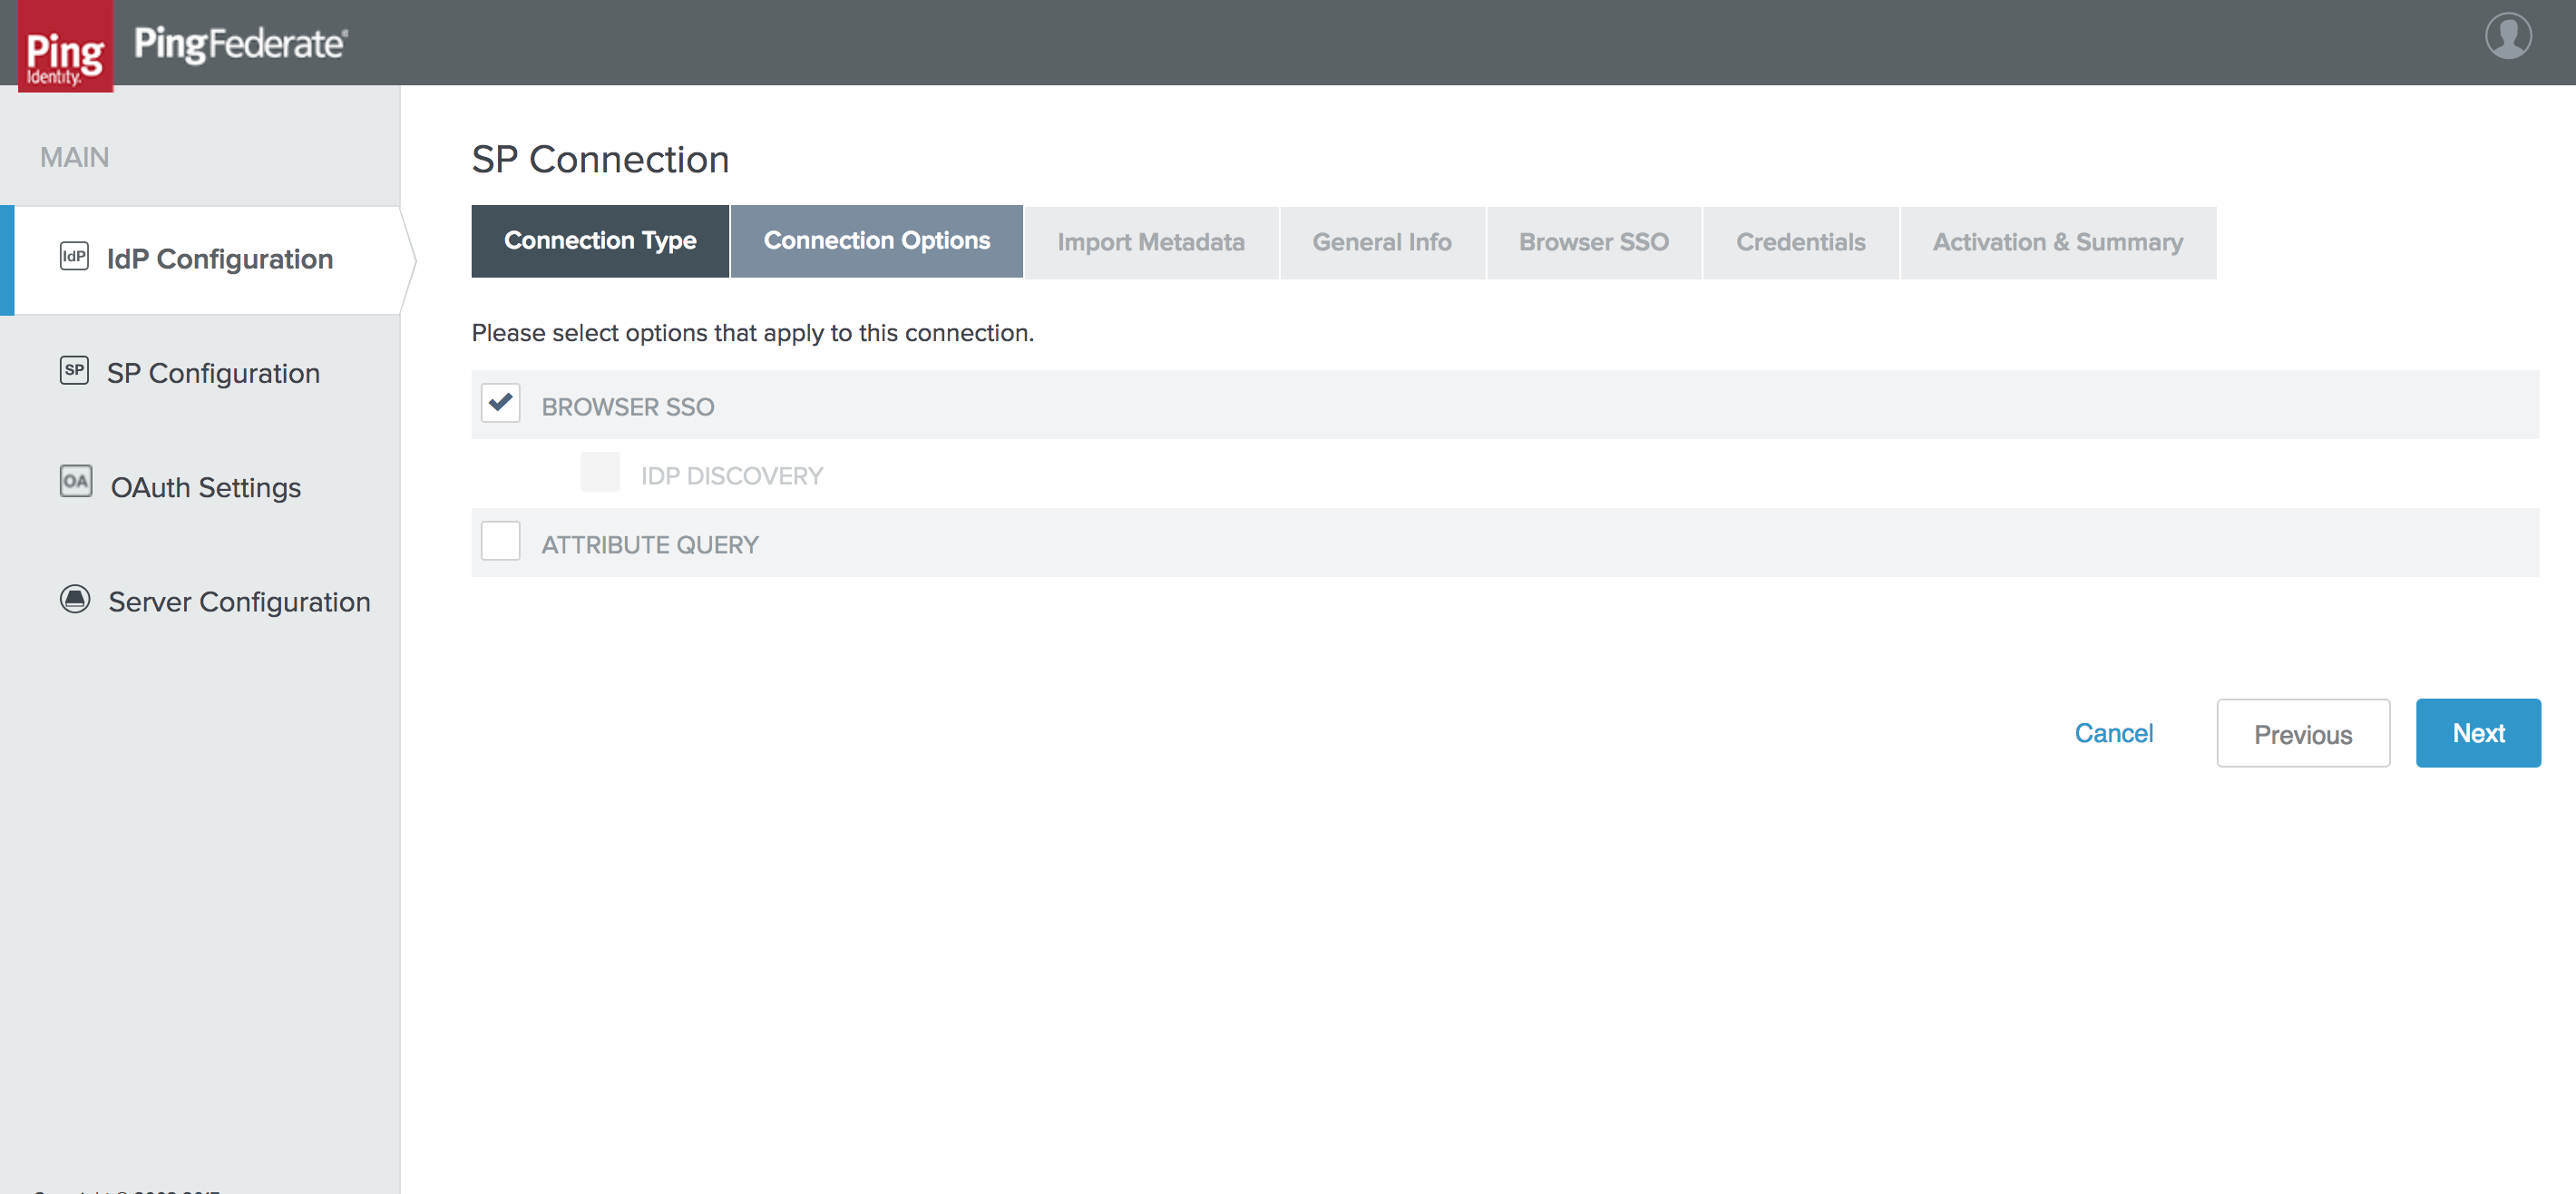
2. Go to **IdP Configuration > SP Connection > Connection Type**, and select **Browser SSO**.
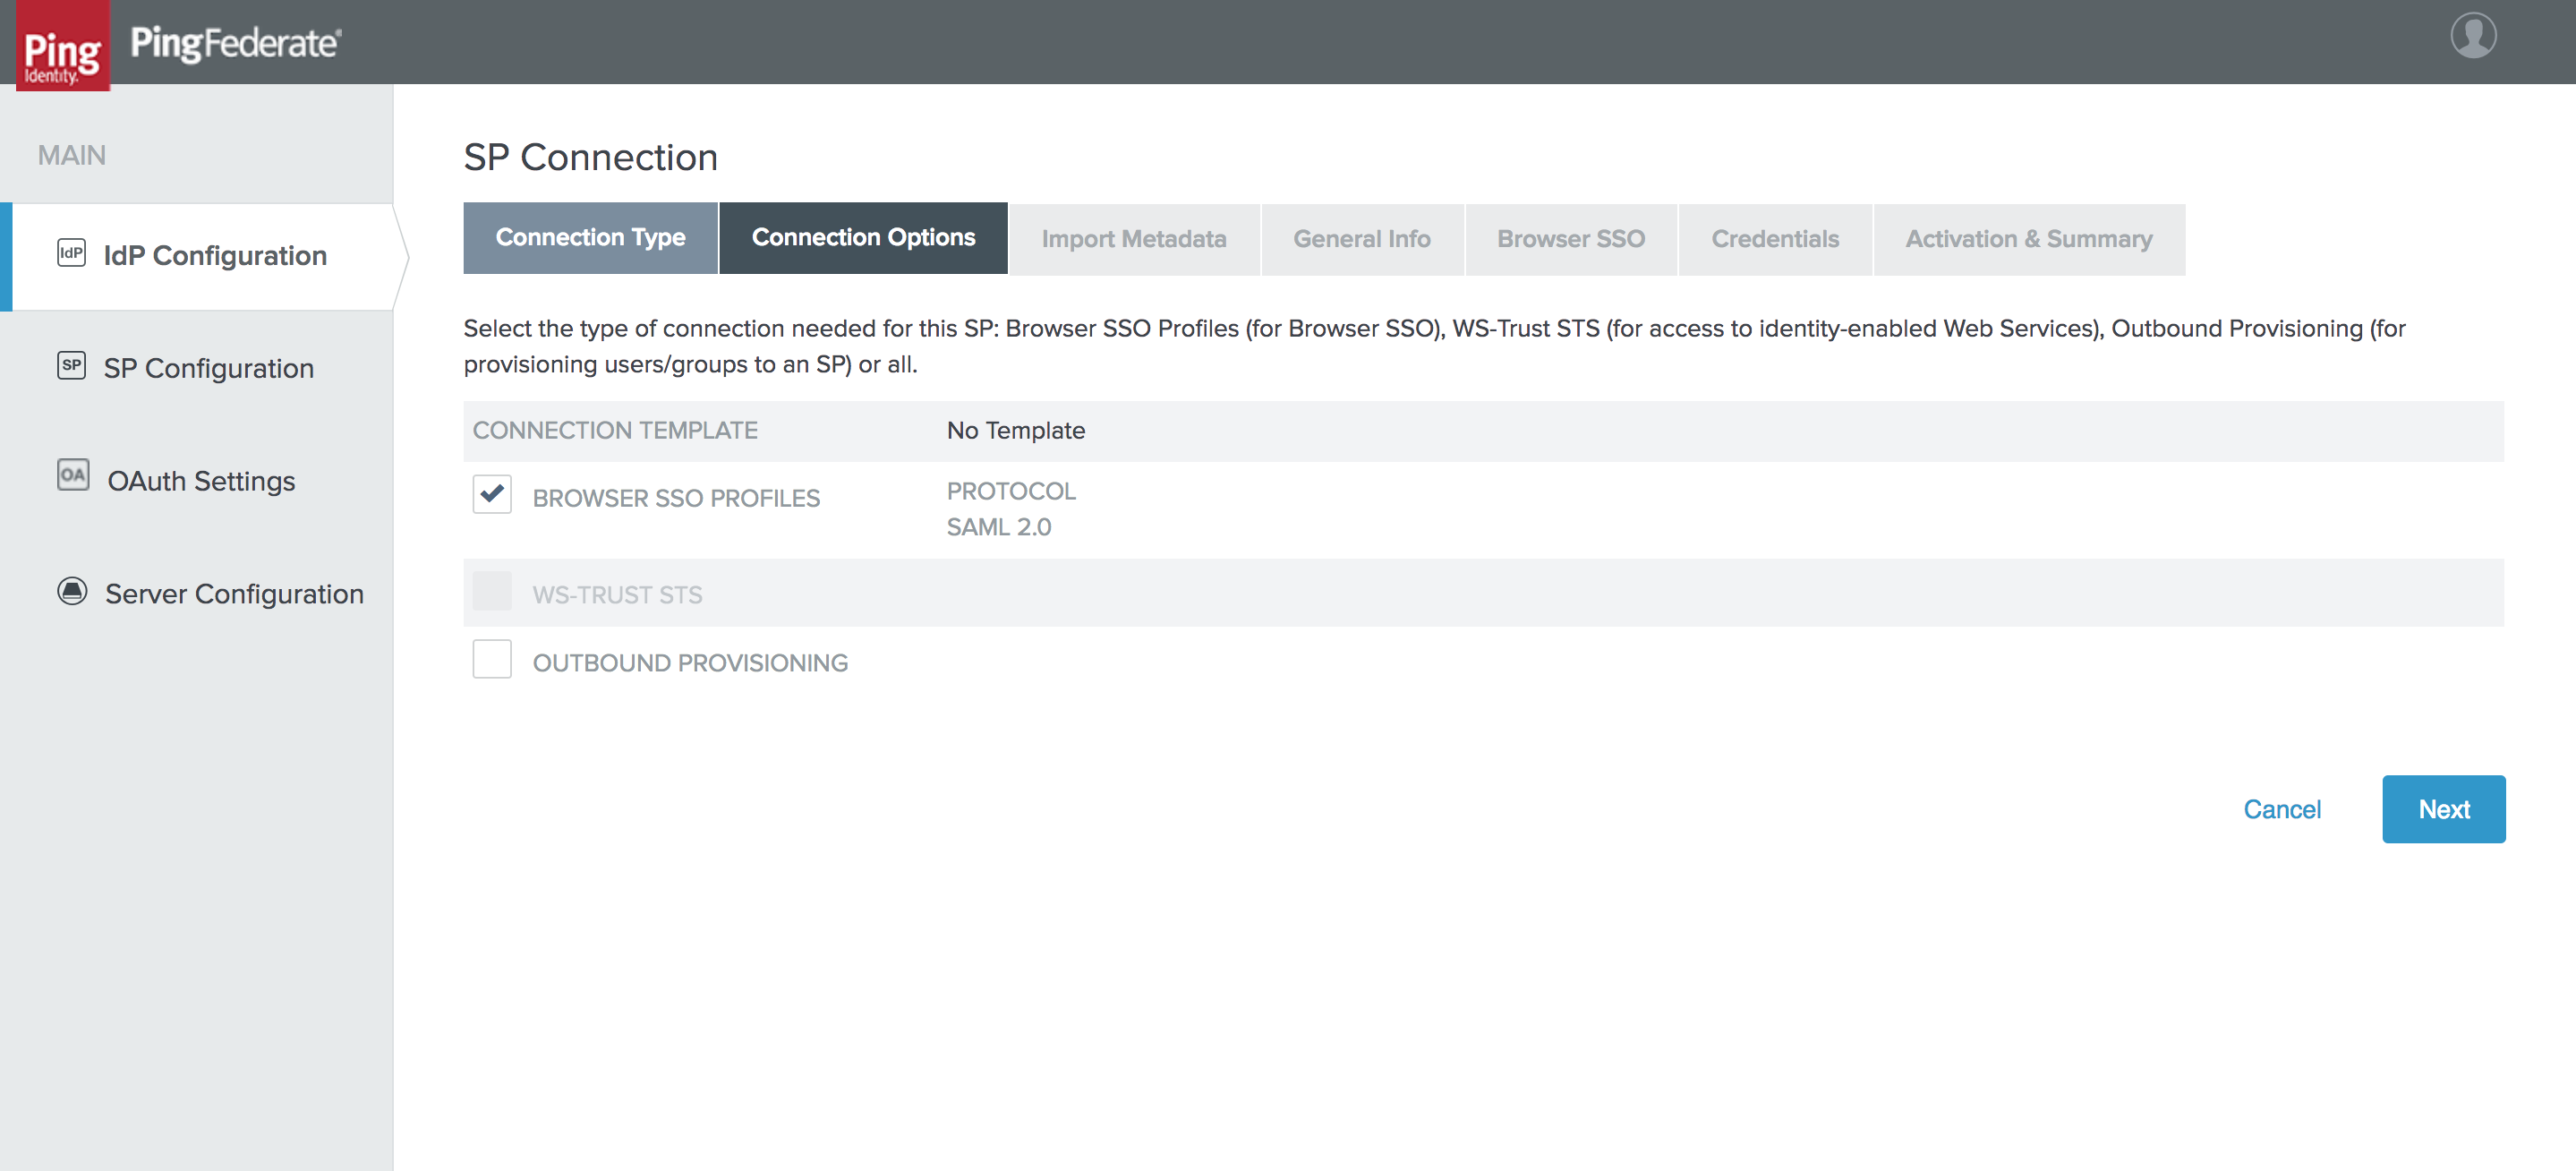
3. Go to **IdP Configuration > SP Connection > Connection Options**, and select **Browser SSO Profiles SAML 2.0**.
4. Skip the **Import Metadata** tab.
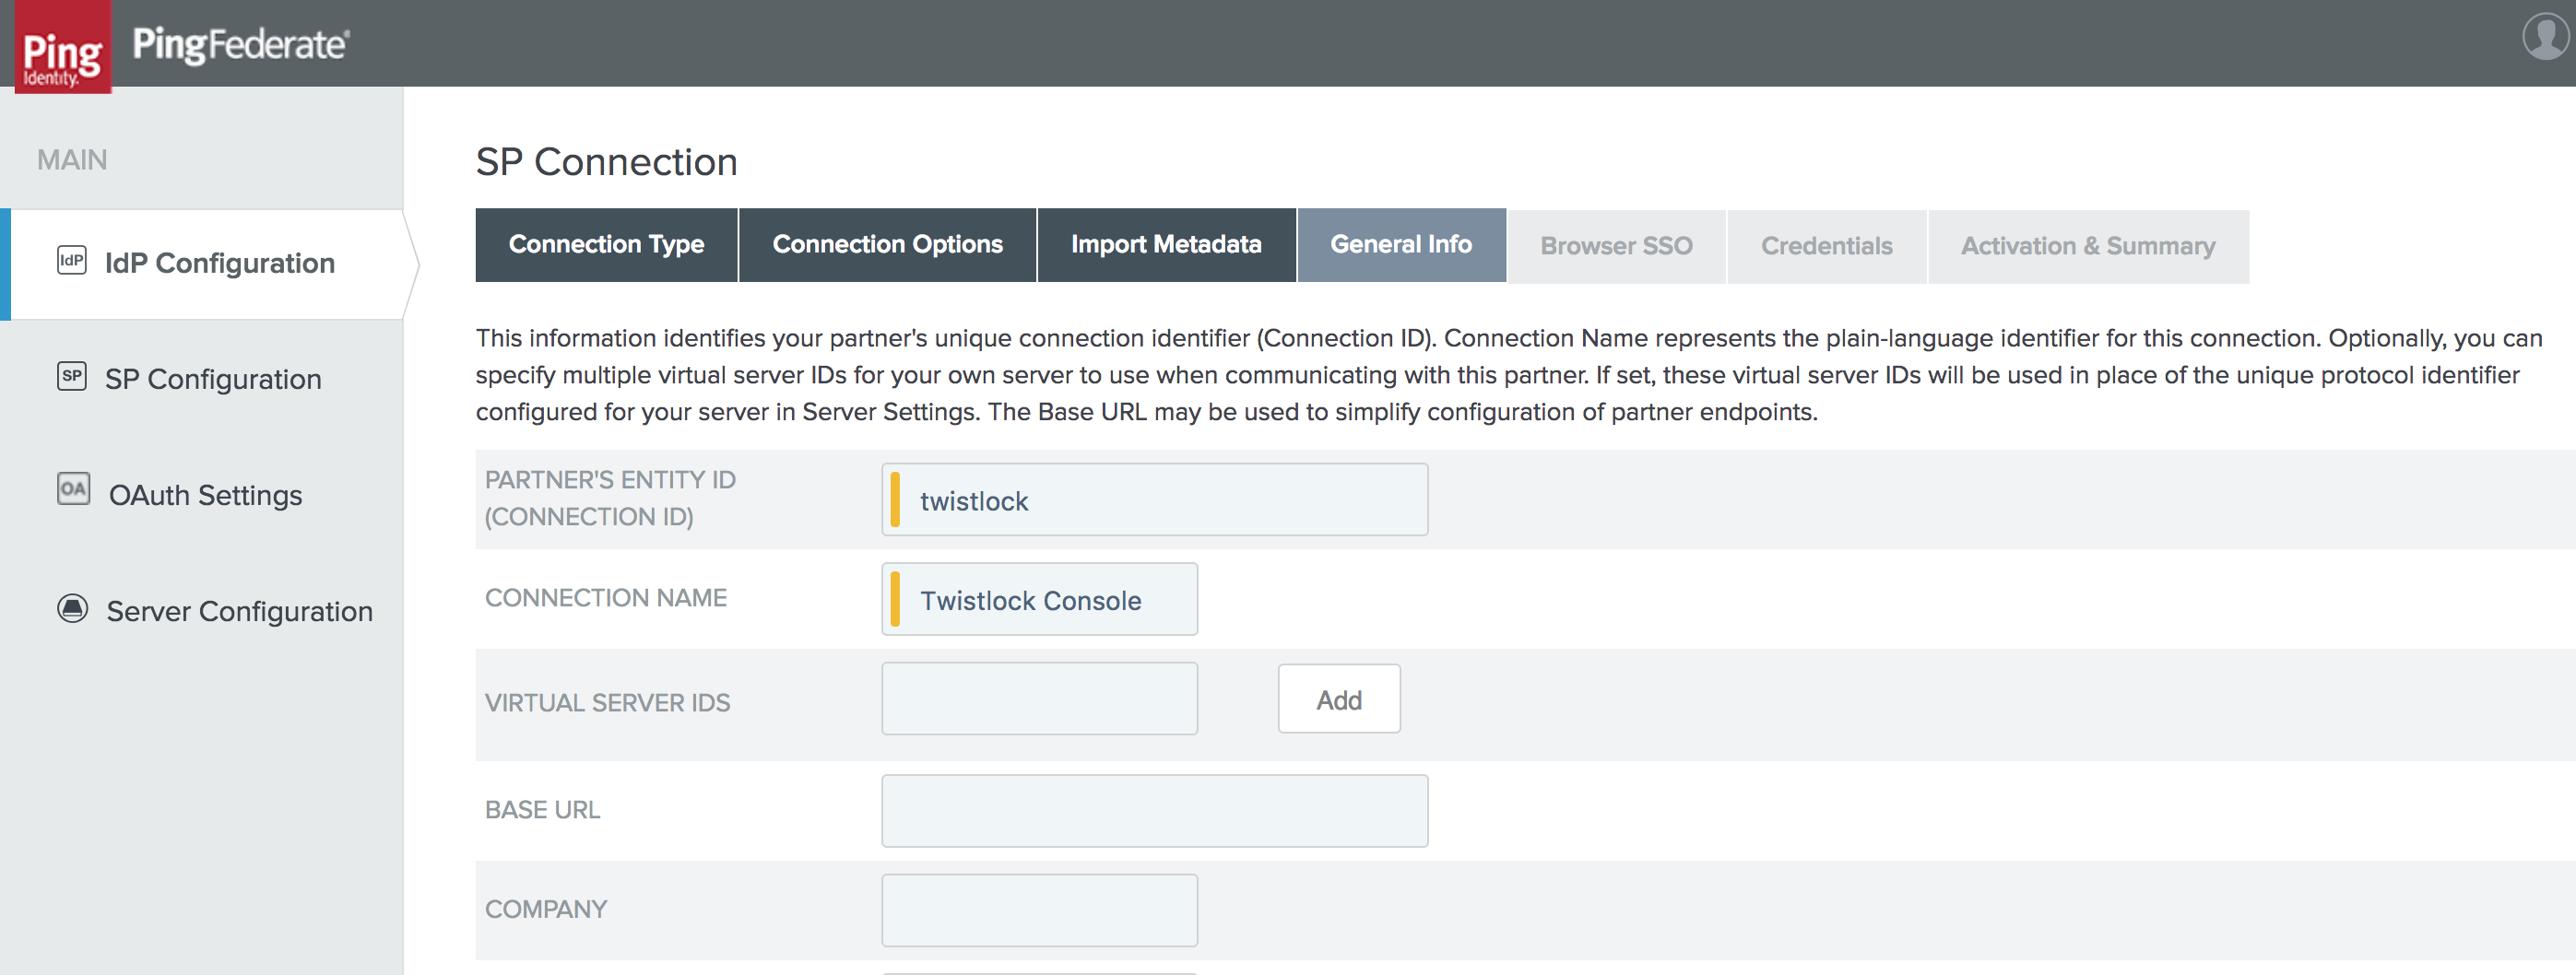
5. Go to **IdP Configuration > SP Connection > General Info**.
1. In **Partner’s Entity ID**, enter **twistlock**.
By default, the Partner’s Entity ID is "twistlock". When configuring the SAML Audience in the Prisma Cloud Console, the default value is "twistlock". If you choose a different value here, be sure to set the same value in your Console.
2. In **Connection Name**, enter **Prisma Cloud Console**.
3. Click **Add**.
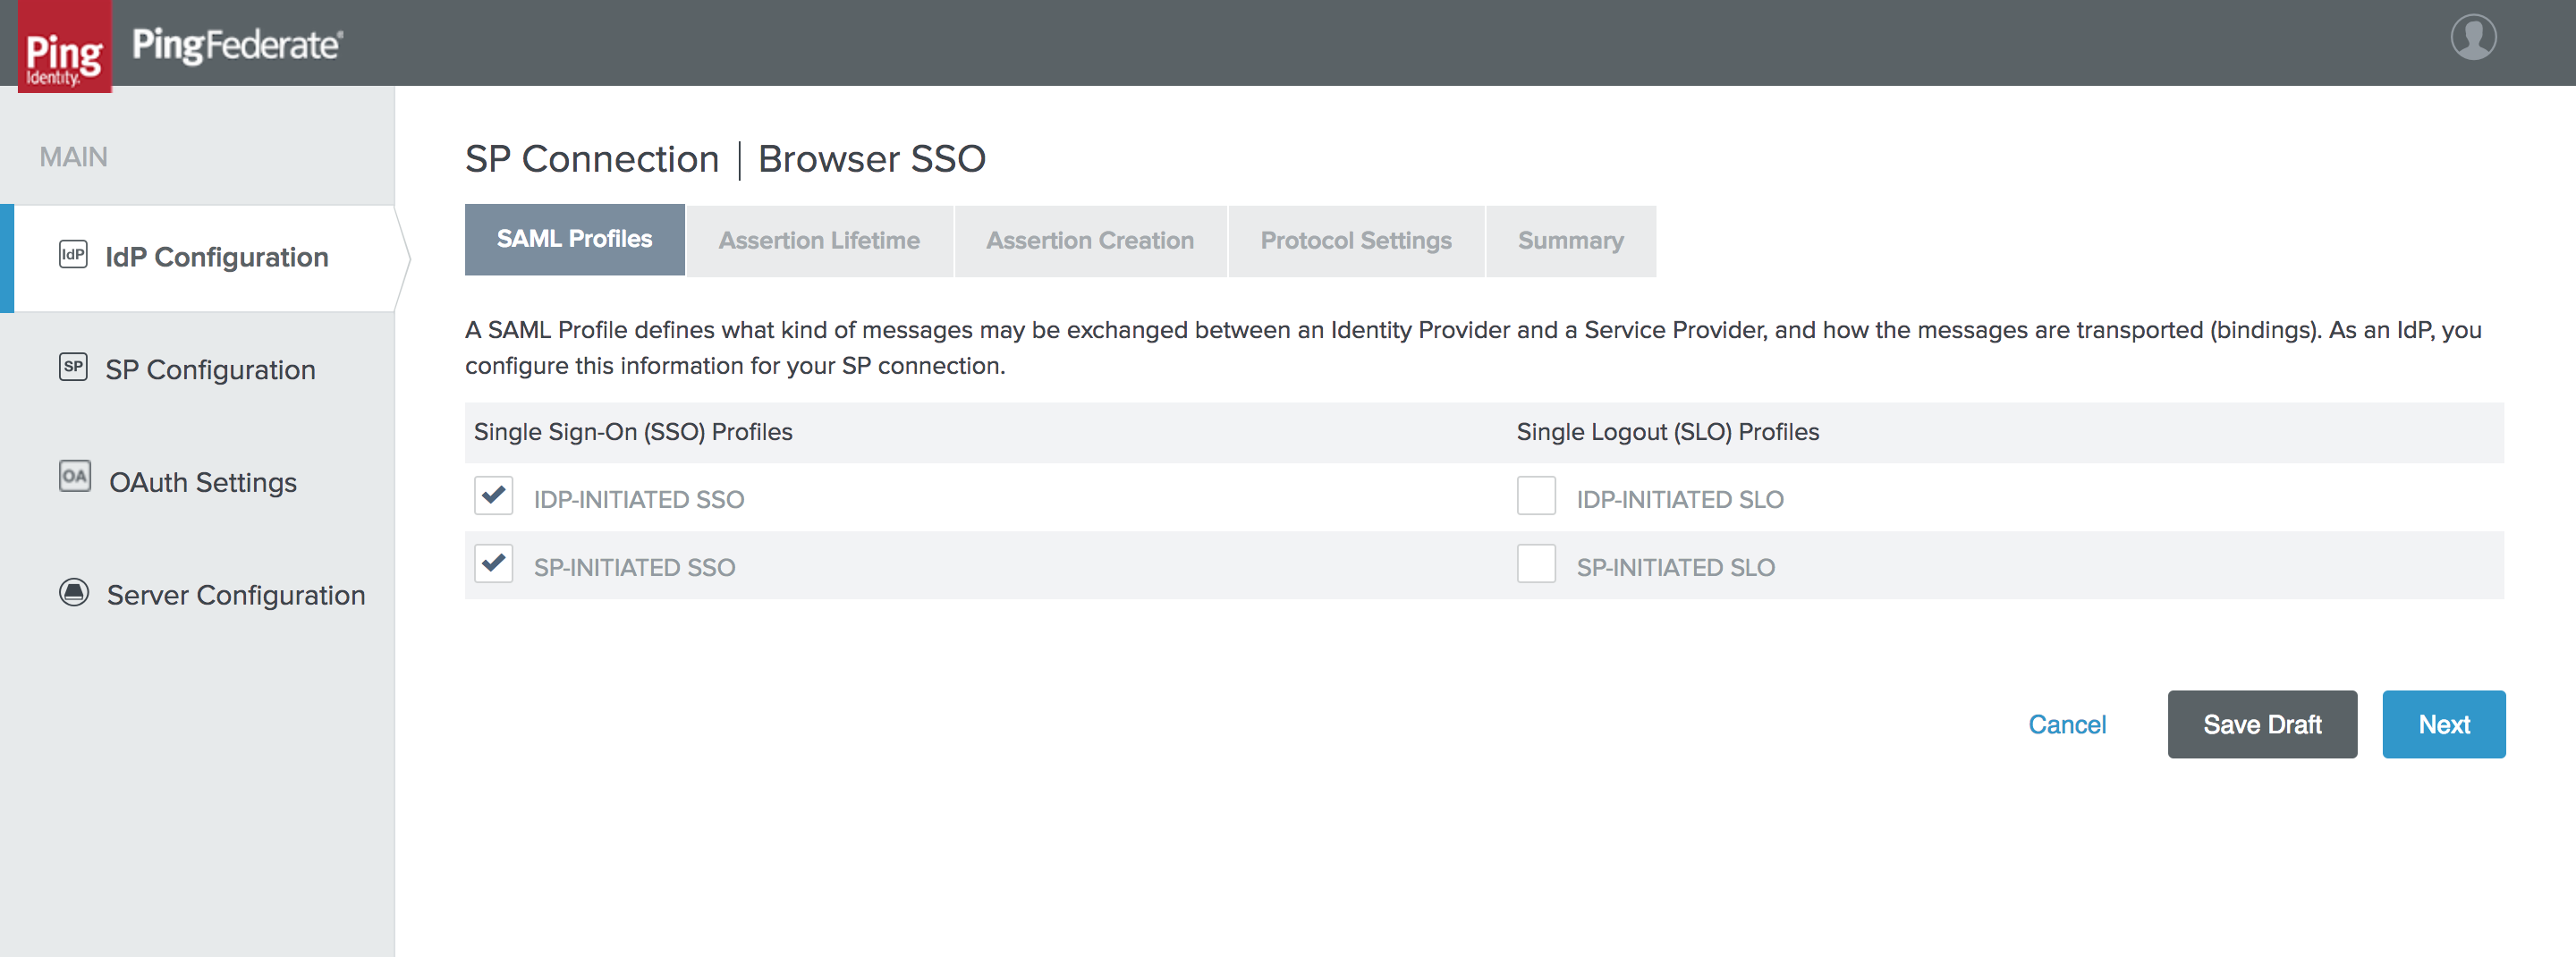
6. In **Browser SSO > SAML Profiles**, select both **IDP-INITIATED SSO** and **SP-INITIATED SSO**.
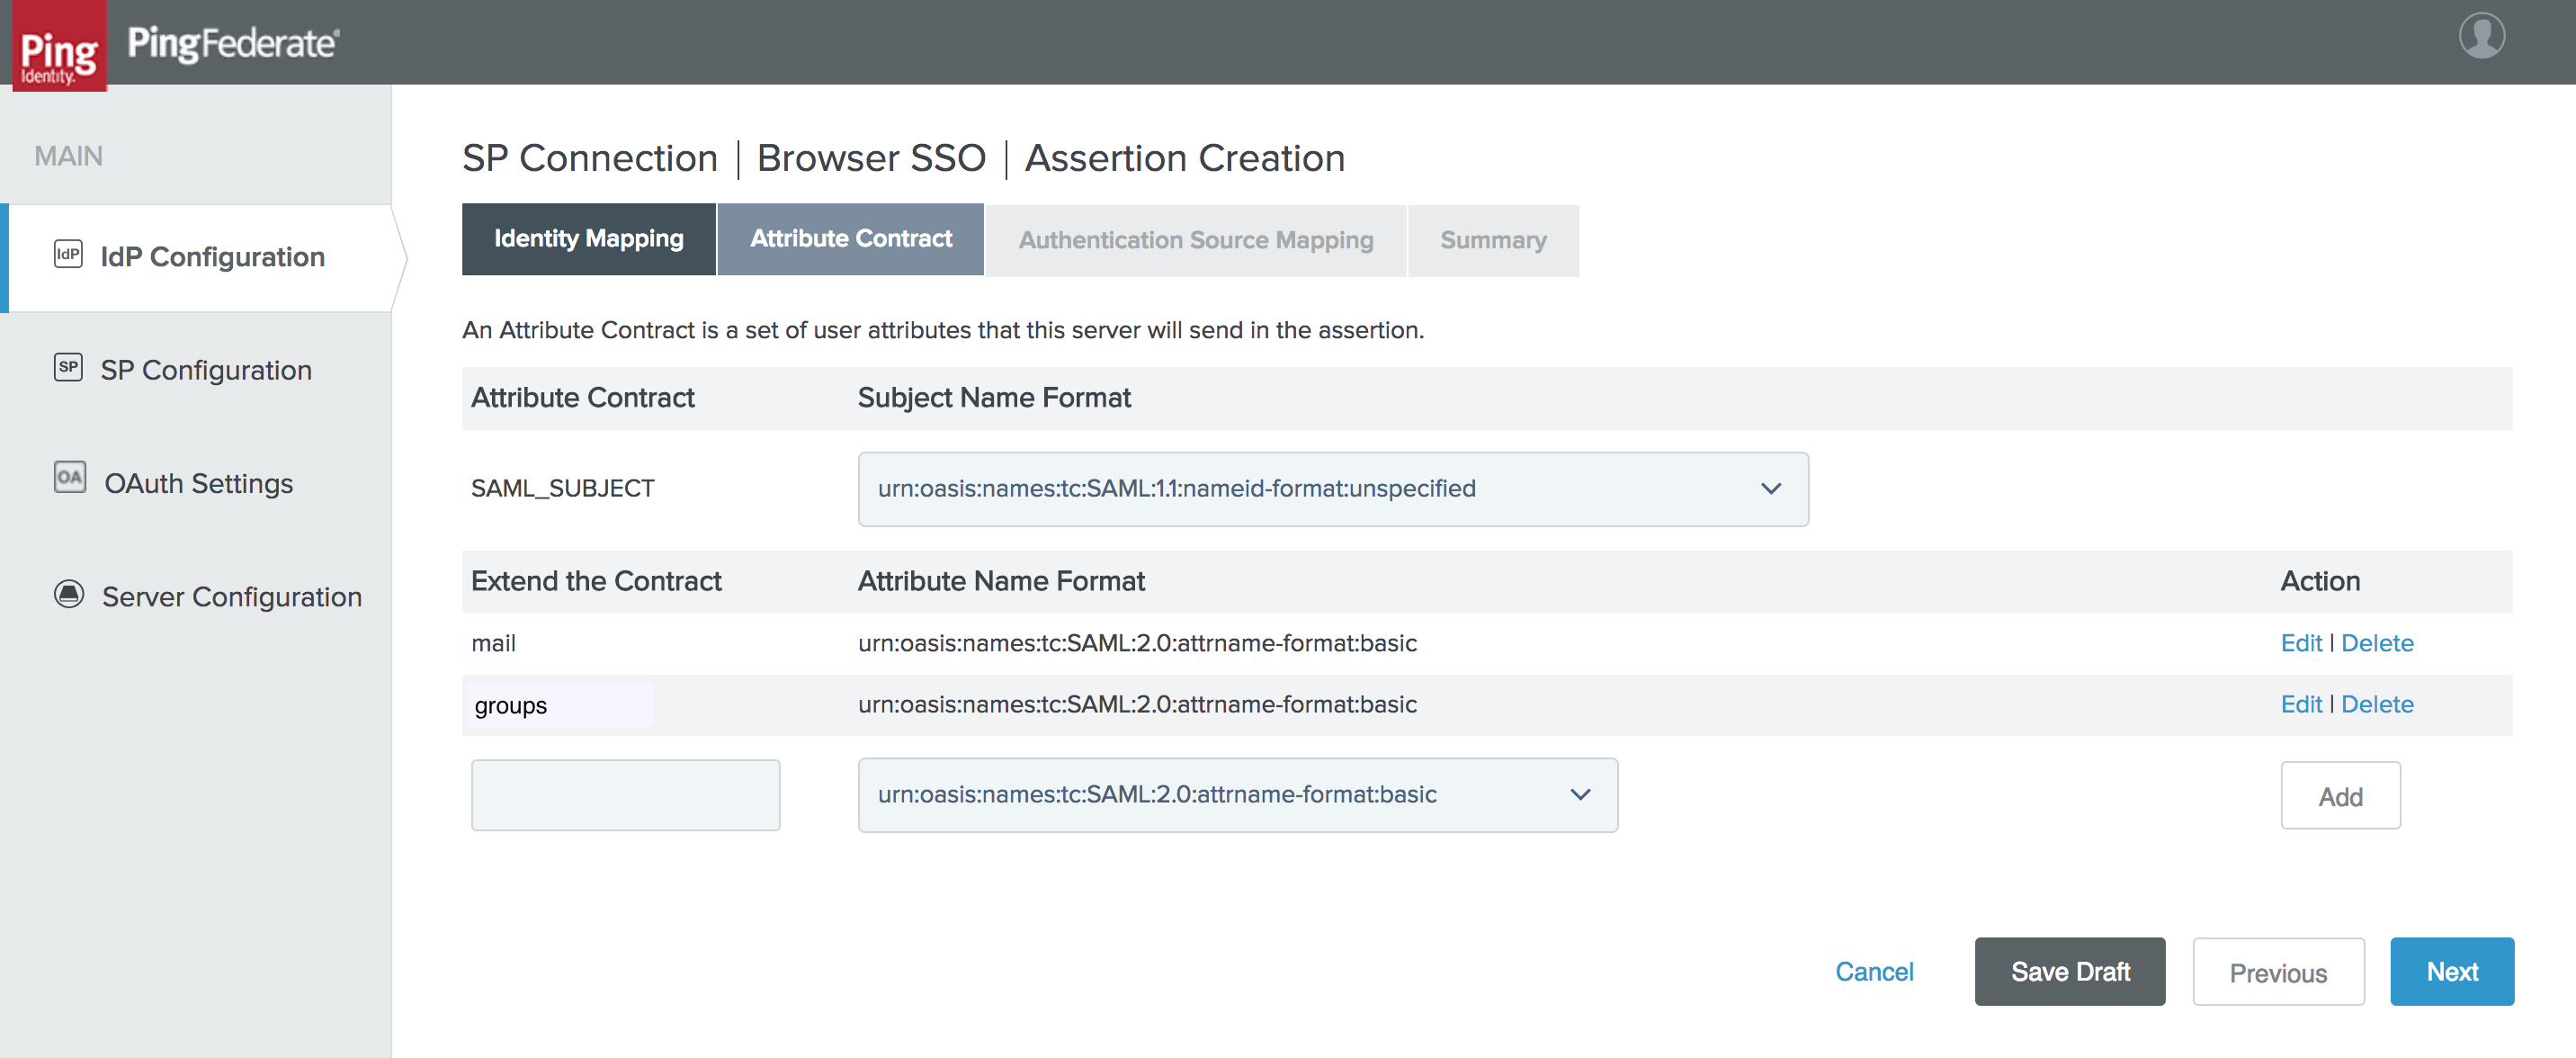
7. Go to **Assertion Creation** and set **SAML\_SUBJECT** to **SAML 1.1 nameid-format**.
In this example you mapped the user’s email address to the SAML\_SUBJECT attribute which matches the user’s Prisma Cloud account. If you are using group-to-Prisma Cloud-role associations, add **groups** to the list of attributes to be returned in the SAML token.
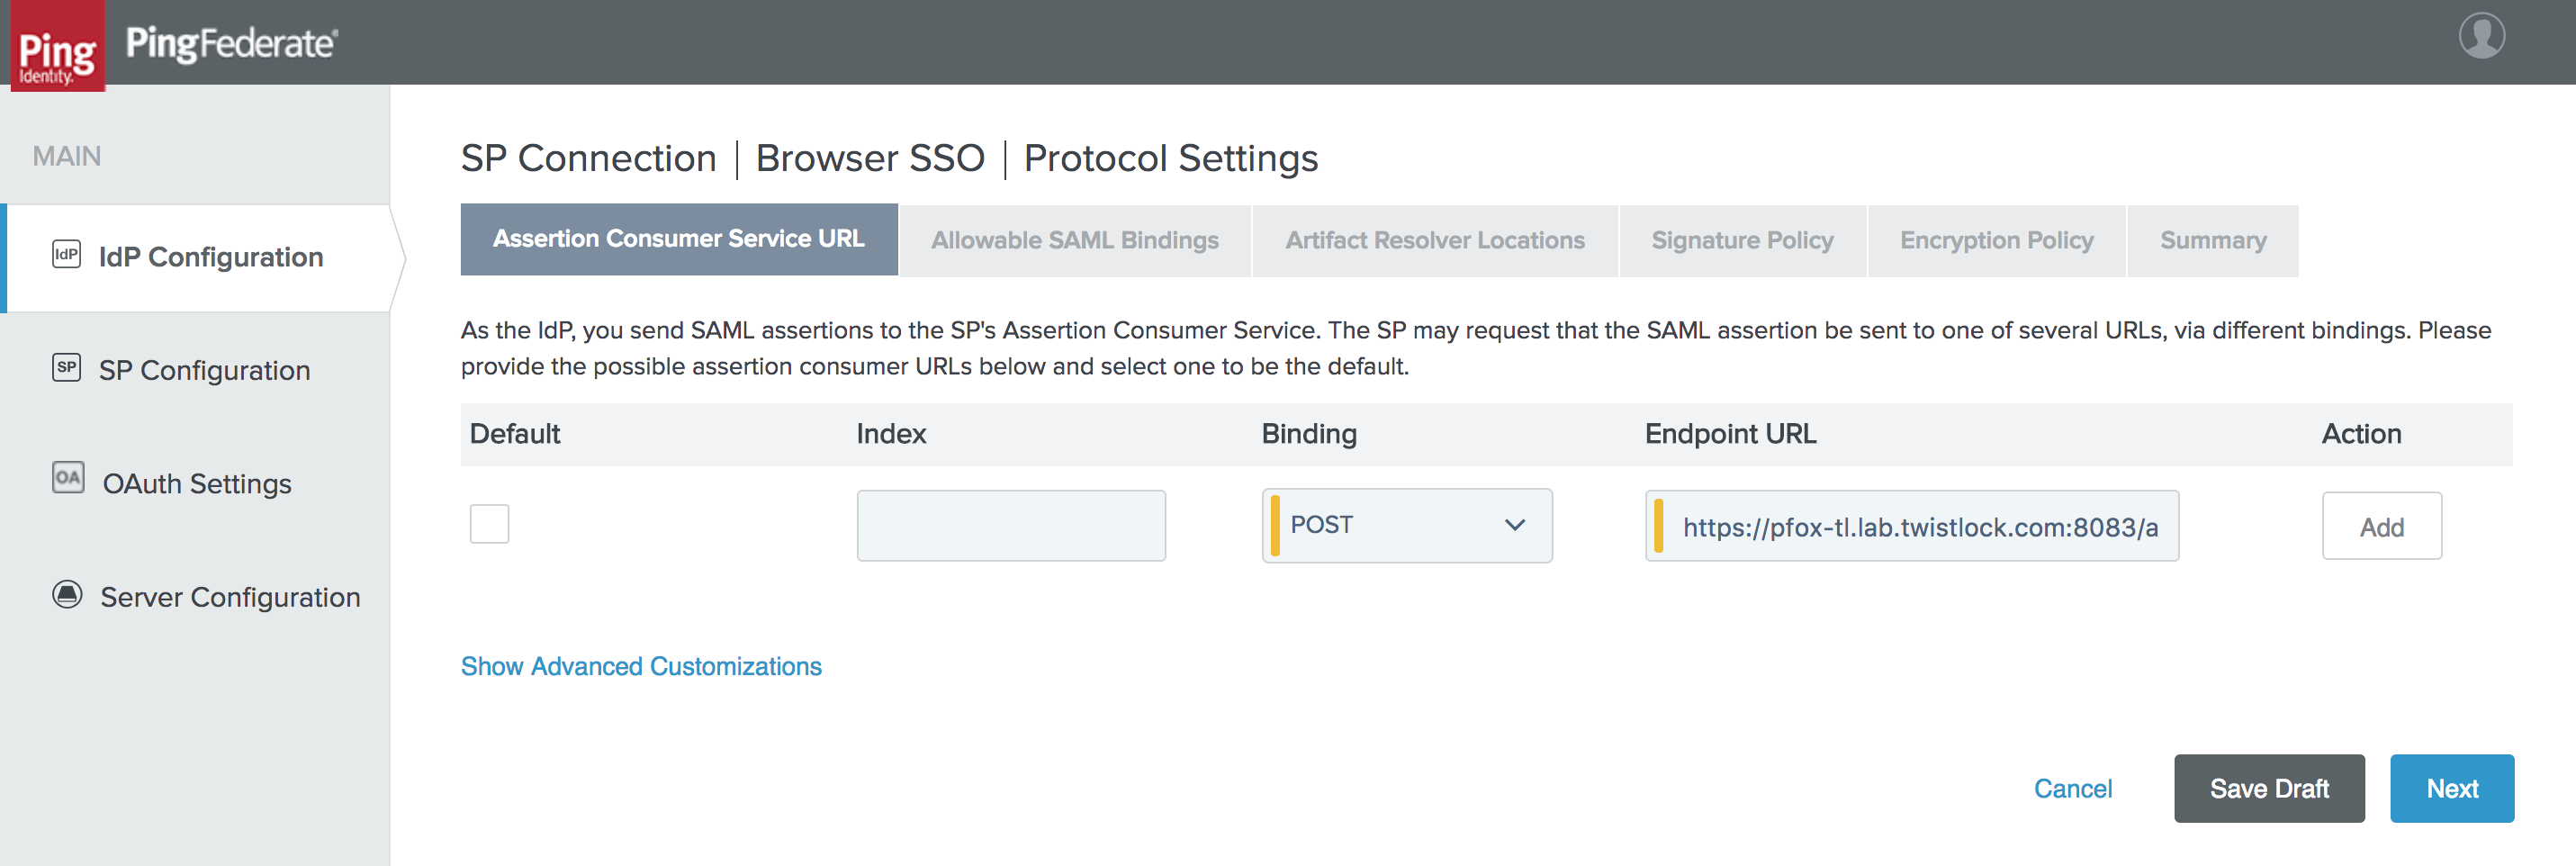
8. In **IdP Configuration > SP Connection > Browser SSO > Protocol Settings > Assertion Consumer Service URL**, specify an assertion consumer URL.
1. Under **Binding**, select **POST**.
2. Under **Endpoint URL**, enter **https\://\:8083/api/v1/authenticate**.
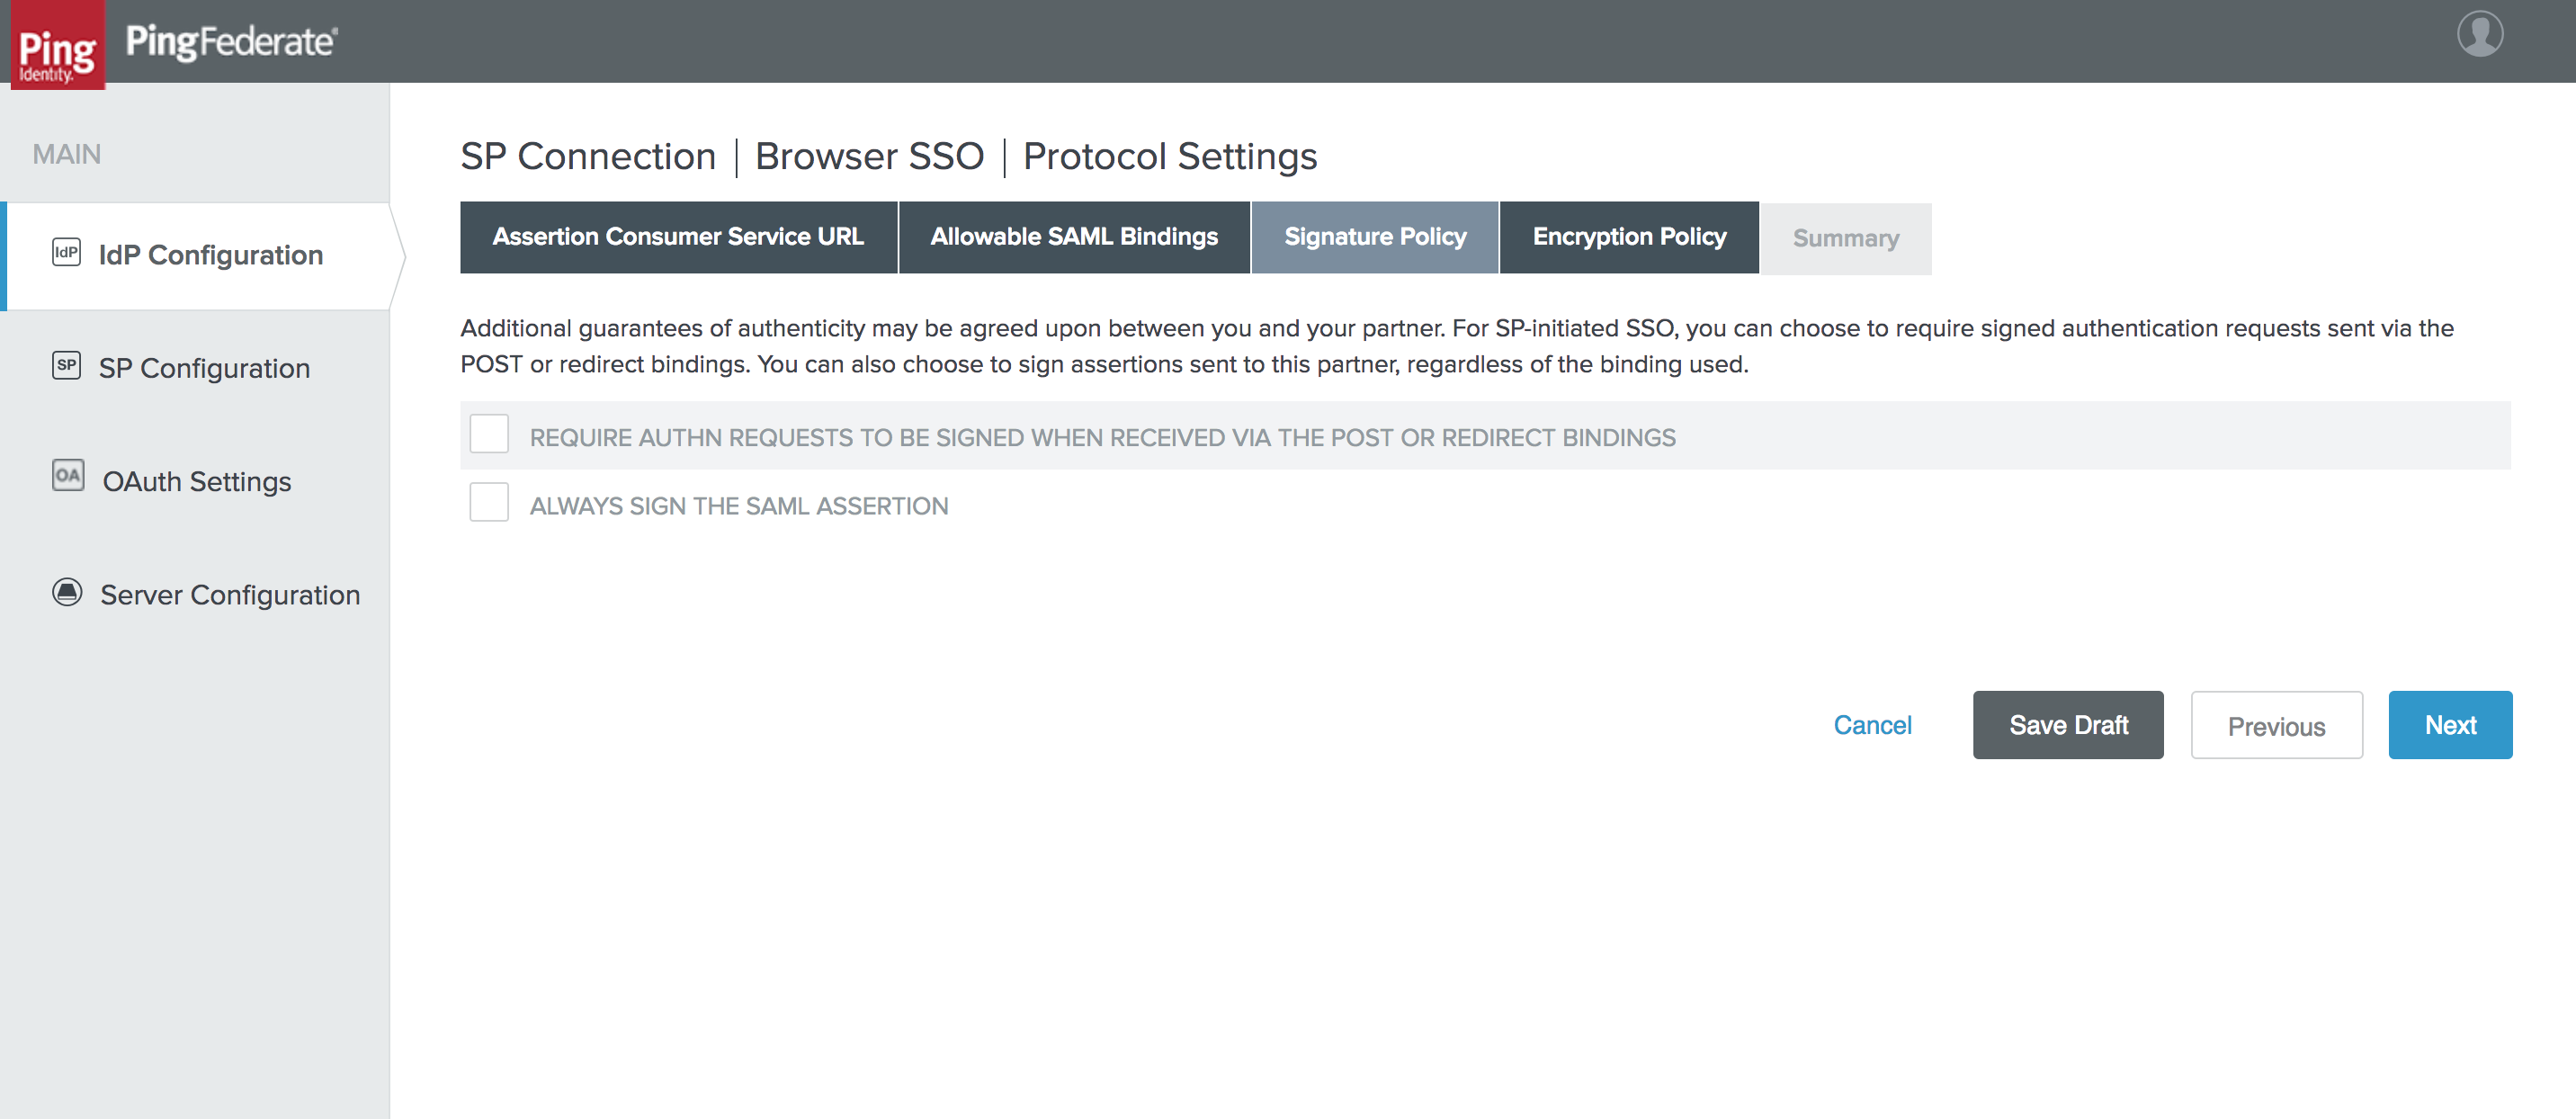
9. In **IdP Configuration > SP Connection > Browser SSO > Protocol Settings > Signature Policy**, leave both values unchecked.
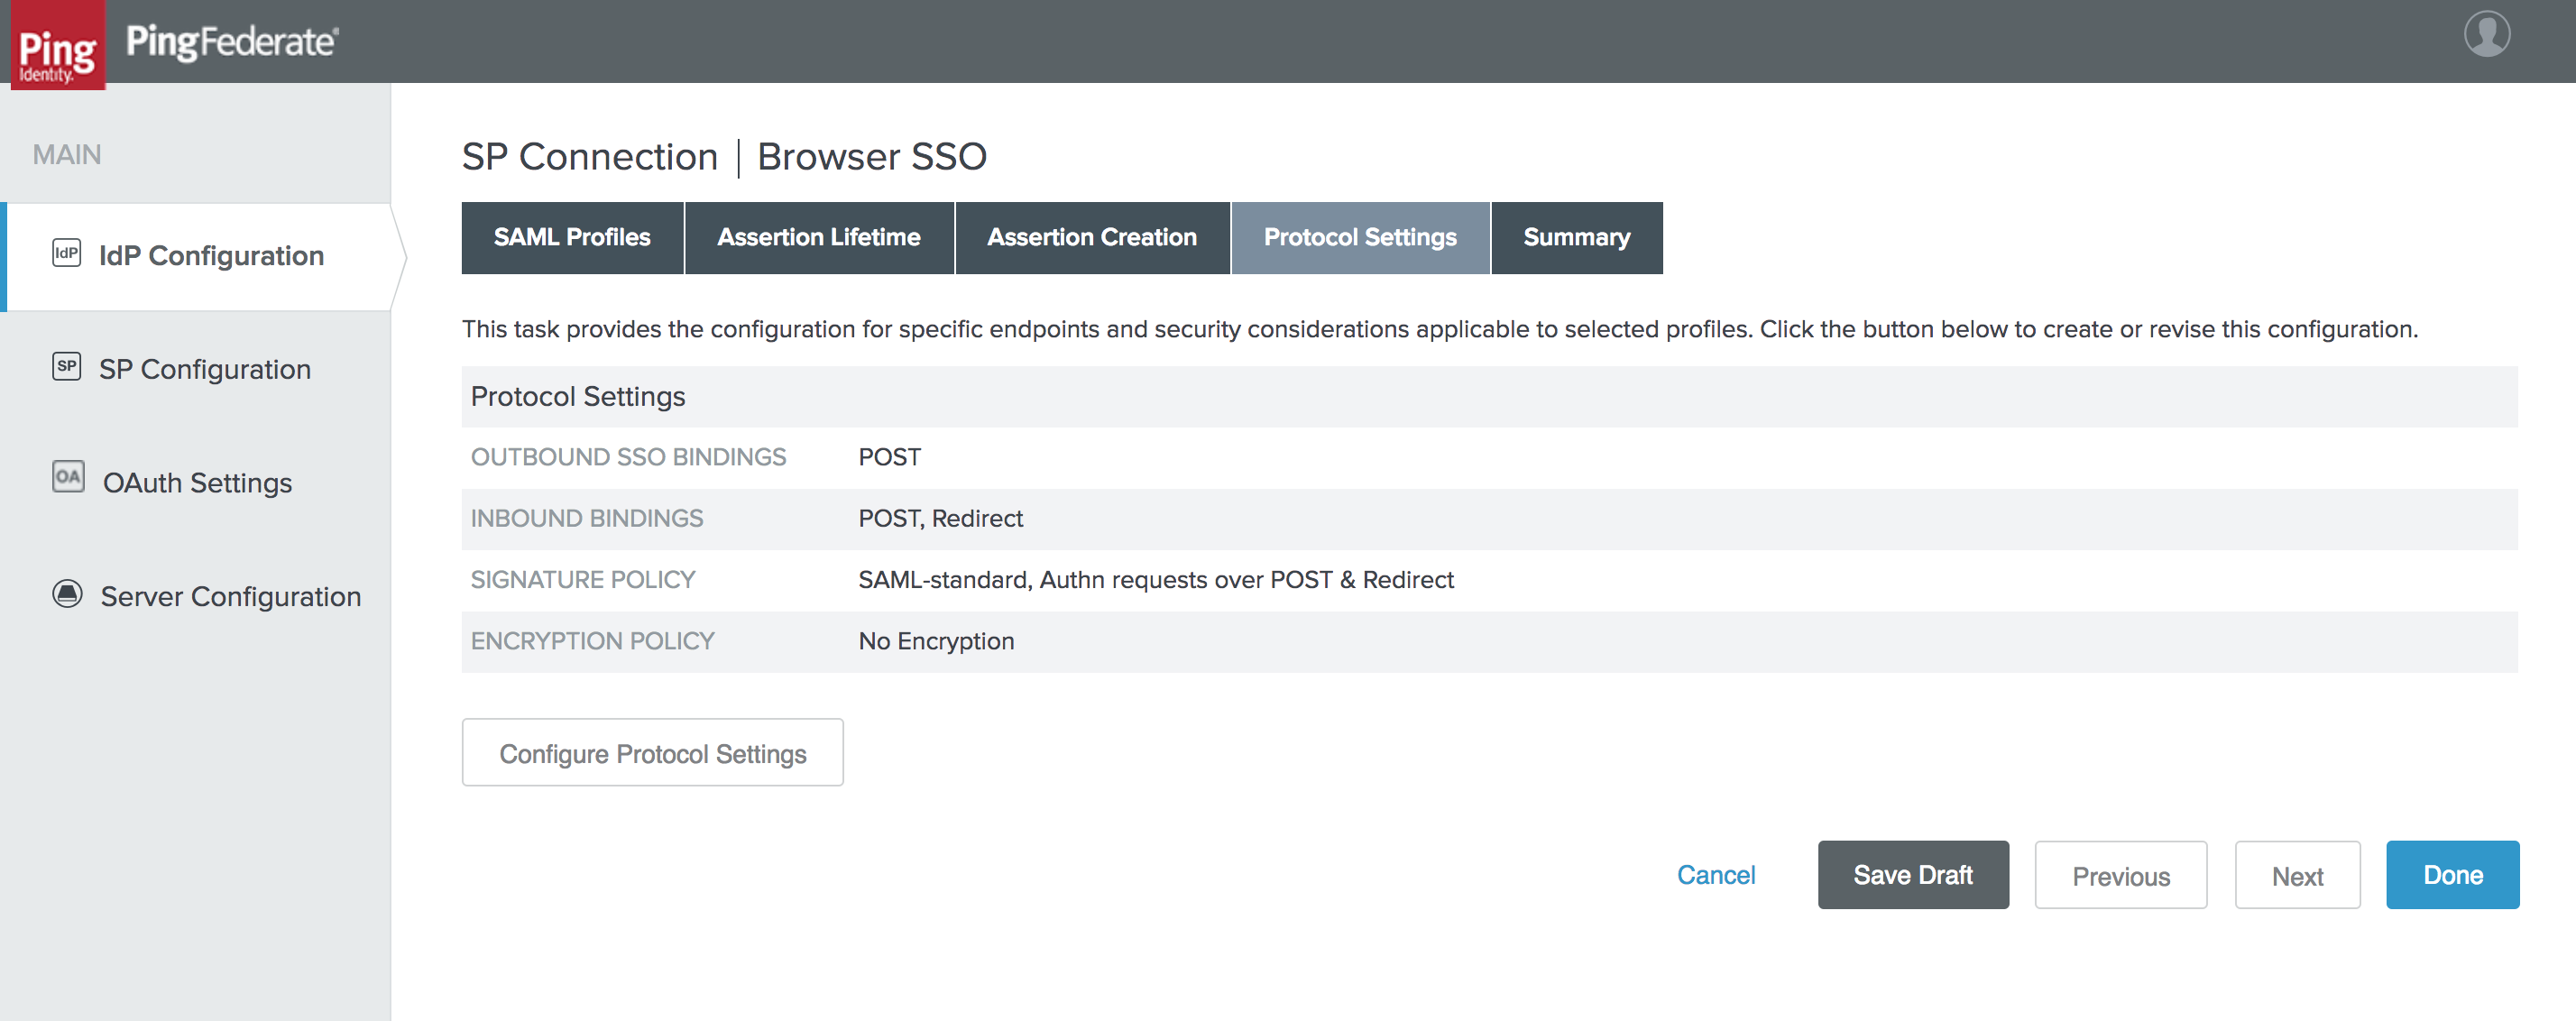
10. In **IdP Configuration > SP Connection > Browser SSO > Protocol Settings**, review the protocol settings.
11. Click **Done**.
12. Copy the PingFederate SAML token signing X.509 certificate as Base64 in **Server Configuration**. This certificate will be imported into Prisma Cloud Console.
## Configure Prisma Cloud Console
Configure Prisma Cloud Console.
1. Login to the Prisma Cloud Console as an administrator.
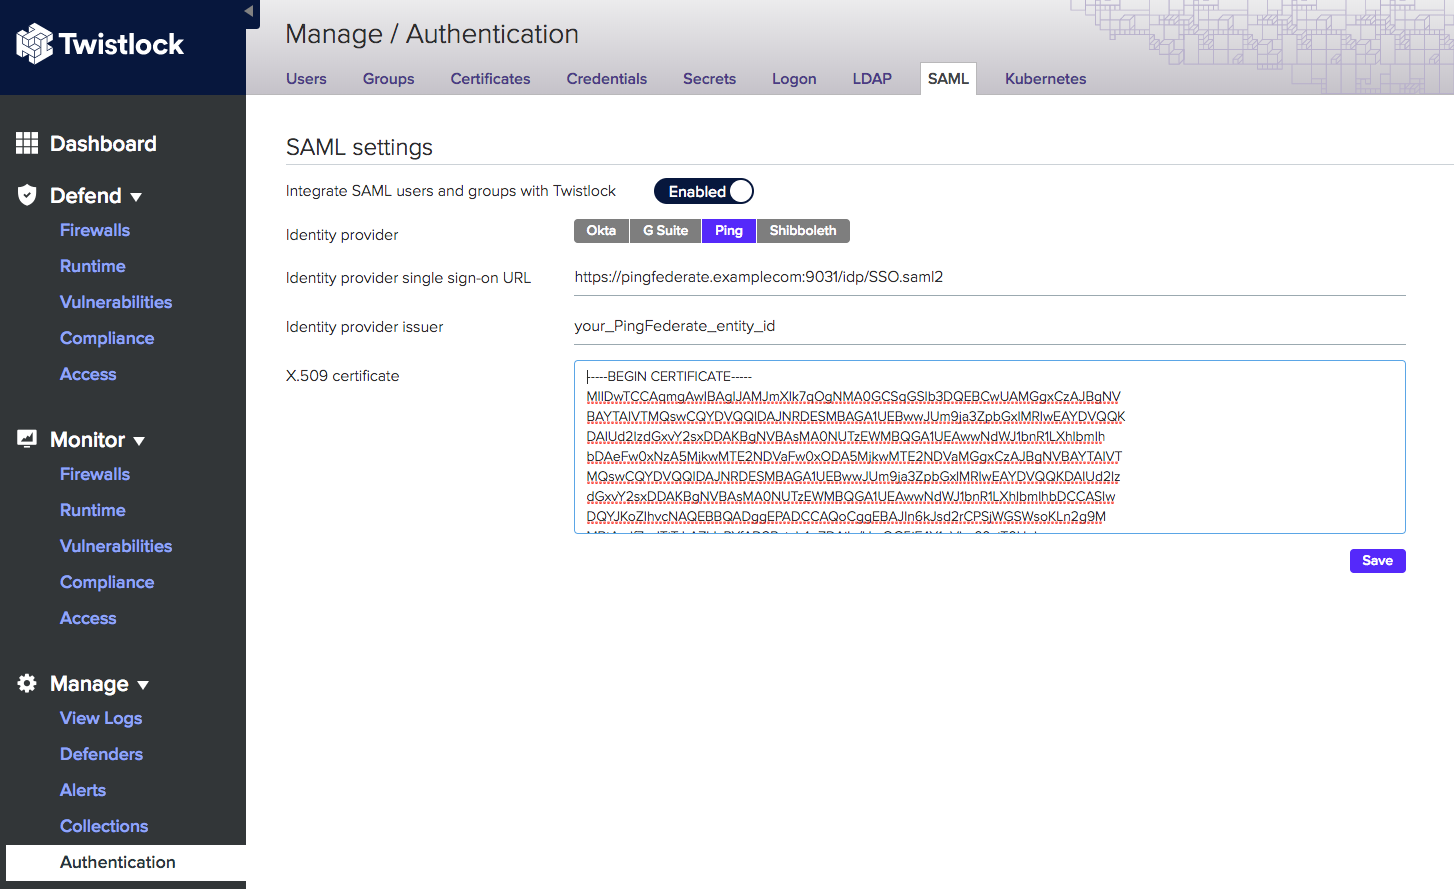
2. Go to **Manage > Authentication > Identity Providers > SAML**.
3. Set **Integrate SAML users and groups with Prisma Cloud** to **Enabled**.
4. Set **Identity Provider** to **Ping**.
5. In **Identity provider single sign-on URL**, enter your PingFederate IdP endpoint.
6. In **Identity provider issuer**, enter your PingFederate Entity ID.
7. In **Audience**, enter **twistlock** (default) or the value you set for Partner’s Entity ID in PingFederate.
1. In **X.509 certificate**, paste your PingFederate X.509 **Signing Certificate Base64**.
8. Click **Save**.
## User account name matching
User account name matching.
1. Go to **Manage > Authentication > Users**.
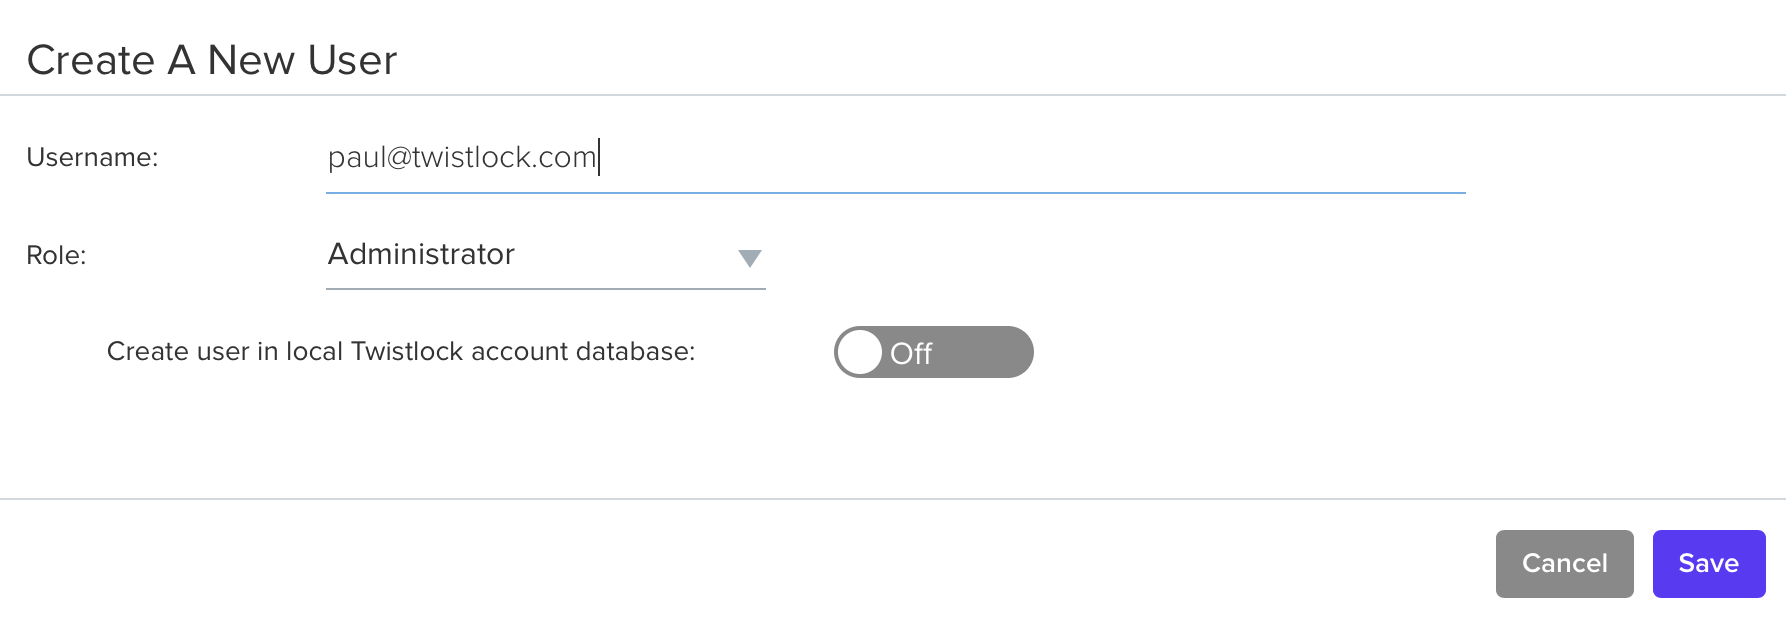
2. Click **Add user**.
3. Create a new user:
1. In **Username**, enter the value returned within the SAML\_SUBJECT attribute *IdP user’s email address*.
2. In **Description**, enter additional details about the user (optional).
3. In **Role**, select the appropriate role.
4. Set **Create user in local Prisma Cloud account database** to **Off**.
4. Click **Save**.
5. Test login into the Prisma Cloud Console via PingFederate SAML federation.
Leave your existing session logged onto the Prisma Cloud Console in case you encounter issues. Open a new incognito browser window and go to **https\://\:8083**.
## Group name matching
Group name matching.
1. Go to **Manage > Authentication > Groups**.
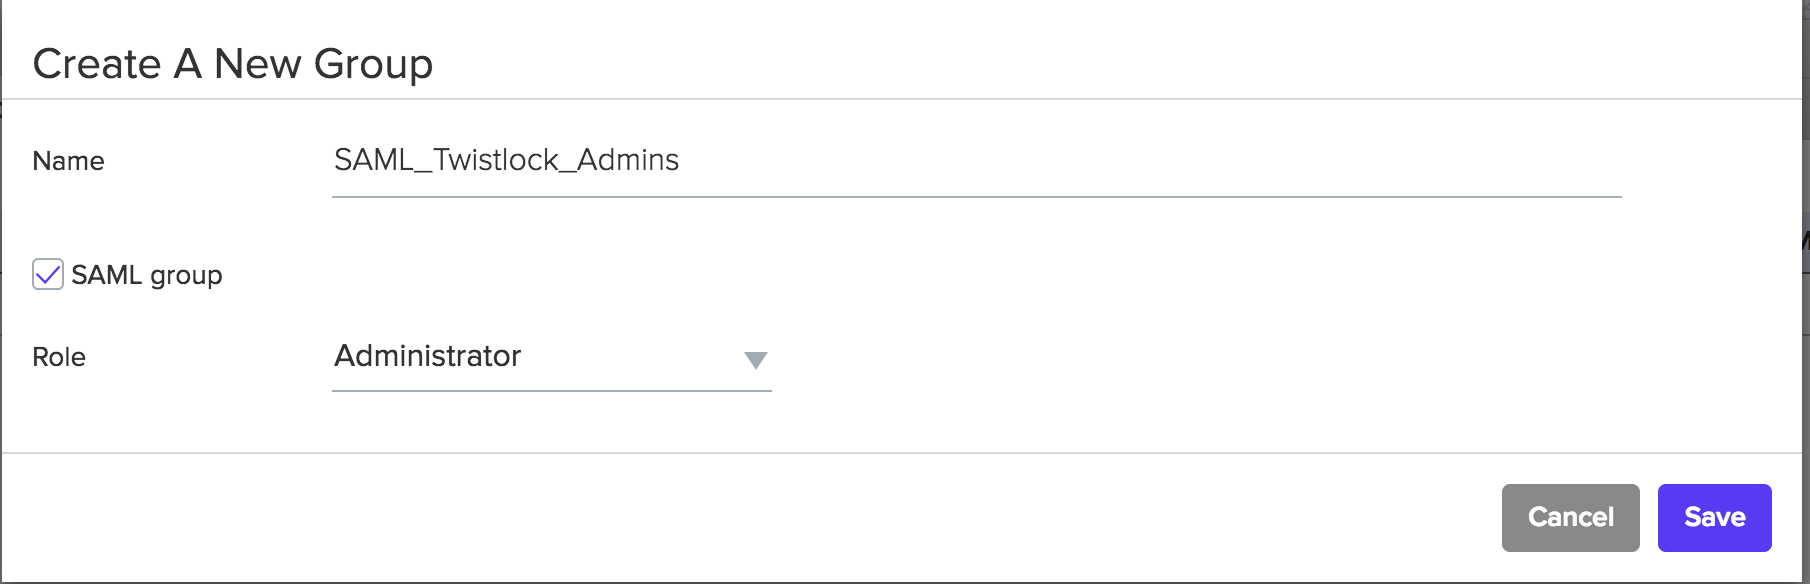
2. Click the **+Add Group** button.
3. In the **Name** field, enter a group name.
The group name must exactly match the group name in the SAML IDP. Console does not verify if that the value entered matches a group name in the SAML IDP.
4. Select the **SAML group** checkbox.
5. Click **Save**
6. Test login into the Prisma Cloud Console via PingFederate SAML federation.
Leave your existing session logged onto the Prisma Cloud Console in case you encounter issues. Open a new incognito browser window and go to **https\://\:8083**.
---
# Agent Instructions
This documentation is published with GitBook. GitBook is the documentation platform designed so that both humans and AI agents can read, navigate, and reason over technical content effectively. Learn more at gitbook.com.
## Querying This Documentation
If you need additional information that is not directly available in this page, you can query the documentation by asking a question.
Perform an HTTP GET request on the following URL with the `ask` and `goal` query parameters:
```
GET https://docs.prismacloud.io/admin-guide/authentication/saml-ping-federate.md?ask=&goal=
```
`ask` is the immediate question: it should be specific, self-contained, and written in natural language.
`goal` is what the user is ultimately trying to achieve, the reason they need the answer. Sharing it helps GitBook give you a better, more relevant answer. A goal is most helpful when it describes the outcome the user wants rather than restating the question. For example, with `ask=how do I create an API token`, a goal like `automate deployments from our CI pipeline` lets GitBook tailor the answer to that use case.
The response will contain a direct answer to the question and relevant excerpts and sources from the documentation.
Use this mechanism when the answer is not explicitly present in the current page, you need clarification or additional context, or you want to retrieve related documentation sections.