> For the complete documentation index, see [llms.txt](https://docs.prismacloud.io/llms.txt). Markdown versions of documentation pages are available by appending `.md` to page URLs; this page is available as [Markdown](https://docs.prismacloud.io/content-collections/governance/create-a-policy.md).
# Create a Custom Policy on Prisma Cloud
Create a custom policy to meet your specific needs for compliance or monitoring of cloud resources.
You can create a custom policy with remediation rules that are tailored to meet the requirements of your organization. When creating a new policy, you can either build the query using [RQL](https://github.com/PaloAltoNetworks/pc-docs-md/tree/main/enterprise-edition/content-collections/search-and-investigate/search-and-investigate.md) or you use a saved search to automatically populate the query you need to match on your cloud resources. For [Cloud Application Security](https://github.com/PaloAltoNetworks/pc-docs-md/tree/main/enterprise-edition/content-collections/application-security/get-started/get-started.md), you can also create configuration policies to scan your Infrastructure as Code (IaC) templates that are used to deploy cloud resources. The policies used for scanning IaC templates use a JSON query instead of RQL.
If you want to enable auto-remediation, Prisma Cloud requires write access to your cloud platform to successfully execute the remediation commands.
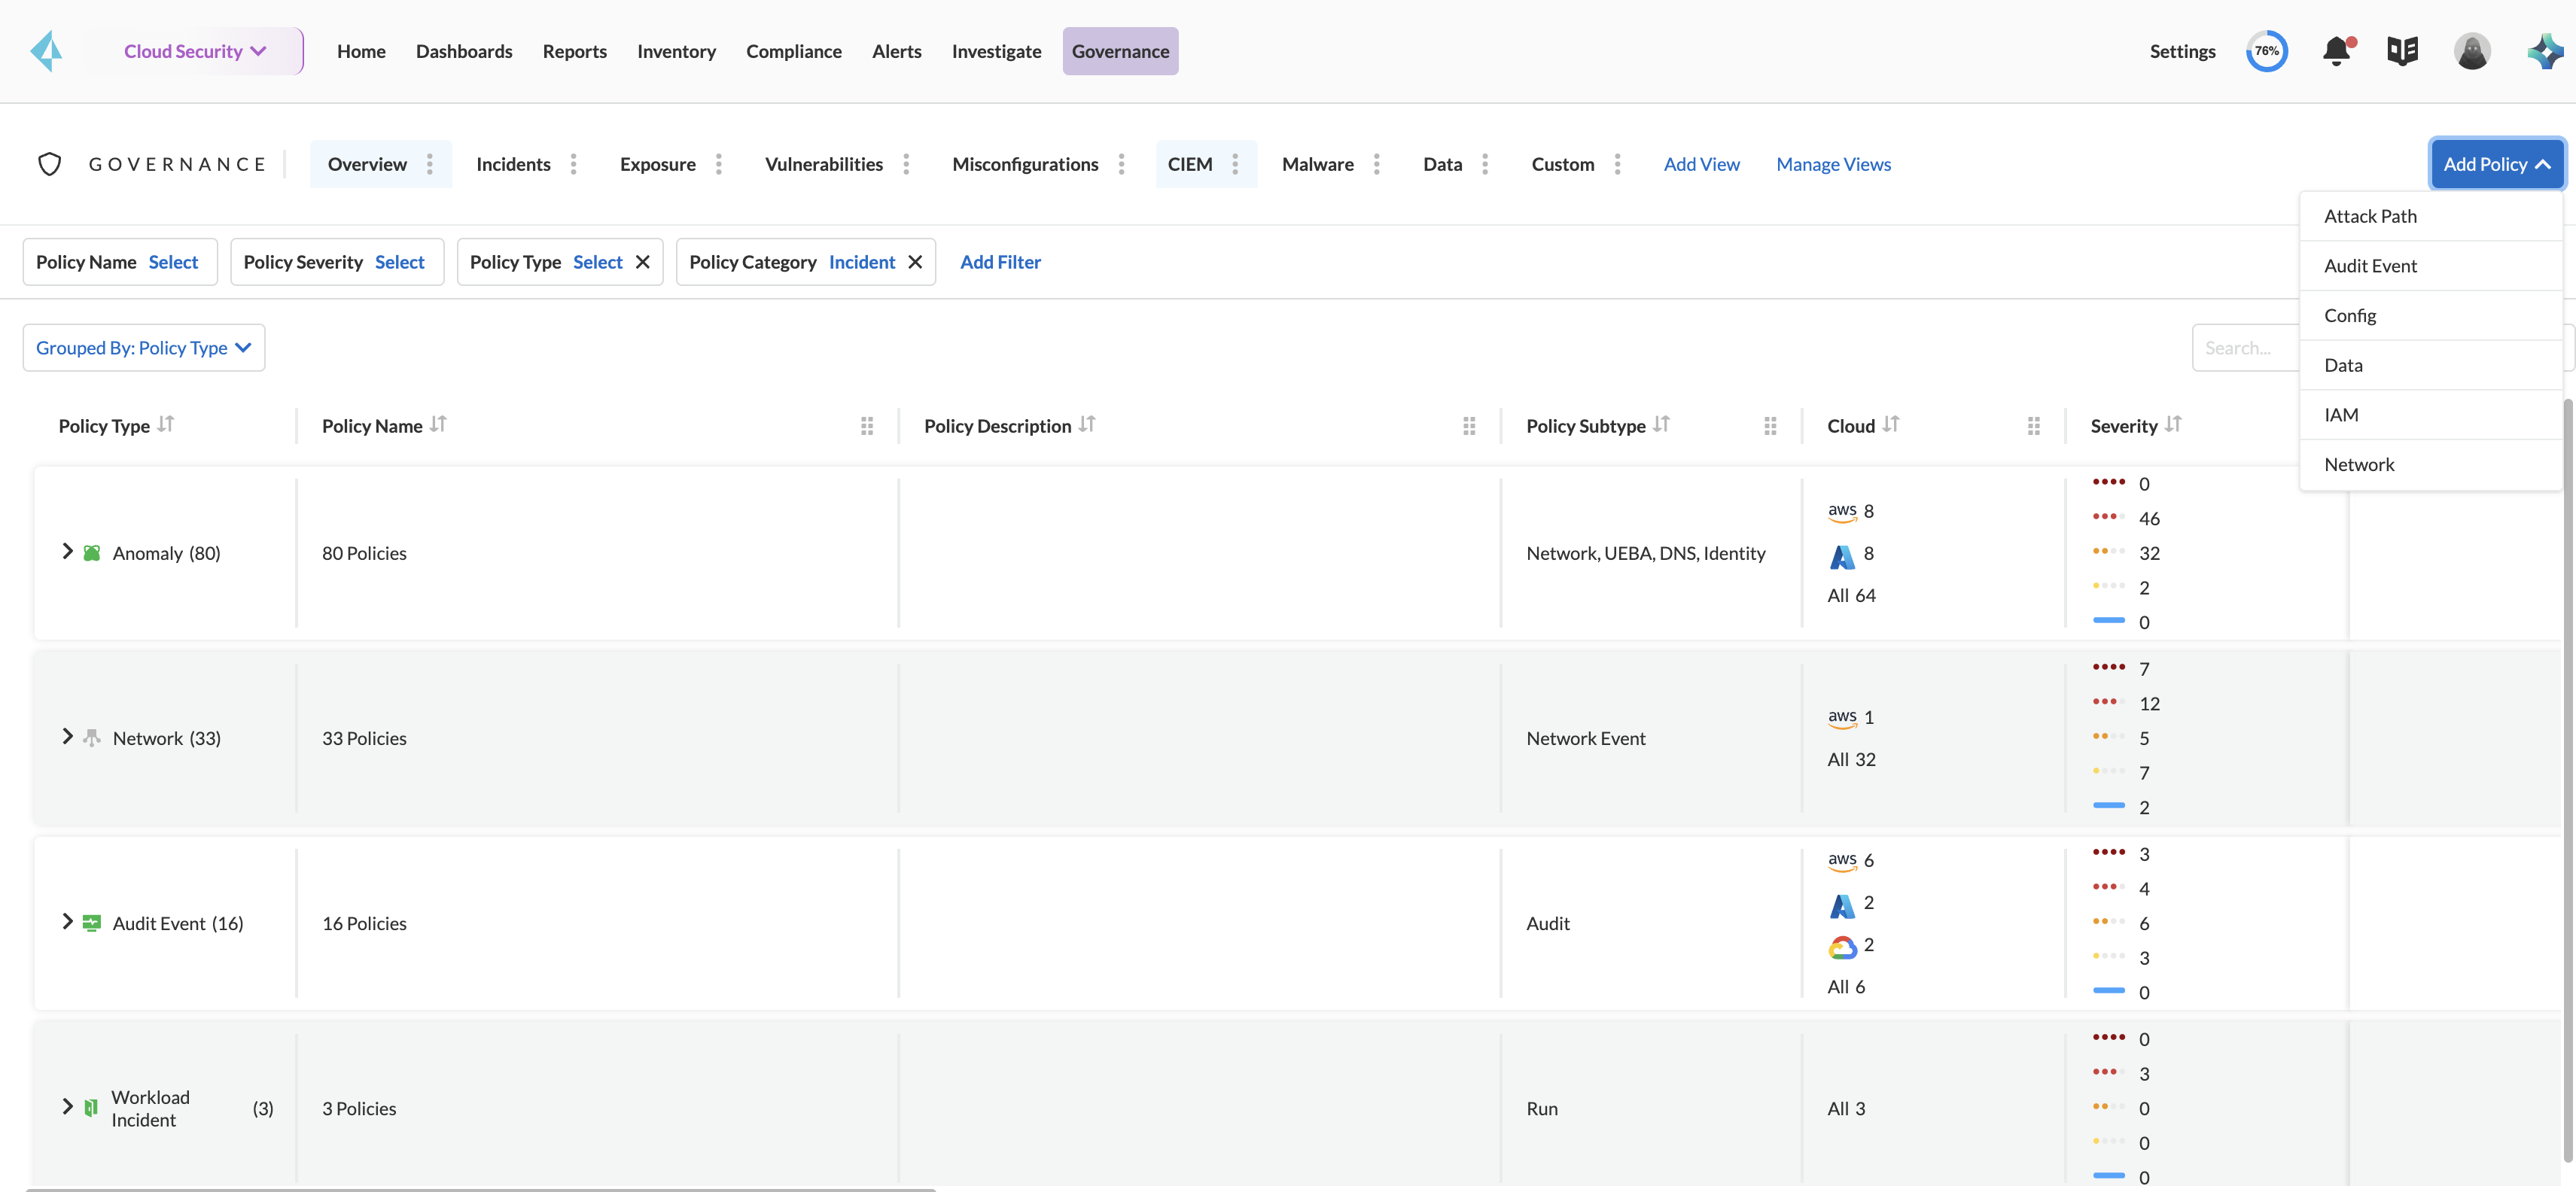
You can create the following types of custom policies:
* **Attack Path**—Attack path policies monitor the high risk attack paths for possible breaches. See [Attack Path Policies](/content-collections/governance/attack-path-policies.md).
* **Audit Event**—Event policies monitor audit events in your environment for potential policy violations. You create audit policies to flag sensitive events such as root activities or configuration changes that may potentially put your cloud environment at risk. See [Create a Network or Audit Event Policy](#create-an-audit-event-policy).
* **Config**—Configuration policies monitor your resource configurations for potential policy violations. Configuration policies on Prisma Cloud can be of two sub-types—Build and Run—to enable a layered approach. Build policies enable you to check for security misconfigurations in the IaC templates and ensure that these issues do not make their way into production. The Run policies monitor resources and check for potential issues once these cloud resources are deployed. See [Create a Configuration Policy](#create-a-config-policy).
* **Data**—Data policies protect against malware and enable data classification. To identify sensitive data in cloud storage buckets, it uses machine learning and pattern matching. See [Data Policies](https://github.com/PaloAltoNetworks/pc-docs-md/tree/main/enterprise-edition/content-collections/administration/configure-data-security/monitor-data-security-scan/data-policies.md).
* **IAM**—IAM policies monitor the identities in your cloud environment for excess-or-unused permissions. See [Create an IAM Policy](/content-collections/governance/create-an-iam-policy.md).
* **Network**—Network policies monitor network activities in your environment. See [Create a Network or Audit Event Policy](#create-an-audit-event-policy).
## Create a Configuration Policy
Use these instructions to add a custom configuration policy, for checking resources in the build or run phase of your application lifecycle. Because building the rules takes practice, before you start, take a look at a few Prisma Cloud default policies directly on the administrative console, and review the query format within the rules.
You must enable a Configuration policy with the subtype Run, Build and attach it to an alert rule on Prisma Cloud if you want to view the build-time details in an alert.
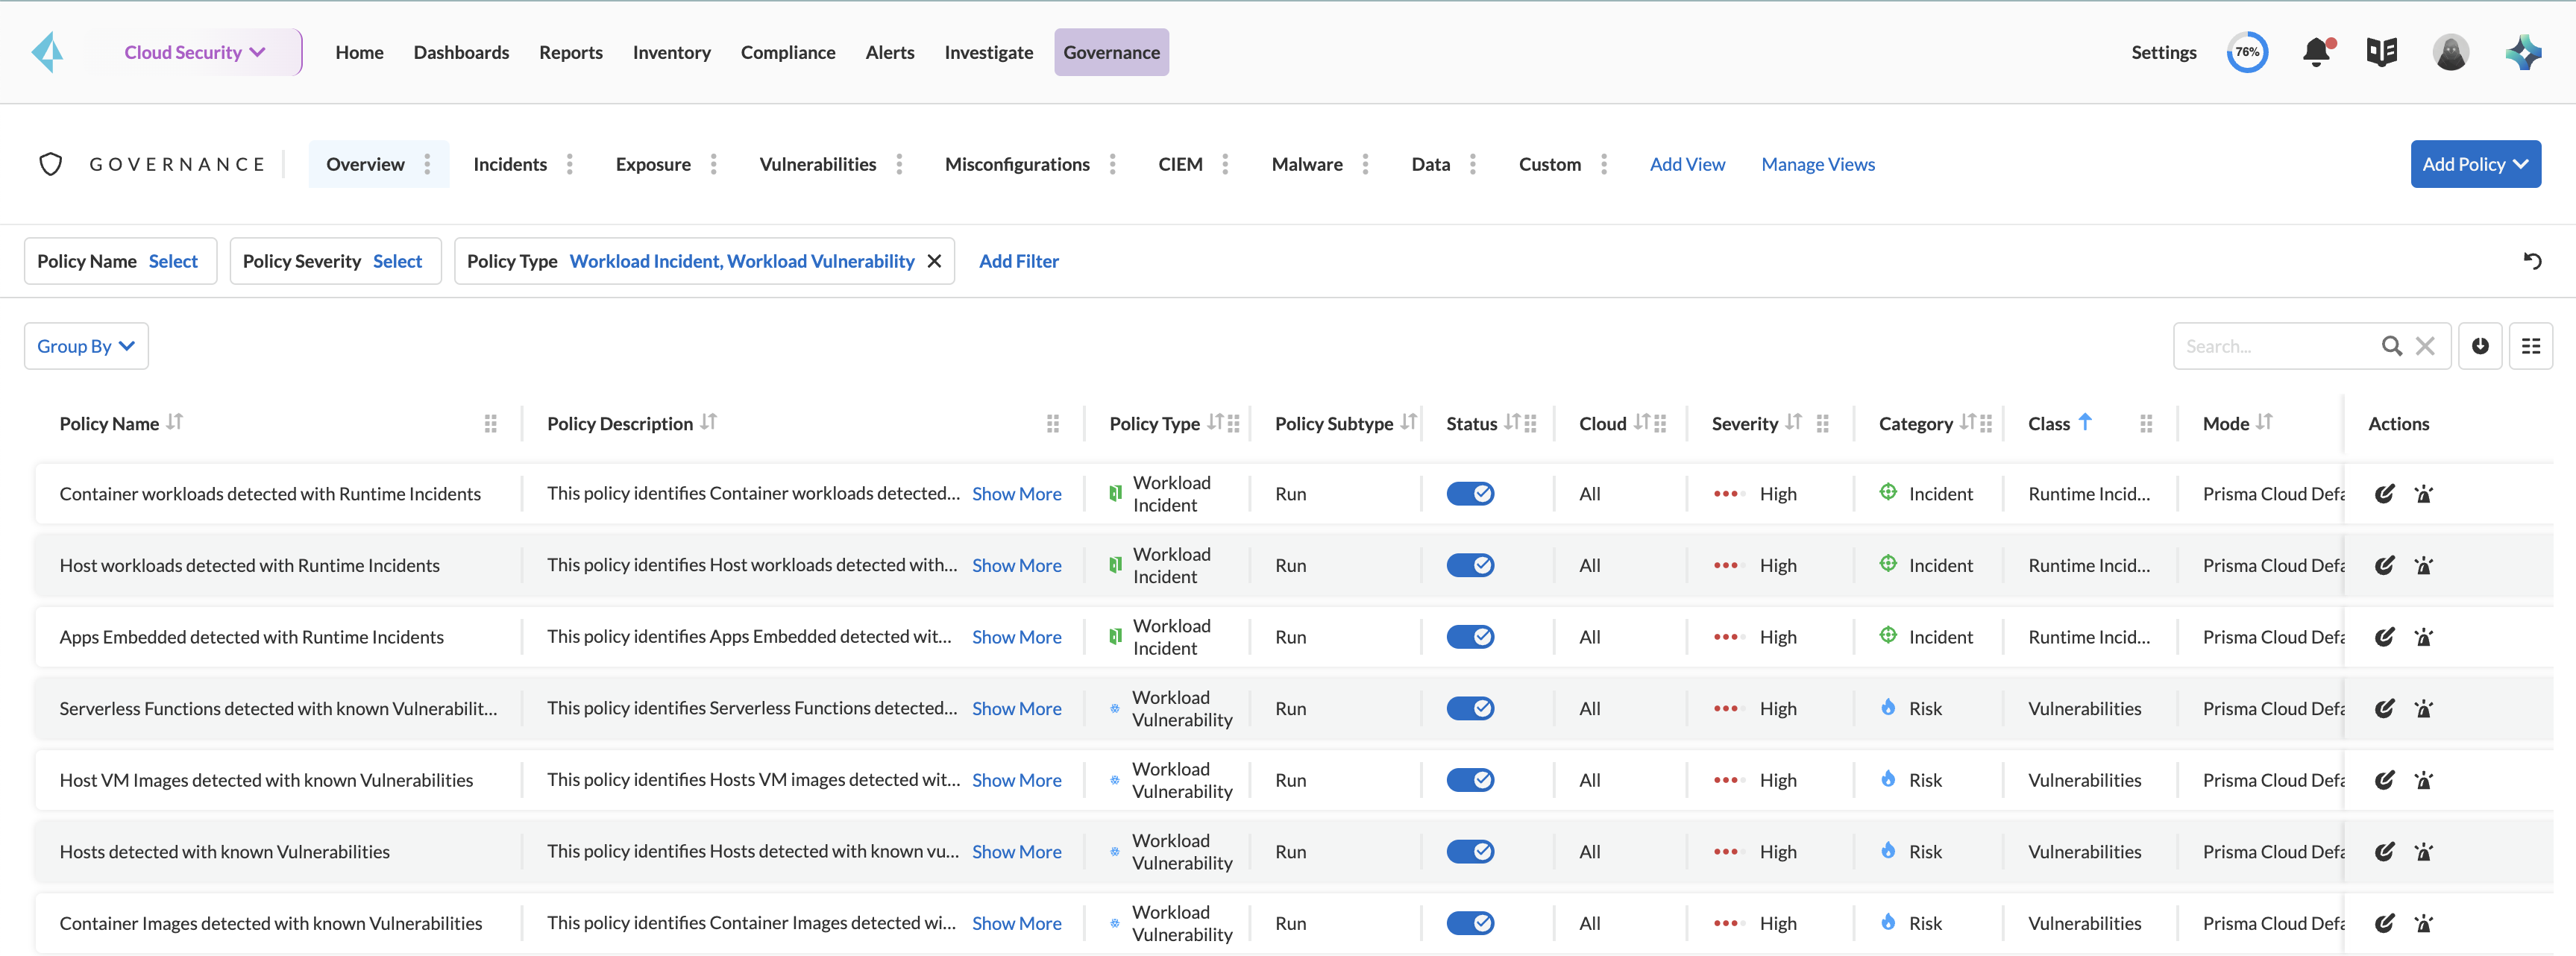
1. Select **Governance**.
2. Select **Add Policy > Config**.
3. Enter a **Policy Name**.
You can optionally add a **Description** and **Labels**.
**NOTE:** When creating a custom policy or modifying a default policy, do not use or delete system assigned labels.
4. Select the policy subtype and select **Next**.
You can choose one or both the policy subtypes options:
**Run** subtype enables you to scan cloud resources that are already deployed on a supported cloud platform.
**Build** subtype enables you to scan code repositories and IaC templates that are used to deploy cloud resources.
5. Select the **Severity** for the policy and select **Next**.
For a **Run** policy, an alert will be generated on a policy violation.
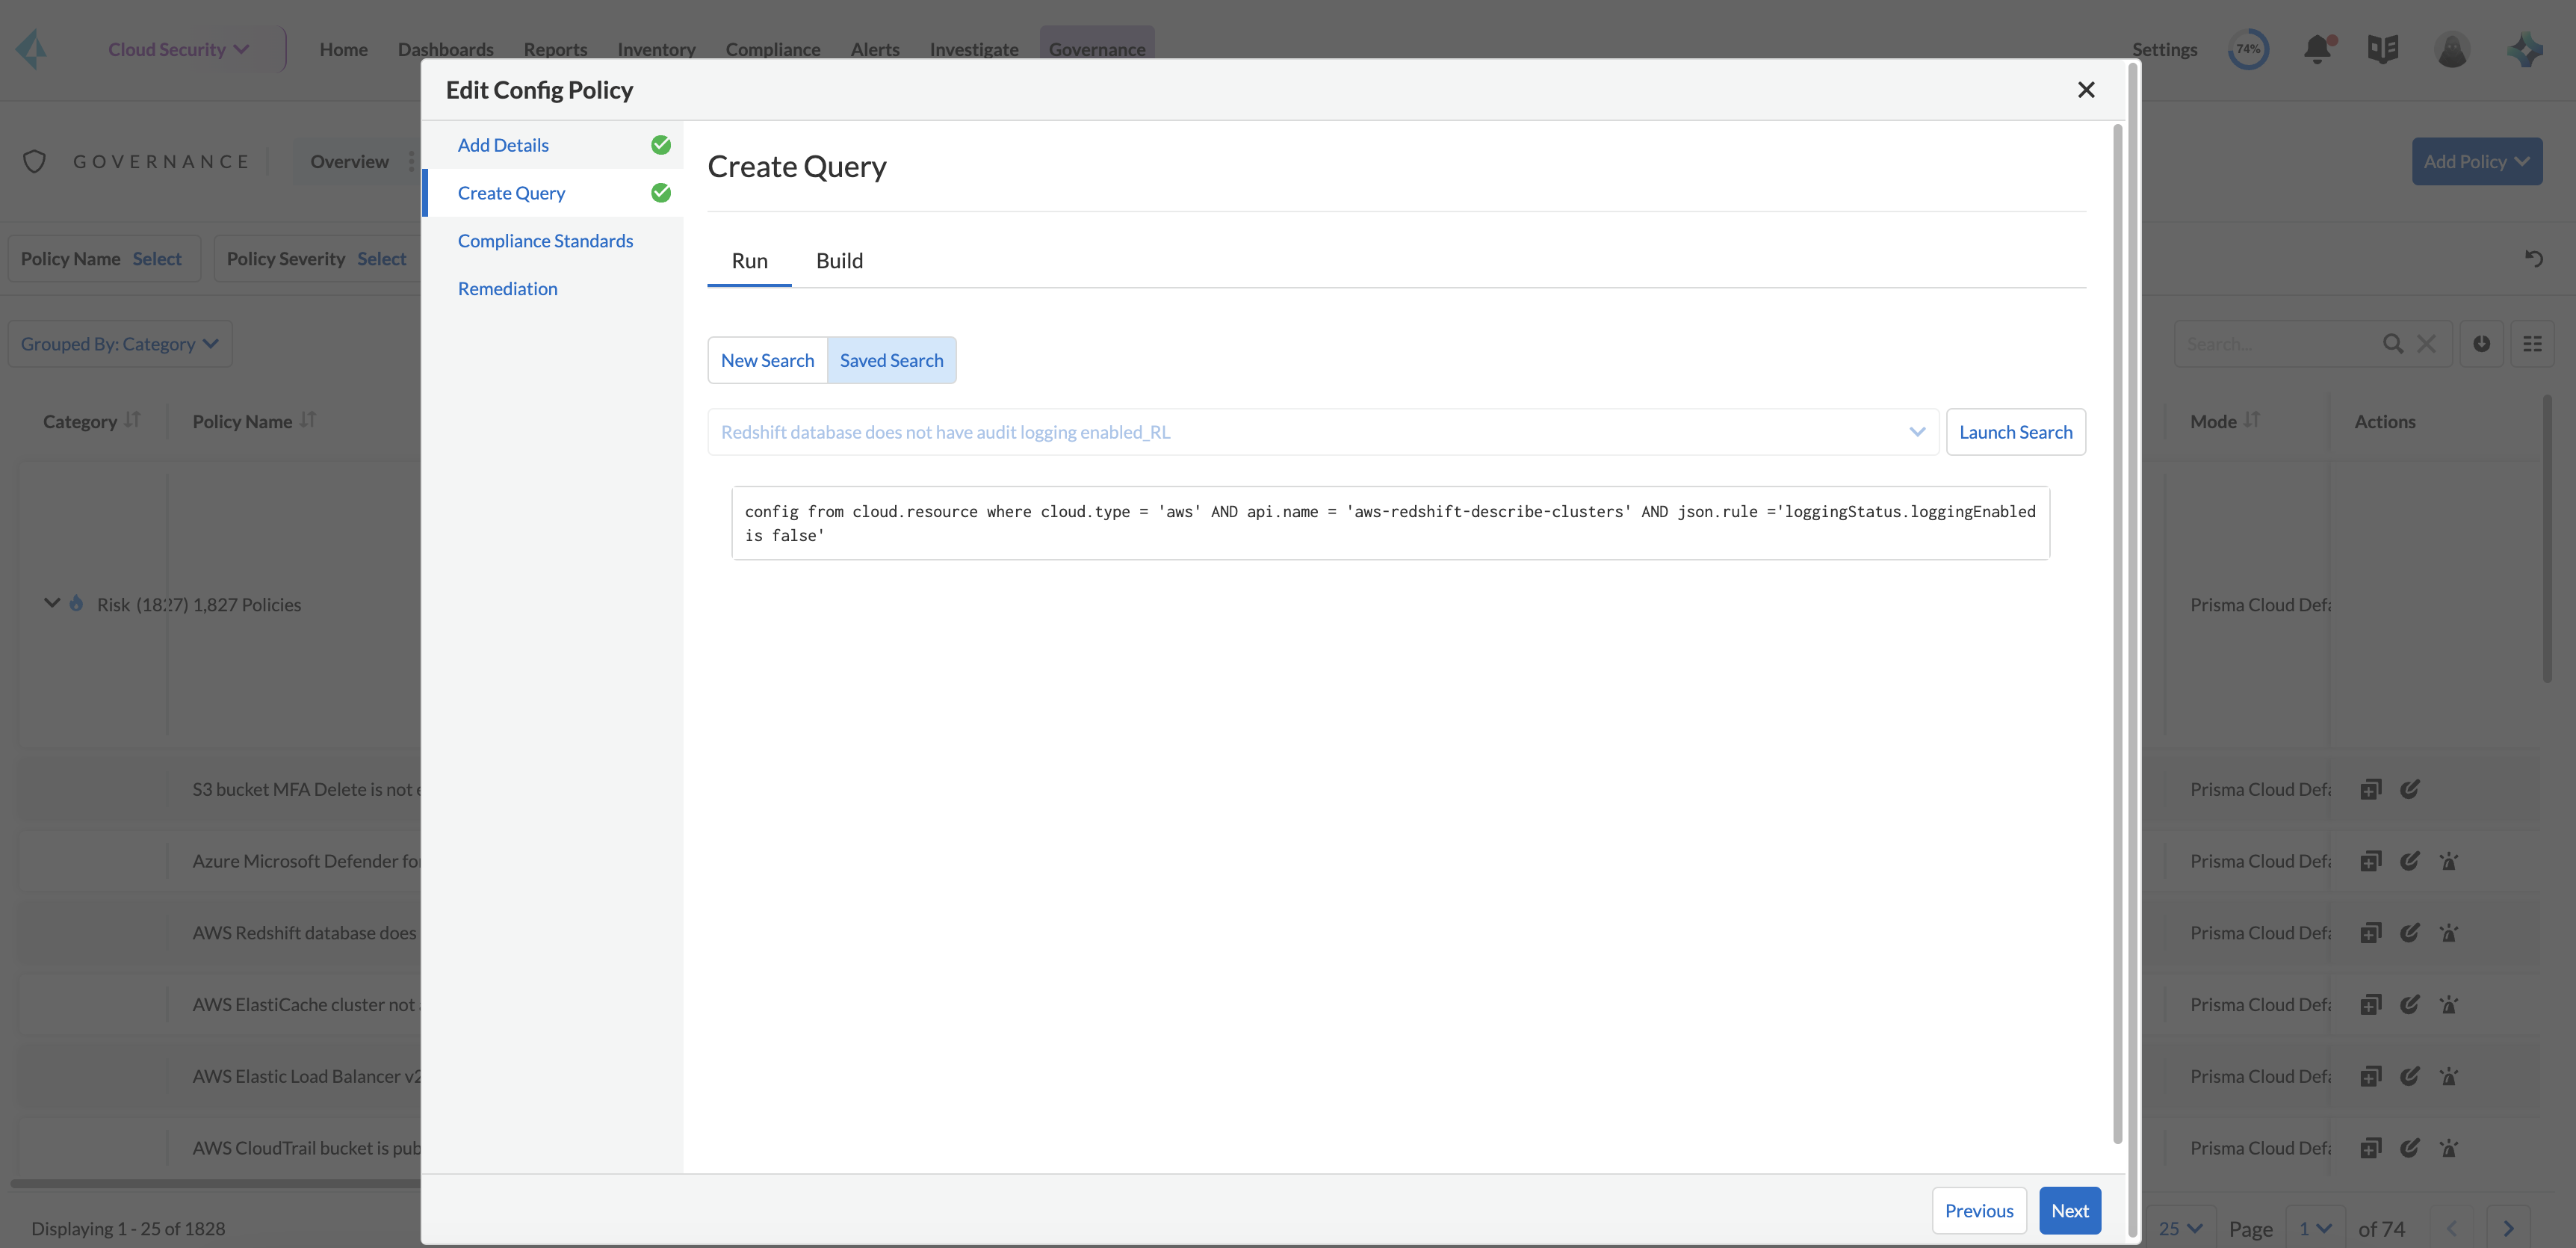
6. Build the query to define the match criteria for your policy.
1. Add a rule for the **Run** phase.
The Configuration—Run policies use RQL. If you are using a **Saved Search**, you can select from predefined options to auto-populate the query. For building a **New Search**, `config from cloud.resource where` and use the auto-suggestion to select the available attributes and complete the query.
Config queries require some mandatory attributes. It should begin with `config where cloud.resource where` and at a minimum have `api.name` in conjunction with `json.rule` or it can have an attribute from completion suggestions, or it can have two `api.name` attributes with a `filter` attribute.
```
config from cloud.resource where cloud.type = 'azure' AND api.name = 'azure-network-usage' AND json.rule = StaticPublicIPAddresses.currentValue greater than 1
config from cloud.resource where finding.type = 'Host Vulnerability'
config cloud.resource where api.name = 'aws-ec2-describe-internet-gateways' as X; config where api.name = 'aws-ec2-describe-vpcs' as Y; filter '$.X.attachments[*].vpcId == $.Y.vpcId and $.Y.tags[*].key contains IsConnected and $.Y.tags[*].value contains true'; show Y;
config from cloud.resource where resource.status = Active AND api.name = 'aws-acm-describe-certificate' AND json.rule = 'domainValidationOptions[*].domainName contains *'
```
**NOTE:** When creating a custom policy, as a best practice **do not** include `cloud.account`, `cloud.accountgroup`, `cloud.region`, `resource.status`, or `tag` attributes in the RQL query. If you have a saved search that includes these attributes, make sure to edit the RQL before you create a custom policy. While these attributes are useful to filter the results you see on **Investigate**, they are ignored by the policy engine (scanner) when used in a custom policy.
2. Add a rule for the **Build** phase.
If your policy will include both Run and Build checks, and you have added the RQL query, your cloud type for the build rule is automatically selected. It is based on the cloud type referenced in the RQL query.
**NOTE:** If you have activated the Application Security module, see [Create a custom build policy](https://github.com/PaloAltoNetworks/pc-docs-md/tree/main/enterprise-edition/content-collections/governance/custom-build-policies/custom-build-policies.md) to continue with creating a build policy rule.
7. Add the compliance standards to your policy.
1. Choose the compliance **Standard**, **Requirement**, and **Section**.
2. Click **+** to add more standards as required and click **Next**.
8. Enter details in the remediation section, if you want to automatically remediate alerts on a policy violation.
1. Select **Run** or **Build**
Build phase policies do not support remediation via CLI or UI.
2. (tt:\[Configuration—Run policies only]) Enter Command Line remediation commands in **CLI Remediation**.
CLI remediation is available for `config from` queries only. You can add up to 5 CLI commands, and use a semi-colon to separate the commands in the sequence. The sequence is executed in the order defined in policy, and if a CLI command fails, the execution stops at that command. The parameters that you can use to create remediation commands are displayed on the interface as CLI variables, and a syntax example is: `gcloud -q compute --project=${account} firewall-rules delete ${resourceName}; gsutil versioning set off gs://${resourceName};`:
* $account — Account is the Account ID of your account in Prisma Cloud.
* $azurescope — tt:\[(Azure only)] Allows you to specify the node in the Azure resource hierarchy where the resource is deployed.
* $gcpzoneid — tt:\[(GCP only)] Allows you to specify the zone in the GCP project, folder, or organization where the resource is deployed.
* $region — Region is the name of the cloud region to which the resource belongs.
* resourcegroup — tt:\[(Azure only)] Allows you to specify the name of the Azure Resource Group that triggered the alert.
* $resourceid — Resource ID is the identification of the resource that triggered the alert.
* $resourcename — Resource name is the name of the resource that triggered the alert.
3. Click **Validate syntax** to validate the syntax of your code.
If you would like to see an example of the CLI syntax in the default remediable policies on Prisma Cloud, [Manage Prisma Cloud Policies](/content-collections/governance/manage-prisma-cloud-policies.md) any existing policy and edit it.
**NOTE:** The default policies include additional variables that are restricted for use in default policies only, and are not supported in custom policies. Syntax validation displays an error if you use the restricted variables.
4. Select **Submit**.
All your System Admin, Account and Cloud Provisioning Admin and Account Group Admin are notified when there is a change to the CLI commands.
Serverless auto-remediation is an option (for AWS only for now). For more complex or customizable remediation solutions, check out serverless-autoremediation:
## Create a Network or Audit Event Policy
Use the following instructions to add a custom Network or Audit Event policy on Prisma Cloud.
For Network policies, the RQL query used in a saved search is different for detecting risk of [network exposure](/content-collections/governance/create-a-network-policy.md) versus network protection.
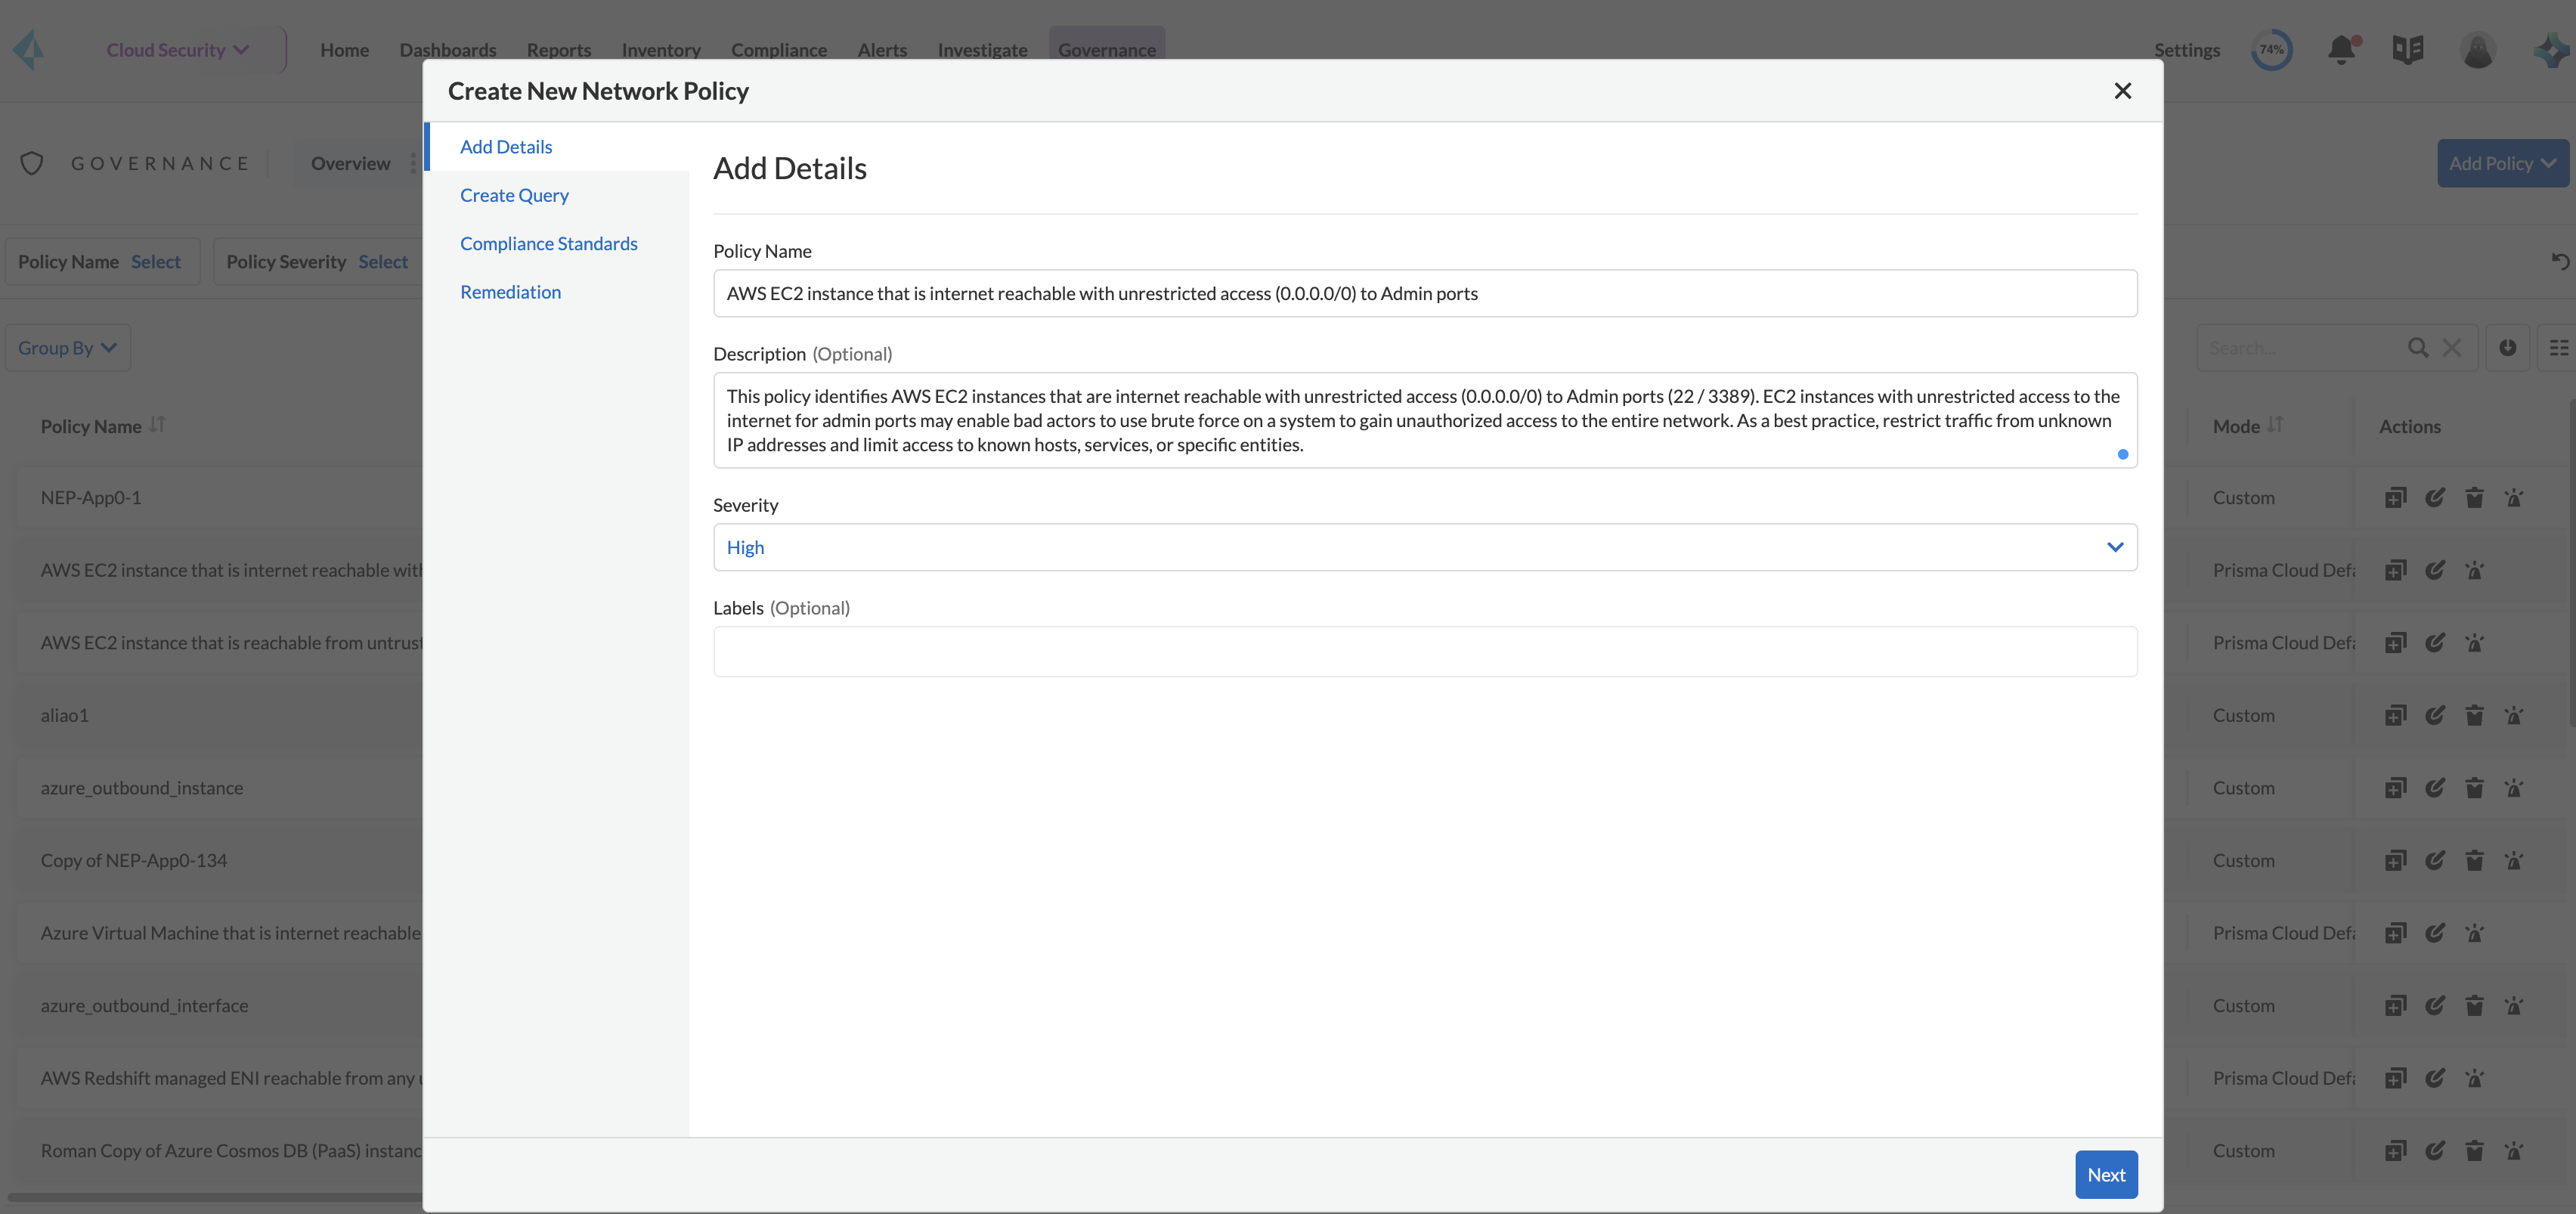
1. Select **Governance**.
2. Select **Add Policy > Network**.
3. Enter a **Policy Name** and **Severity**.
4. Add an optional **Description** and **Labels** before you click **Next**.
**NOTE:** When creating a custom policy or modifying a default policy, do not use or delete system assigned labels.
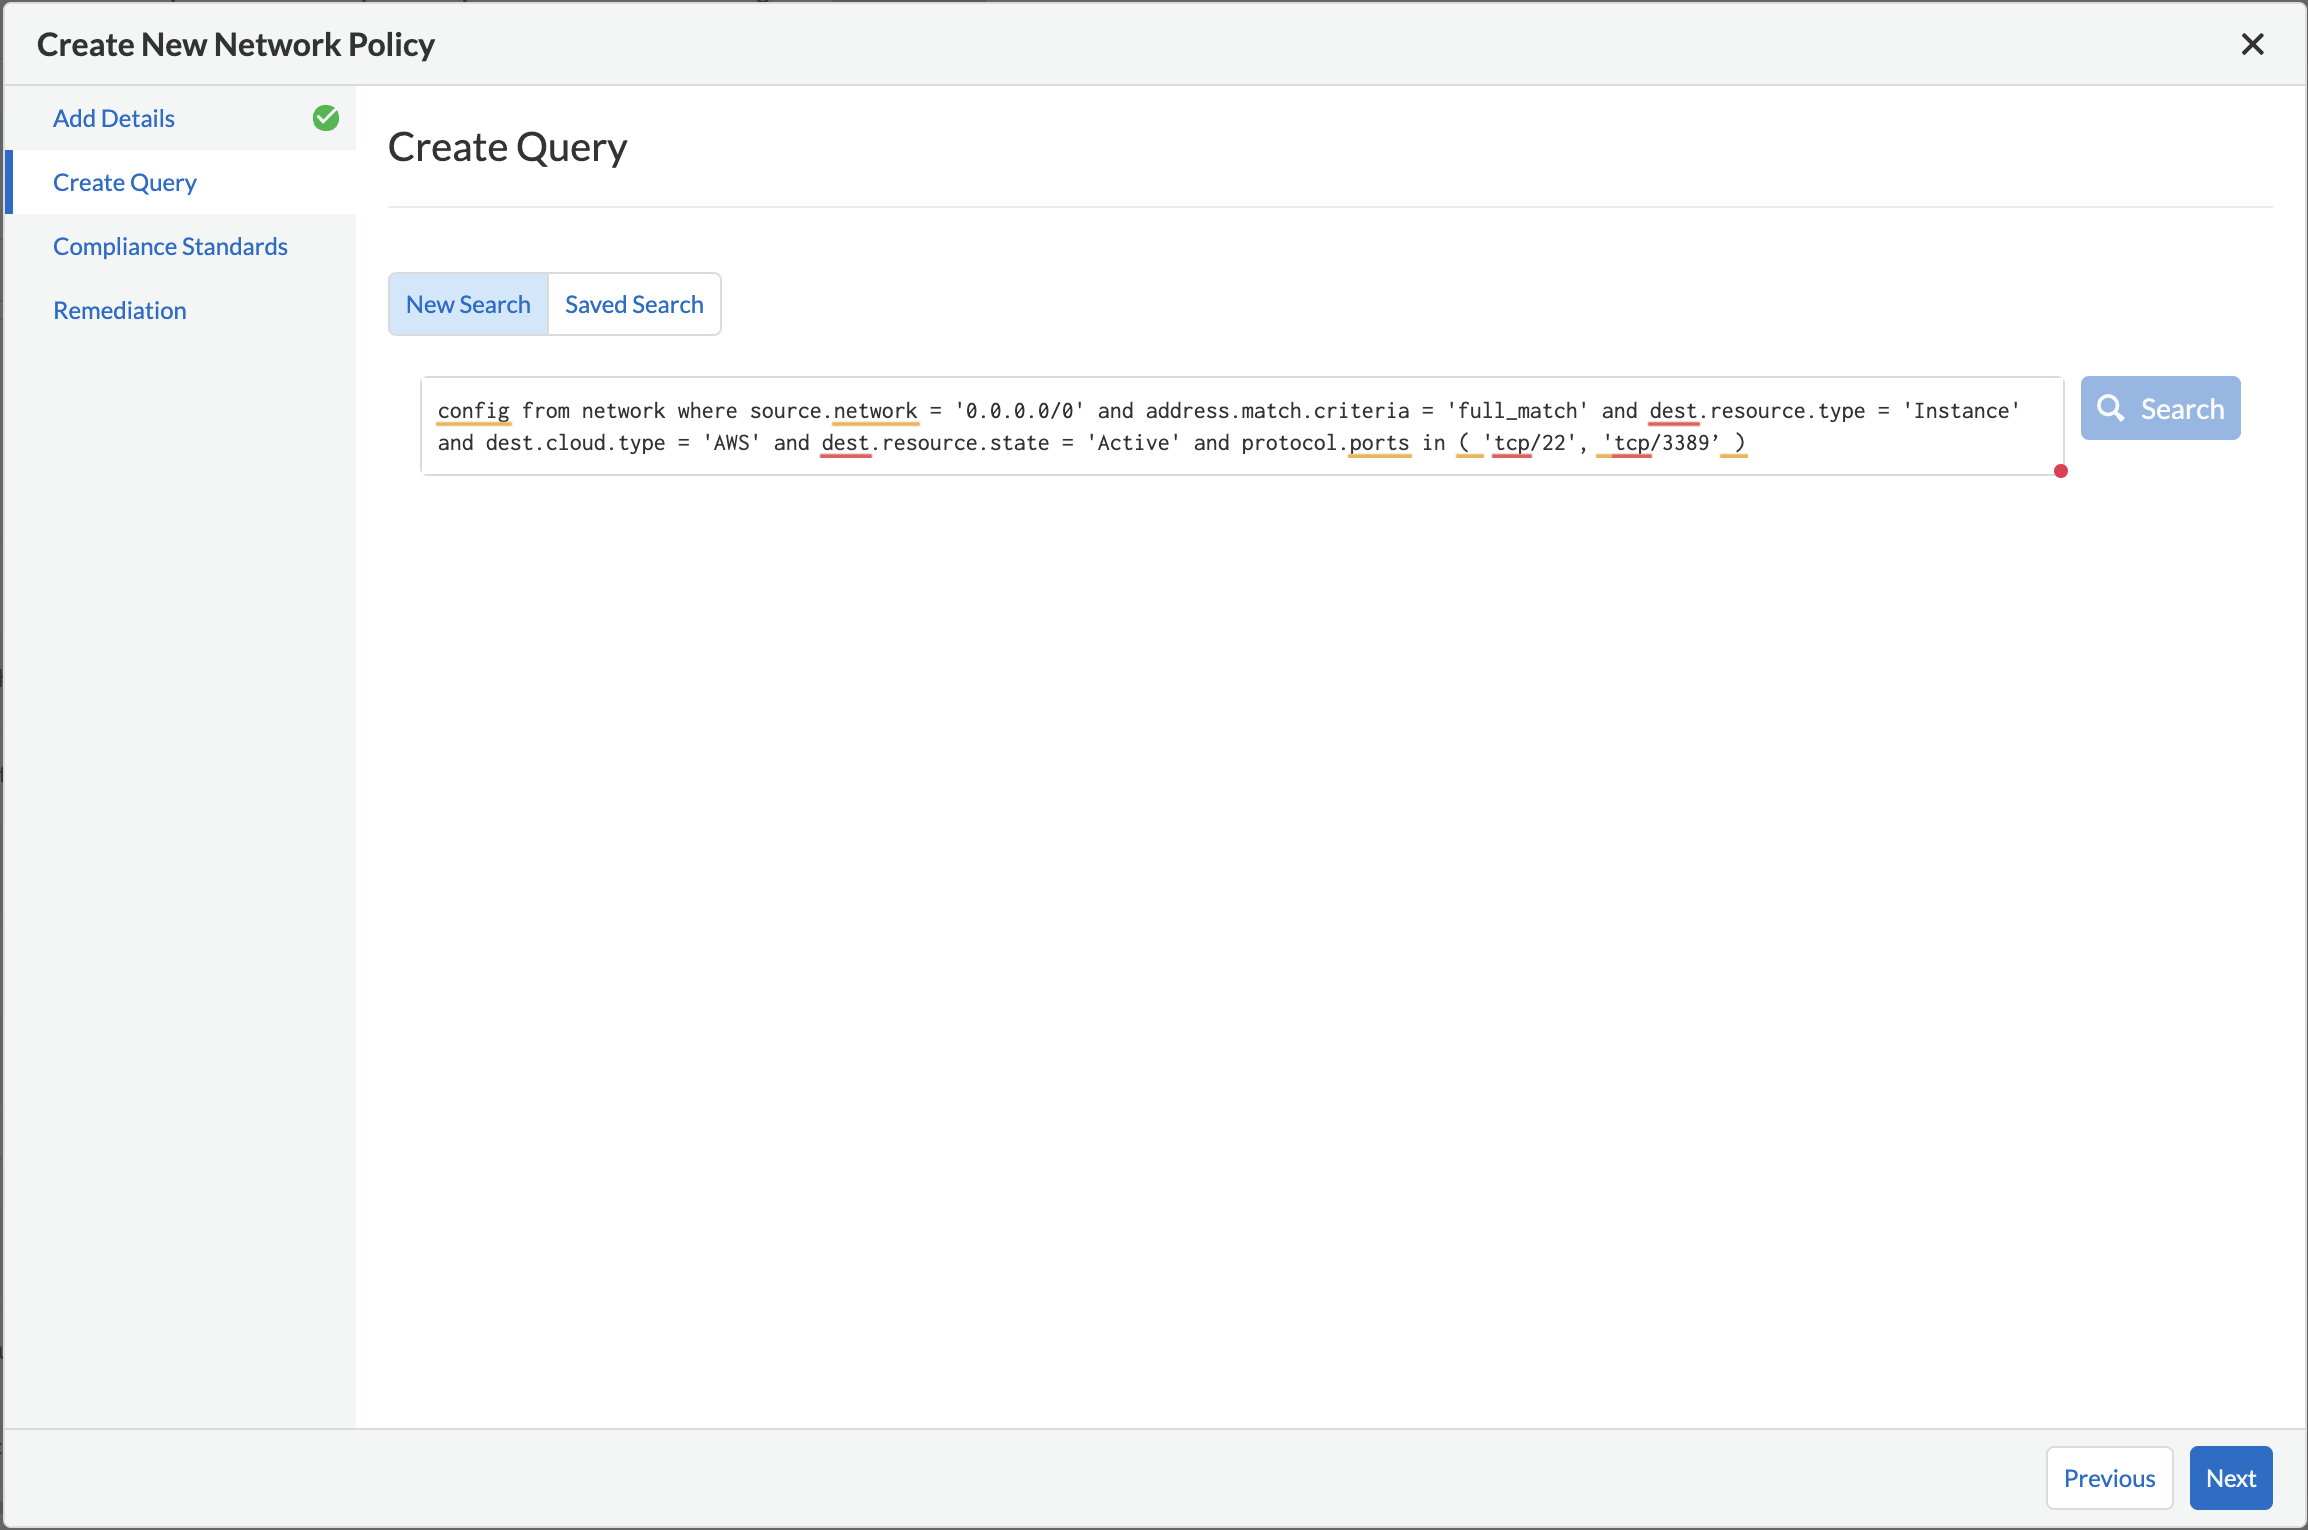
5. Build the query to define the match criteria for your policy by using a **New Search** or a **Saved Search** and click **Next**.
If you are using a **Saved Search**, you can select from the list of predefined options to auto-populate the query. The **Select Saved Search** drop-down displays the RQL for saved searches that match the policy type you selected in Step 2 above.
For a building a **New Search**, the RQL query must begin with `event from` for an Audit Event policy; for Network policy `config from network where` , or `network from` , or `network from vpc.flow_record where` . You can then use the auto-suggestion to select the available attributes and complete the query.
6. (tt:\[Optional]) Select the compliance standards for your policy.
Compliance standards can be only associated with custom policies for Audit Events, and for Network policies that do not use the RQL `config from network where` .
1. Choose the compliance **Standard**, **Requirement**, and **Section**.
2. Click **+** to add more standards as required and click **Next**.
7. (tt:\[Optional]) Provide a **Recommendation for Remediation**.
CLI commands to enable automatic remediation are not supported on Audit Event or Network policy.
8. **Save** the policy.
## Create an Attack Path Policy
Use the following instructions to add an Attack Path policy on Prisma Cloud.
1. Select **Governance**.
2. Select **Add Policy > Attack Path**.
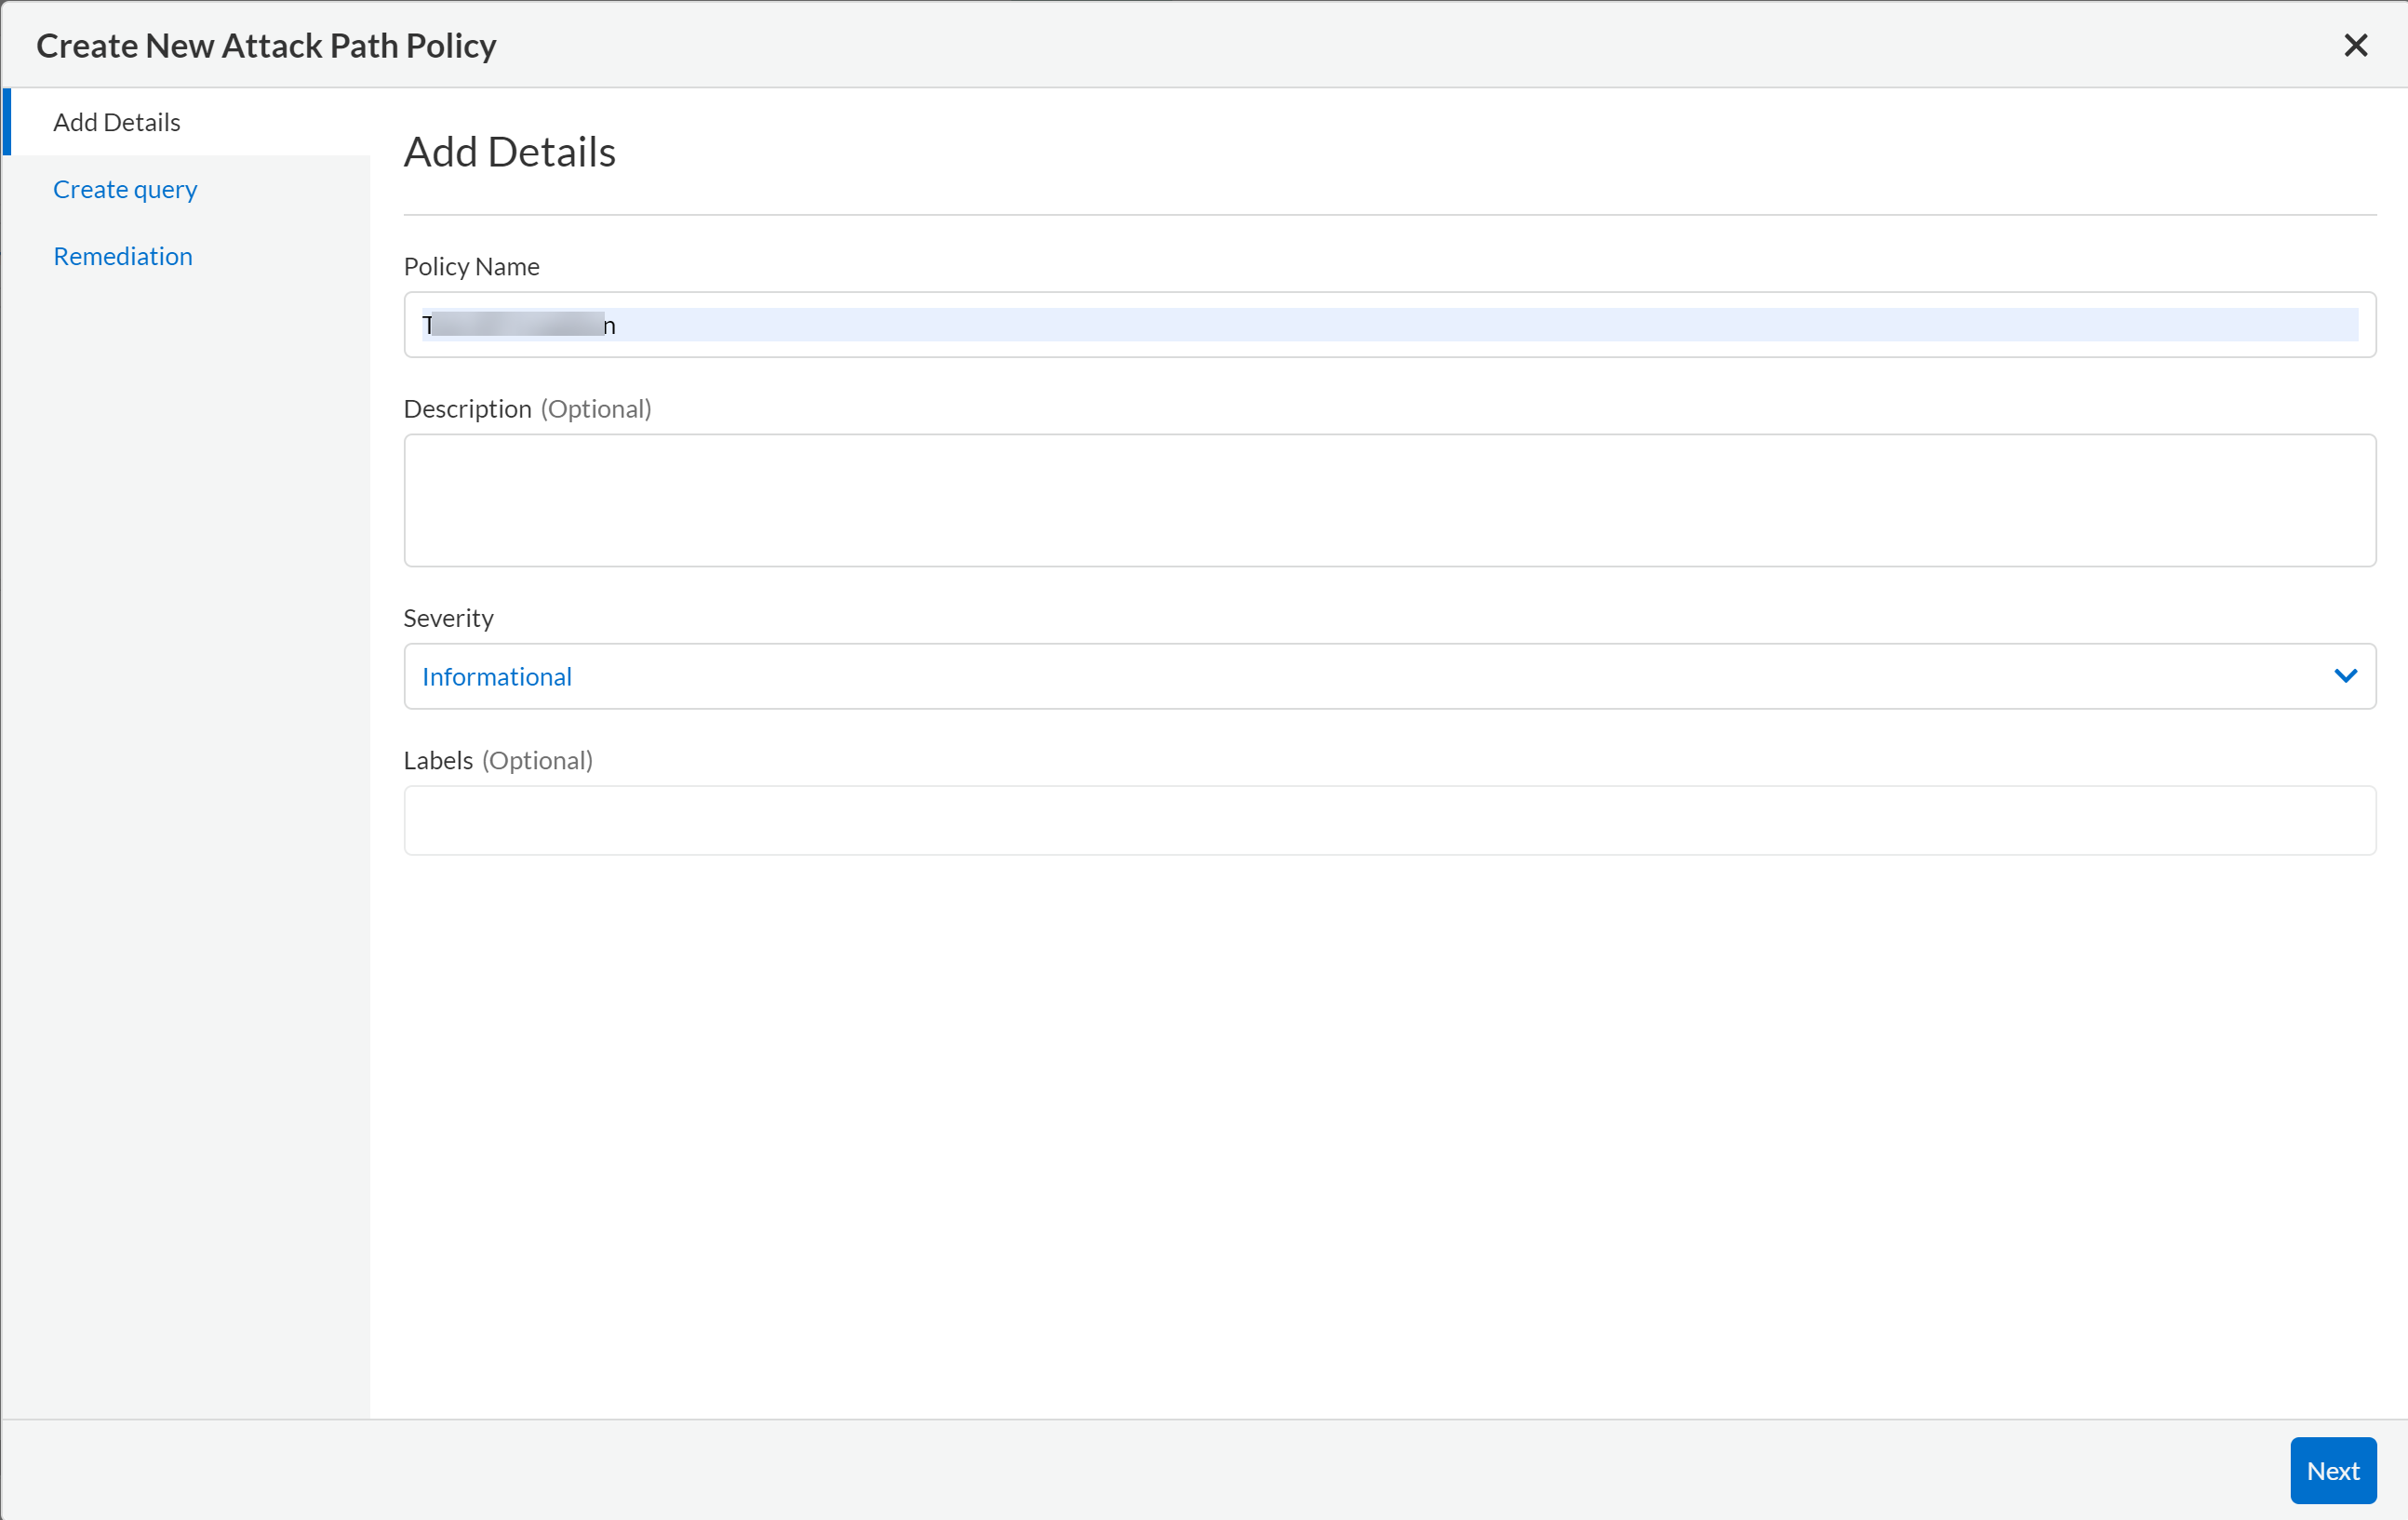
3. Enter a **Policy Name** and select the **Severity**.
4. (tt:\[Optional]) Add a **Description** and **Labels**.
**NOTE:** When creating a custom policy or modifying a default policy, do not use or delete system assigned labels.
5. Click **Next**.
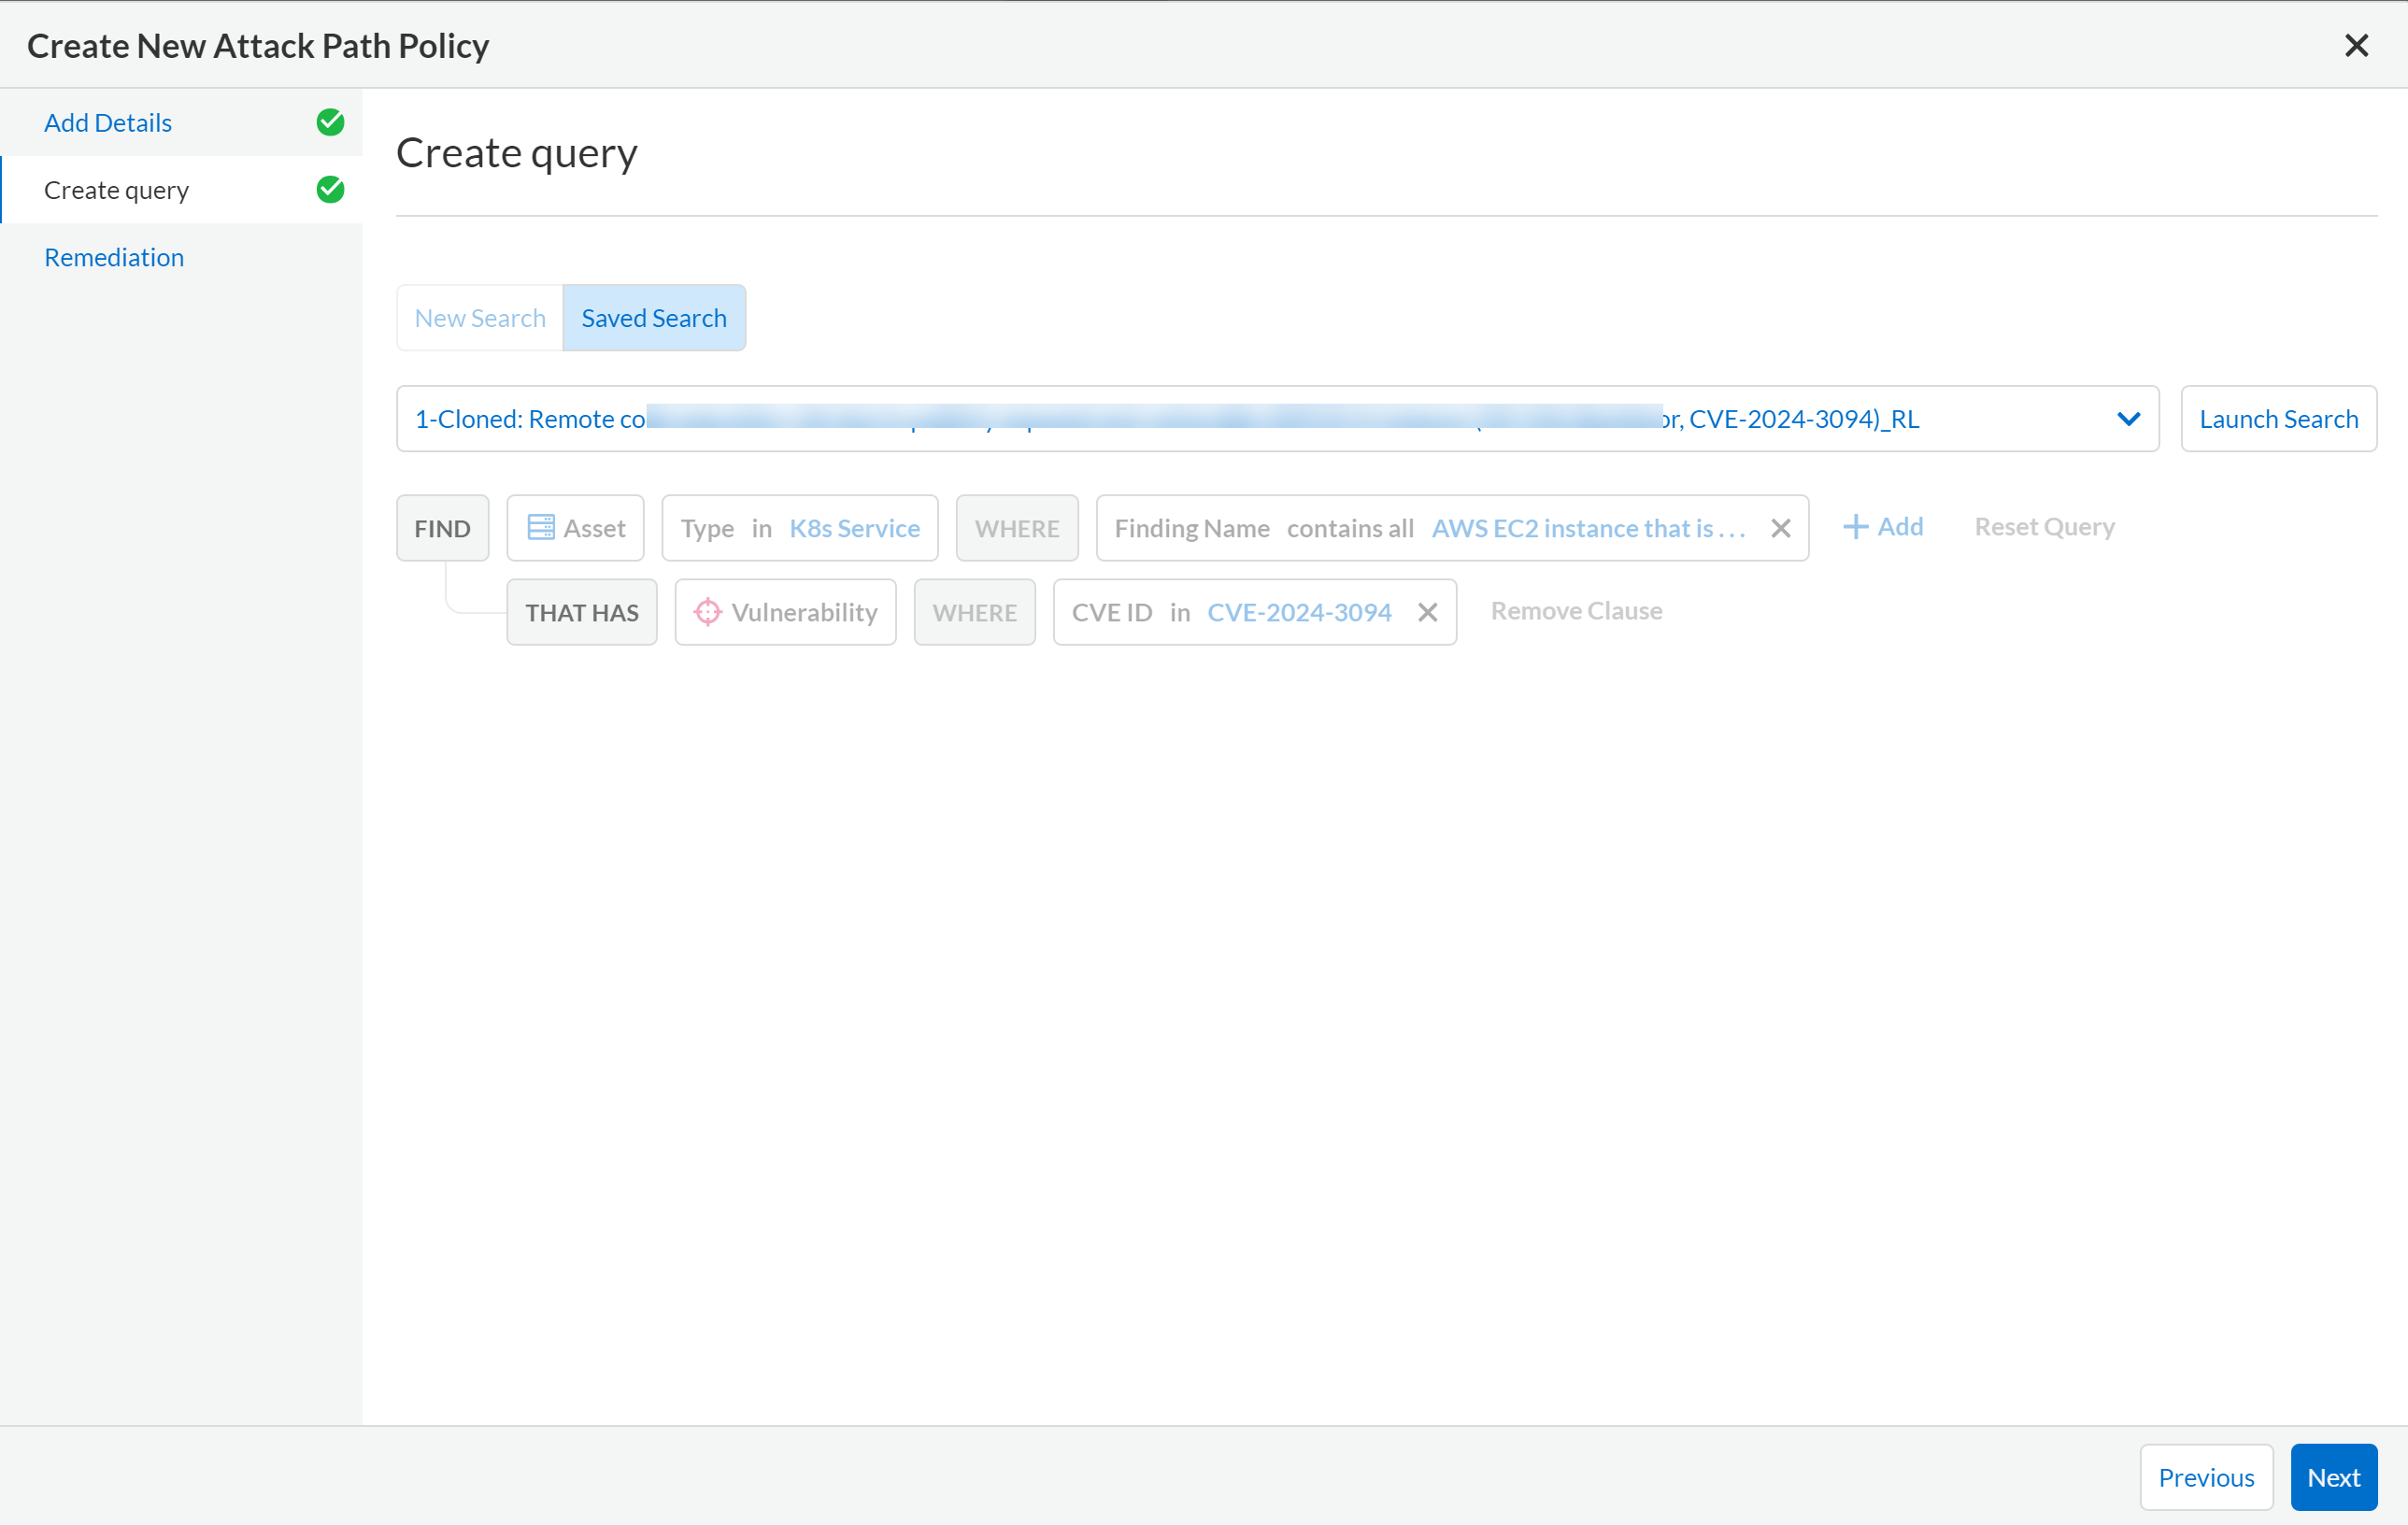
6. Click **Select saved search** dropdown to select from one of the existing Asset Search queries.
**NOTE:** You cannot run a **New Search** in this workflow. However, you can run a new search from the [Investigate](/content-collections/search-and-investigate/explore-data.md) page and save the query as a custom Attack Path policy.
7. Click **Next**.
8. (tt:\[Optional]) Provide a **Recommendation for Remediation**.
9. Click **Submit** to save the policy.
---
# Agent Instructions
This documentation is published with GitBook. GitBook is the documentation platform designed so that both humans and AI agents can read, navigate, and reason over technical content effectively. Learn more at gitbook.com.
## Querying This Documentation
If you need additional information that is not directly available in this page, you can query the documentation by asking a question.
Perform an HTTP GET request on the following URL with the `ask` and `goal` query parameters:
```
GET https://docs.prismacloud.io/content-collections/governance/create-a-policy.md?ask=&goal=
```
`ask` is the immediate question: it should be specific, self-contained, and written in natural language.
`goal` is what the user is ultimately trying to achieve, the reason they need the answer. Sharing it helps GitBook give you a better, more relevant answer. A goal is most helpful when it describes the outcome the user wants rather than restating the question. For example, with `ask=how do I create an API token`, a goal like `automate deployments from our CI pipeline` lets GitBook tailor the answer to that use case.
The response will contain a direct answer to the question and relevant excerpts and sources from the documentation.
Use this mechanism when the answer is not explicitly present in the current page, you need clarification or additional context, or you want to retrieve related documentation sections.